Intro to Comic Craft: Text Balloons
In our last Intro to Comic Craft tutorial, we talked about font choice and placement for comics. Today we're covering text balloons.


Guestpost: Selecting and Using Fonts for Webcomics
Pre-Lettering Pages
Relettering and Redoing Word Balloons
Super Easy Lettering Hack
Handlettering:
Lettering Practice and Pangrams
Lettering Practice-Dialogue and Blocking
When I was 13- Lettering Process Part 2
Lettering Practice- Dialogue and Blocking
There are a variety of ways to handle lettering and word balloons for comics:
Physically Lettering On the Page


Drawing Your Balloons on the Page, Lettering Digitally

Digitally Lettering and Putting in Balloons


If you don't like the word balloons you've physically drawn on the page, you can also reletter and balloon quite easily.
Materials Needed:
Color Pencil Brush for Program of Choice
Graphics Program of Choice (I'm using Photoshop)
Watercolor Paper Scan (I have several, I'm using an Arches scan for these pages)
Setting Up Your Workspace:
For this tutorial, you're going to need a program that has a clone tool.

Comic Page

Texture Page
Open up your comic page as well as the texture paper you wish to clone onto your comic page. It helps if it's a similar size and format to your comic page, so you may wish to rotate it before you begin.

Page we're cloning from

Page we're cloning to
Creating Your Word Balloons
Select the Clone tool, and hold Alt to select the area you wish to clone.

On a new layer, and with the clone tool still selected, but no longer holding Alt, begin cloning your watercolor texture paper onto your comic page. I recommend using a round brush for this.


For adjacent balloons like the example above, I put my balloons on separate layers, in case I want to move my text.


I like to bump the opacity back to 80%. Not only does this make my text bubble look like it belongs on the page, but it also allows some of my artwork to shine through without losing legibility. I vary the opacity- muttered things may be knocked back all the way to 65%.
Rather than set the opacity for the individual balloons, I create a folder, put all files relating to those balloons in that folder, and adjust the folder's opacity.
Creating a Border Around Your Balloon:
Depending on your comic, this may be optional- there are many webcomics that opt not to border their balloons.
For my borders, I use a custom color pencil brush set to a fixed width. I border my balloons using a dark brown.


Before adding borders, I create a new layer on top of my text layers, and set it to multiply.

Then I simply begin tracing my balloons. There are many ways to add a border to your text balloons- find the one that works best for you and for your comic's aesthetic!


Finished Page:

Pages with Multiple Panels:
When working with multiple panels, or multiple speakers per panel or page, staying organized is key! You may have to make revisions later on, and you want to find your dialogue and attribution, as quickly as possible.

In this example, the page has already had basic dialogue placement, and the dialogue has been sorted into panel specific folders.

Working panel by panel, I create a speech balloon on a unique layer for each piece of dialogue, using the techniques demonstrated above.

For dialogue with multiple speech balloons, I continue to create each balloon on its own layer. Once all balloons in a sequence are completed, I put them in a folder, and change the opacity on the folder, rather than on the individual balloons.
What If You Run Out Of 'Paper'?


Go back to your cone source (in our case, this Arches scan), reselect your clone area by holding alt)

And you can resume work!

Finished Page:
For muttered and whispered dialogue, I handle things a bit differently. I tend to leave my font without a stroke, so it's a bit wispier than fully spoken text.


Rather than a round word balloon, I go for a vague shape with sputtered little dots eminating from it. I draw the tail vague as well.

I set the opacity lower than regular text-around 65% rather than 80%, depending on the art in the panel.

And I leave muttered and whispered balloons unbordered.
Creating Labels That Don't Compete With Dialogue
I handle these somewhat similarly to muttered dialogue. The text is left unbolded or without a stroke- however left as is, it's almost unreadable.

To increase legibility, I need to create a little contrast. To do this, I create a layer of paper texture behind my text.

And play with the opacity until it's legible, but not distracting.

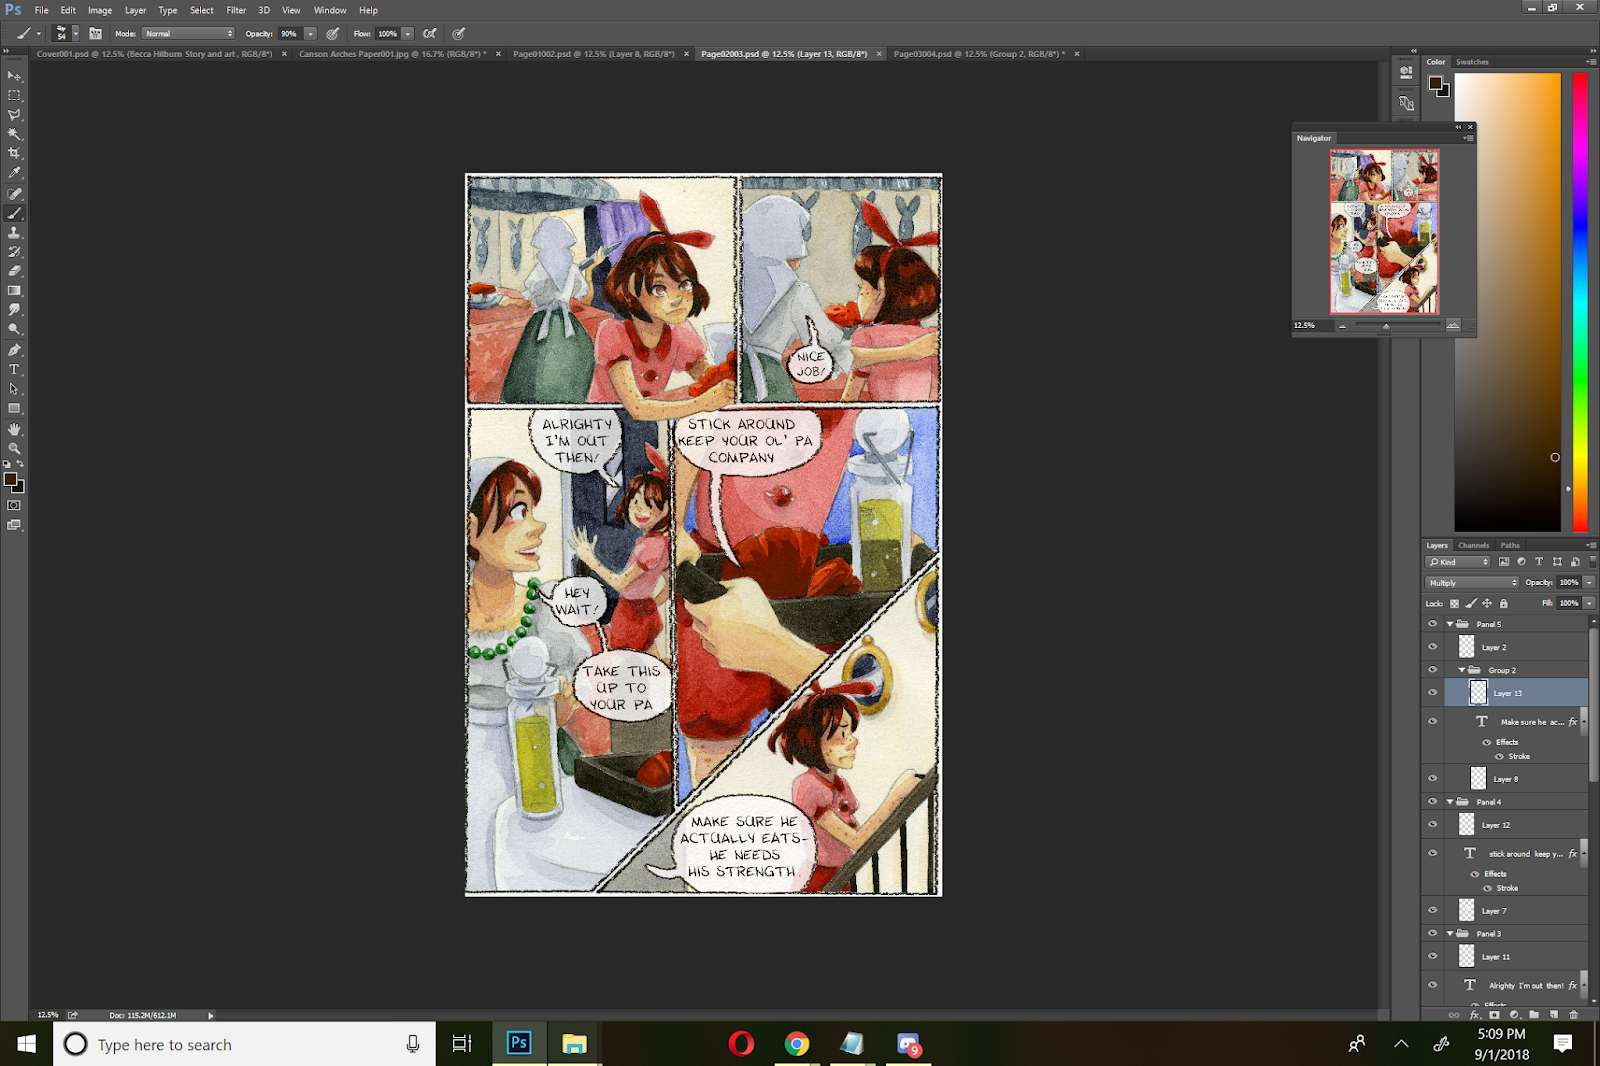
I typically keep my sound effects hand drawn (or retouched digitally), but sometimes I want to give dialogue a special connotation, emphasis, or feel. Often I will break the rounded balloon border with jagged edges, or adjust the color of the border to imply various emotions such as shock, anger, or in this case, happiness.
I used a salmon color, set to multiply, to help give a soft, happy feeling to the final panel on this page, and to imply that this is a special promise.

Recommended Reading and Outside Resources:
Making Word Balloons:
Two Schools of Balloon Making: Layer Vs Stroke
Consistent Balloon Tails
Pointers (Tails)
Layering Balloons in a Conversation
Don't Cross Balloon Tails...Ever!
Text Tips and Hacks:
Line and Negative Space in Comics Dialogue
The 94% Line Width Cheat
Wordy Balloons and Reading Order
Balloon Air
Captions and Special Uses:
Captions
Special Balloons
Burst Balloons


Comments
Post a Comment