Super Easy Lettering Hack
Today I'm going to show you a super simple trick to help you balance word balloons/text within your comic panels. If you struggle with placement or find you frequently cover important parts of your panels with necessary text, this tutorial should help you out!
The basics of this technique are very simple, but require you to work digitally in your earlier stages. I use Photoshop in this tutorial but any graphics software that allows lettering will work.
In this tutorial, I used Digital Strip 2.0 BB Regular and Indie Star BB Regular, both Blambot Fonts with a free license for indie comics.
These pages were created as a bonus Q&A comic for 7" Kara, and were an excellent opportunity to practice some of the pacing techniques utilized by my webcomic peers. This includes writing as I went, finishing a page to completion before progressing to the next page, and digital production practices. While I enjoyed this experiment, I benefitted most from realizing that this sort of process does not work for me.


This post was brought to you thanks to Ink Drop Cafe. Ink Drop Cafe is a webcomic collective with thirteen phenomenal member comics, and loads of fantastic comic resources affiliated with the collective.

Lettering Your Template


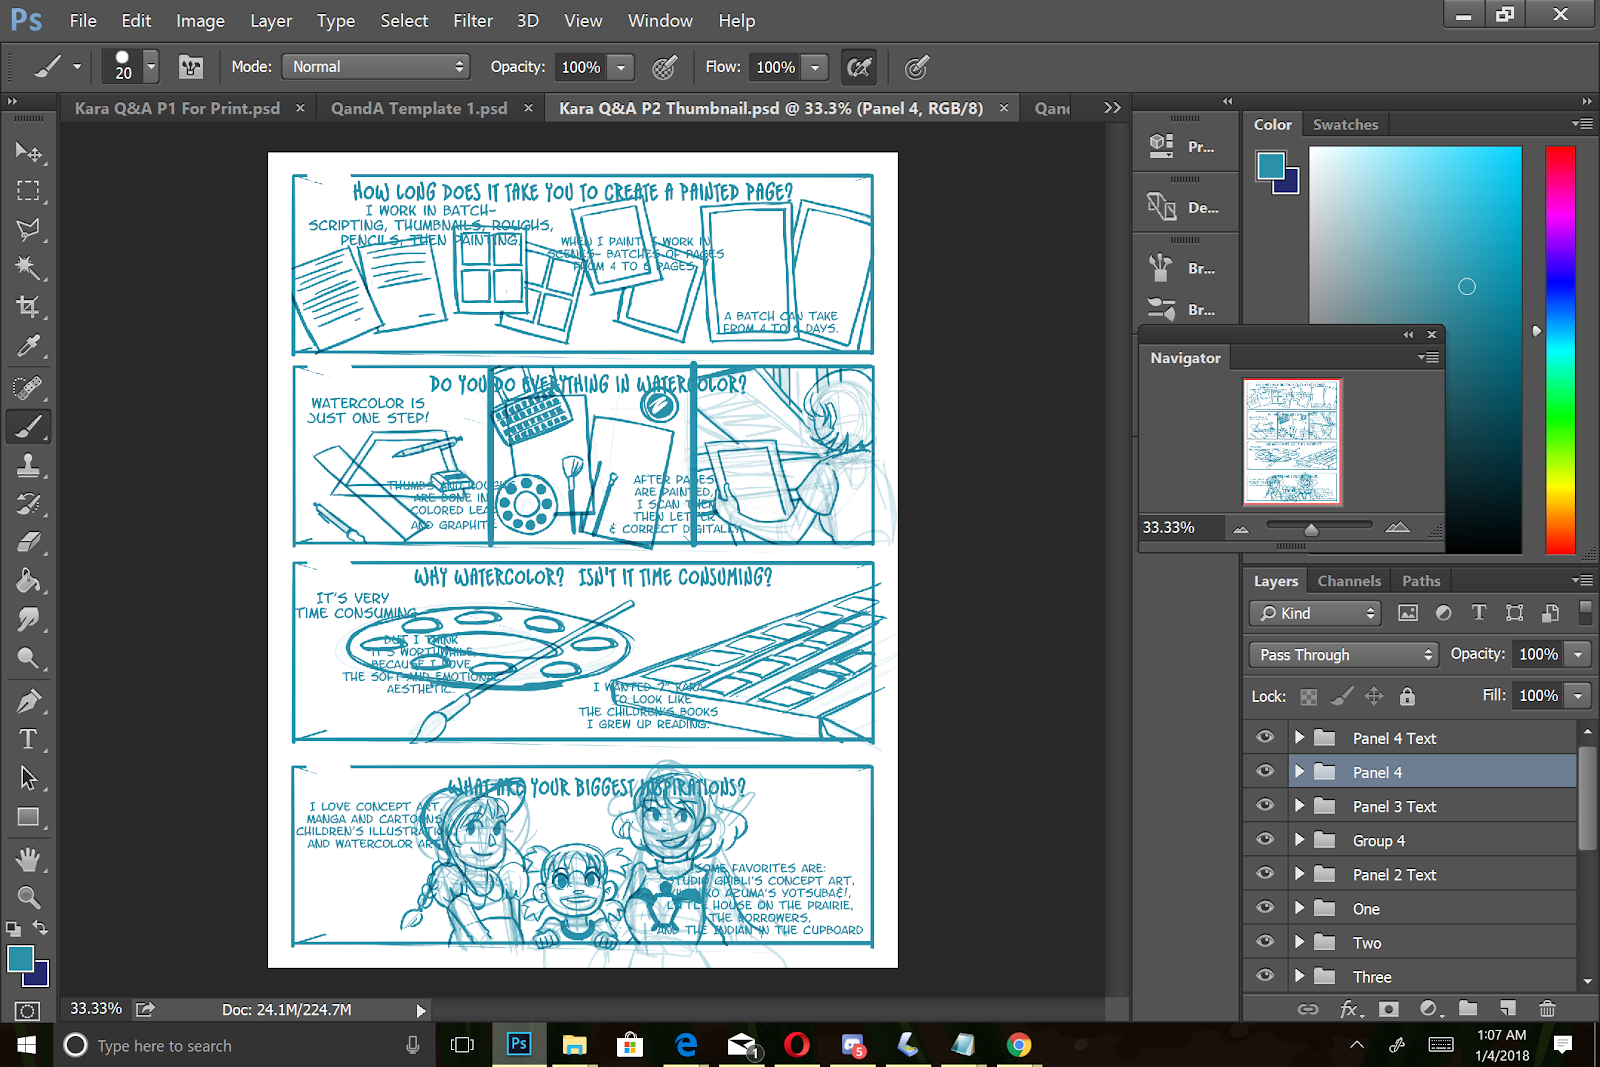
Begin sketching in your characters- a loose sketch is fine- and adjust the text around the characters (or vice versa!)
Tightening Your Sketch


Open your original sketch PSD, which should include your text files. Adjust the sizes of your two files so they are the same size.
EX:
9"x12", 300 DPI

Drag your text from the sketch file to your final file.

Adjust text so it suits the balloons you've inked.


The Finished Page
 Note: Effects brushes (tones) were created by Kabocha! You can check them out here.
You can check out this bonus Q&A segment in it's finished form here!
These bonus pages were created to celebrate the completion of 7" Kara Volume 1 as a webcomic!
 You can check out 7" Kara in its full watercolor glory at 7inchkara.com or 7inchkara.tumblr.com.
There are lots of methods for lettering comics out there, and it may take experimentation to find a method that works for you! So how do you guys letter your comics? Let me know on Twitter!
The basics of this technique are very simple, but require you to work digitally in your earlier stages. I use Photoshop in this tutorial but any graphics software that allows lettering will work.
In this tutorial, I used Digital Strip 2.0 BB Regular and Indie Star BB Regular, both Blambot Fonts with a free license for indie comics.
These pages were created as a bonus Q&A comic for 7" Kara, and were an excellent opportunity to practice some of the pacing techniques utilized by my webcomic peers. This includes writing as I went, finishing a page to completion before progressing to the next page, and digital production practices. While I enjoyed this experiment, I benefitted most from realizing that this sort of process does not work for me.

'

This post was brought to you thanks to Ink Drop Cafe. Ink Drop Cafe is a webcomic collective with thirteen phenomenal member comics, and loads of fantastic comic resources affiliated with the collective.

Lettering Your Template

Exact placement isn't necessary- you're going to move the text around frequently at this stage.
Sketching Your Figures and Adjusting Your Text

Begin sketching in your characters- a loose sketch is fine- and adjust the text around the characters (or vice versa!)
Tightening Your Sketch


At this stage, begin formatting your text to suit dialogue needs.
Lettering Tutorials:
Save this file separately as Thumbnails or Sketch, you're going to want the PSD later.
If You Work Traditionally:
Printing
Using methods covered in this Bluelines Tutorial
Convert Sketch to Grayscale
Boost Contrast
Convert Sketch to Nonphoto Bluelines
Print onto Bristol Paper
Penciling and Inking
When Penciling and Inking, you do have the option to ink your letters at this time, but I focused on just drawing and inking my word balloons
Scan
Lettering Your Final Page

EX:
9"x12", 300 DPI

Drag your text from the sketch file to your final file.

Adjust text so it suits the balloons you've inked.


Adjust the color of your text so that it's black.

The Finished Page

You can check out this bonus Q&A segment in it's finished form here!
These bonus pages were created to celebrate the completion of 7" Kara Volume 1 as a webcomic!

There are lots of methods for lettering comics out there, and it may take experimentation to find a method that works for you! So how do you guys letter your comics? Let me know on Twitter!


Comments
Post a Comment