Blending, Layering, and Glazes for Pages- Watercolor Basics
The majority of time spent on a watercolor comic page is spent applying layers, blending, and applying glazes. These three techniques are very simple to learn, and while they do take some practice to master, can yield impressive results with just a short amount of study. Blending, layering, and glazing results can vary with the paper you use- for best results, I've found 100% cotton rag papers to be your best bet, but you can achiever fairly masterful results even on inexpensive cellulose papers.
We utilize these techniques in standalone illustrations as well as individual panels to develop interest, establish lighting, and build contrast.
The order of operations for best results on cellulose watercolor papers are:
The materials for blending, layering, and glazing are pretty straightforward
Blending:
Blending is a wet into wet technique that works best when the paper is damp and receptive, but not saturated. Blending techniques can result in paper buckling if you're working with unstretched, unsecured paper. For multiple layers of blended techniques, or larger scale blends, I recommend working with papers that are 140lb or heavier.
Quick Wet into Wet Watercolor Techniques:
Painting Seagrass- A Wet into Wet Painting Tutorial:
Painting a Starry Sky in Watercolor:
Layering:
Layering is a wet over dry technique that works best if the paper is dry before the next layer is applied. If the paper no longer has a surface sheen and is not cool to the touch, it's dry enough to layer. Even if the surface is somewhat cool to the touch, unless the paper is saturated from prior layers, you can probably layer. Layering techniques work well on cellulose and cotton rag paper, and are a commonly used technique to develop depth, color, and volume.
The Eyes Have It- Blends and Layering in Watercolor:
Let's Paint a Succulent- Watercolor Tutorial
Negative Painting Demonstration:
Developing Lighting and Color Through Layering:
Basic Lighting and Contrast:
Basic Lighting and Contrast: Painting a Cube:
Basic Lighting and Contrast: Lighting a Sphere:
Basic Lighting and Contrast: Lighting a Cone:
Basic Lighting and Contrast: Lighting a Cylinder:
Glazing:
Glazing is used in a variety of ways. From adding shadows to adjusting color to lighting effects, glazing can be a helpful technique to know, but it requires discretion.
For glazing, I recommend you use a very soft brush, such as a squirrel hair brush. Stiffer bristle brushes, including synthetics, can disrupt prior layers of paint. I also recommend only applying a single layer of glaze to an area, as colors can quickly become muddy.
Glazing tends to work best on cotton rag papers with a fair amount of surface texture, but can work well on cellulose papers if handled with care.
Glazing Demonstration- Watercolor Tutorial:
I hope these tutorials and examples have been helpful for learning the basics of my three favorite techniques! If you guys would like to see any other techniques covered in depth, don't hesitate to chat me up on Twitter or email me!
If you enjoyed this post, please consider joining the Artnerd community over on Patreon.
Artnerds make content like this possible through financial and emotional support. In return, they get early access to Youtube content, as well as backer exclusives created just for them!
We utilize these techniques in standalone illustrations as well as individual panels to develop interest, establish lighting, and build contrast.
The order of operations for best results on cellulose watercolor papers are:
- Blending (wet into wet)
- Layering (wet over dry)
- Glazing (wet over dry, color over final layers)
The materials for blending, layering, and glazing are pretty straightforward
- Clean Water
- Soft Brushes
- Paper towels or sponges
Blending:
 |
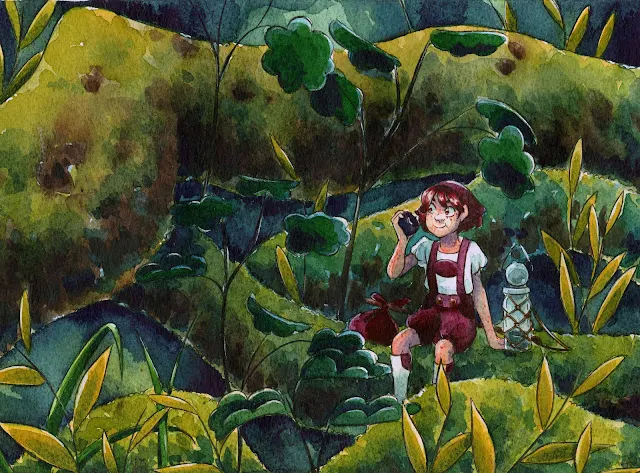
| Illustration painted on Canson Heritage 140lb cotton rag cold press paper. |
Blending is a wet into wet technique that works best when the paper is damp and receptive, but not saturated. Blending techniques can result in paper buckling if you're working with unstretched, unsecured paper. For multiple layers of blended techniques, or larger scale blends, I recommend working with papers that are 140lb or heavier.
Quick Wet into Wet Watercolor Techniques:
Painting Seagrass- A Wet into Wet Painting Tutorial:
Painting a Starry Sky in Watercolor:
Layering:
 |
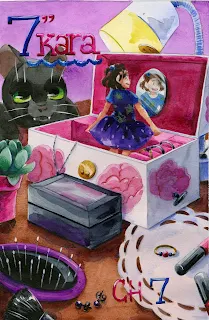
| Illustration completed on Fluid 100 cottonrag paper. |
Layering is a wet over dry technique that works best if the paper is dry before the next layer is applied. If the paper no longer has a surface sheen and is not cool to the touch, it's dry enough to layer. Even if the surface is somewhat cool to the touch, unless the paper is saturated from prior layers, you can probably layer. Layering techniques work well on cellulose and cotton rag paper, and are a commonly used technique to develop depth, color, and volume.
The Eyes Have It- Blends and Layering in Watercolor:
Let's Paint a Succulent- Watercolor Tutorial
Negative Painting Demonstration:
Developing Lighting and Color Through Layering:
Basic Lighting and Contrast:
Basic Lighting and Contrast: Painting a Cube:
Basic Lighting and Contrast: Lighting a Sphere:
Basic Lighting and Contrast: Lighting a Cone:
Basic Lighting and Contrast: Lighting a Cylinder:
Glazing:
 |
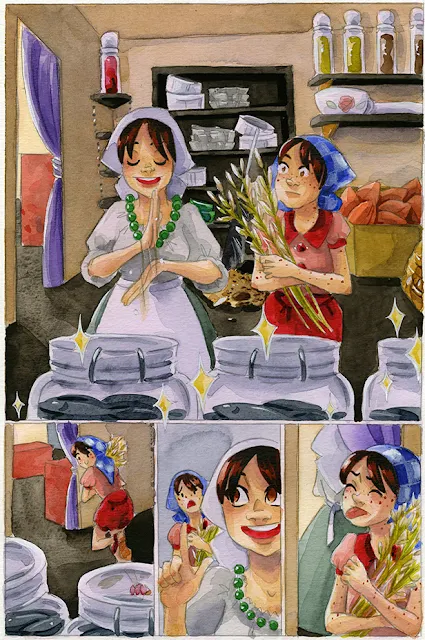
| This illustration was painted on Union Square Cold Press watercolor paper, a cellulose paper. |
Glazing is used in a variety of ways. From adding shadows to adjusting color to lighting effects, glazing can be a helpful technique to know, but it requires discretion.
For glazing, I recommend you use a very soft brush, such as a squirrel hair brush. Stiffer bristle brushes, including synthetics, can disrupt prior layers of paint. I also recommend only applying a single layer of glaze to an area, as colors can quickly become muddy.
Glazing tends to work best on cotton rag papers with a fair amount of surface texture, but can work well on cellulose papers if handled with care.
Glazing Demonstration- Watercolor Tutorial:
I hope these tutorials and examples have been helpful for learning the basics of my three favorite techniques! If you guys would like to see any other techniques covered in depth, don't hesitate to chat me up on Twitter or email me!
If you enjoyed this post, please consider joining the Artnerd community over on Patreon.
Artnerds make content like this possible through financial and emotional support. In return, they get early access to Youtube content, as well as backer exclusives created just for them!


Comments
Post a Comment