Anatomical Construction for More Cartoony Figures- NSFW Artistic Nudes
 |
| Stock image via mjranum stock at Deviantart. |
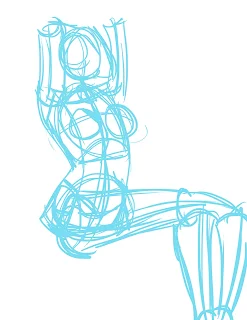
For this demonstration, I did my figure drawing in Photoshop. I apologize because the legs are too large, but I just wanted to get a sketch down to show my process.
I learned how to construct a basic gesture skeleton from Andrew Loomis' Figure Drawing for All It's Worth.
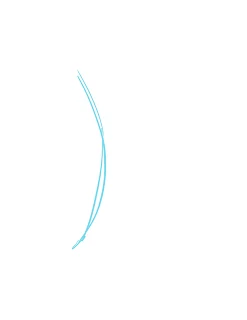
Step 1. Determine Line of Action. For cartoony drawings, this also functions as the spine. With the line of action, you're trying to capture the gesture, and it's best to exaggerate it, since the gesture can get lost as you build the figure. I find that a great way to keep this from happening is to draw some distortion in the bones.
My next course of action changes depending on the pose from this point on. For sitting poses, where the majority of the weight is on the butt, I'll draw the torso first, since it supports the weight. For standing poses, I'll often quickly rough in the torso and then draw in the legs. These are all drawn very simply at this point.
Next I place the directional crosshairs, which'll help me place the breasts later in the drawing.
This next part is pretty unique to how I set up figures, and I really just do it to keep me honest. Now that I have the basic of the torso down, I go ahead and rough in a rectangle to strengthen the pose.
Next I start solidifying the structures inside the larger rectangle, beginning with the ribcage.
And I redrawn the line of action, including a divot line beneath the ribcage.
Next I solidify the pelvis. There are different methods for doing this, but I prefer to draw a 3D trapezoid.
Unfortunately, I got ahead of myself and skipped a couple steps. The first thing I do is draw in the neck hole, which isn't straight across the top of the rib cage, but rather, placed in front. Then I draw the shoulder's line of action straight across the top of the rectangle, and draw in the 'bone' of the arm. I really rely on the whole spheres, cones, and cylinders most kids are taught to construct figures with way back in highschool, and I recommend it.
Next come the breasts. Depending on what I'm doing, I render them more fully or I just leave them as placeholders to remind me to contour the clothing on top.
Now I sketch in a very rough version of the pelvic bone to help in the placement of leg bones.
Next come the leg bones. Make sure you draw in the curve, not just a straight line, because the femurs do have some curve to them.
Draw in the lower leg bones, and then start adding some meat to the femure using ye old cylinder method.
I fail at digital drawing, I neglected to leave enough room for the feet.
Anyway, I use the same method to construct figures of my own as I use to draw from reference.
When I'm doing pose studies, I'll just keep drawing it until I feel like I have the pose down.


Sorry for taking so long to comment on this thing. Thanks for posting it! You have an interesting way of constructing the simplified figure. It's like a hybrid approach. It's useful to see another way of going about it. And it's cool to see how that mass of bluelines in your sketchbook gets put down ;) You really do *build* your figures up. It's like watching a building being erected.
ReplyDelete