Creating Shrink Film Charms
Ever since Printcess closed its doors, I've been at a loss as to where to source my acrylic charms. Zap! and InkIt are both viable contenders, with InkIt's charms being closer to the general aesthetic I like for charms, and their clear charms looking super slick. While I wait for InkIt to open up their rasterization service, inspiration struck. My friend, Cassie Freire (@ferretparty), recently did a set of Catnip Circle double charms available in either Mela or Pera flavors. These adorable charms, featuring one large charm of one of the two girls, and one smaller charm, struck me as being an excellent product to run in a small batch. This sort of prototyping lends itself well to a product I've only dabbled in once- shrink film charms.
 |
| Photo graciously provided by Cassie. |
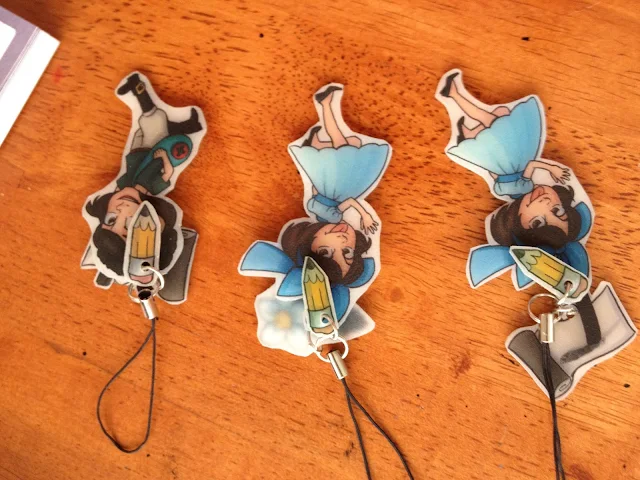
I designed some 7" Kara triple charms- two Kara designs available, a pencil charm, and either some paperbark or a blackberry. These Kara charms had two sides- sweet girly Kara or adventurous buttkicking Kara. After careful consultation with the ever fantastic Cassie and the generous Zoey Hogan (@caporushes), I took the plunge into the world of shrink film charms.
If you're interested in making small production run charms yourself, I highly recommend Zoey's fantastic blog as a resource.
 |
| One of Zoey's adorable charms. Image source |
I knew that I wanted my charms to be digitally colored, but the thought of inking them digitally wasn't thrilling. I decided to try something new (for me), inking them traditionally with a fude pen, then scanning them and coloring them. Generally, if I start in a medium, I try to stay in that medium, but digital inking takes me days whereas traditional inking takes hours, and I felt like the experiment was worth it.
I scanned my inks at 600 DPI, far larger than necessary, but I wanted them to be as sharp as possible.
I'll admit that my digital coloring style isn't very sophisticated- layers upon layers of shading set to on multiply with various levels of opacity. When my files start getting big, I start setting up groups and flatting out layers. Working this way is a bit reminiscent of how I do watercolor and marker work- layers upon layers.
Shrink Film
There's a few options when it comes to purchasing shrink film to make charms. You can buy Shrinky Dinks or Grafix, in white, black, or clear, in original or ink jet. If you're printing charms, I recommend you go with the ink jet film.I chose to go with Grafix Inkjet Shrink Film in clear, which is easily available on Amazon, and occasionally available at JoAnn's Fabrics. I found the Grafix Inkjet film to be easy to print on.
 |
| Image Source |
When printing out shrink film charms, I recommend you carefully read the printing instructions. We printed on Heidi's printer, since it's nicer than my awful little inkjet, and she reduced the color intensity by about 30%, as the charms tend shrink darker than they were printed. Because I was using a clear shrink film, I wanted my charms to be a little more intense than they would be if I were printing on white.
While cutting out my charms, I tread carefully with sharp scissors, as shrink film has a tendency to shear. I made sure there were no sharp corners, and I punched my hole with a regular hole punch. The hole may seem large, but when the charms shrank, it was perfectly sized.
We arranged the charms on a baking sheet lined with parchment paper, and set the oven for 300 degrees.
Before inserting the pan into the oven, we put a sheet of heavy Bristol board on top, to help prevent the charms from curling.
We popped the charms into the oven, and let them 'bake' for five minutes.
While the charms were baking, we prepared a couple heavy books with parchment paper to press the charms flat.
Upon removing the charms from the oven, the kitchen had a vague chemical smell, so proper ventilation is probably quite helpful. We carefully removed the charms from the pan using a metal spatula, and lined them up on the parchment paper within the book, and let the weight of the book do our work for us.
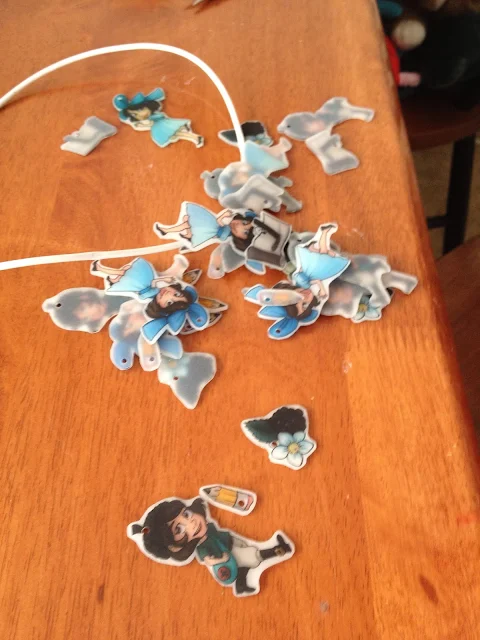
Here's the first batch of charms after they'd been pressed. Some of them look a little green- Heidi's printer had run out of magenta ink. The Grafix shrink film has a bit of a matte finish, and doesn't shrink perfectly clear, but a still has a nice translucence.
After all the charms were baked, we coated the charms with two coats of Testors Dullcoat, available in the model aisle of most craft stores.
In order to assemble the triple charms, I had steal the jump rings off some other lanyards.
In general, I found Grafix shrink film to be fun and fairly easy to work with. I was pleased with the results of these charms, although people who are used to acrylic charms may think they're cheap, or dislike the texture. The Mini Comics Expo was the first time I'd offered homemade charms, and I was a bit disappointed with the lack of sales, but I understand that selling charms of an original character can be a bit dicey (hence why I did a limited run with shrink film, rather than investing a lot of money for acrylic charms). Shrink film charms aren't particularly difficult to make, but you should exercise caution in their production, and keep in mind that they may be a hard sell if you're also offering acrylic charms. Customers used to acrylic charms may bulk at buying shrink film charms.


Comments
Post a Comment