Foiling with a Laminator
Kabocha here again!
So, first things first: What’s fusing foil?
Basically, it’s kind of a foil overlay you can bind to paper using an adhesive. Usually that adhesive is toner, but of course, you can use glues and specialty adhesives with a heat gun.
This may be sold in craft stores as Deco foil or Thermal foil.
In this post, we’ll be going over a quick tutorial of using this material to add foil to a printed illustration.
Procedure
Further Testing & Ideas
FAQ
Further Reading
Therm-o-Web Deco Foil, Minc, and other brands should be fine. For the purposes of this tutorial, I’m using Minc, but only because it was on sale.
I'm aware of ColorFoils' offerings and tutorials, however, I have not yet had a chance to use their product. If you're curious, you can find them online.
Laminator
The AmazonBasics Laminator is sufficient and approaches an appropriate temperature for basic foiling in my experience.
Toner Printer
The Printer I use is a Brother HL-3170CDW -- but I would strongly suggest using a monochrome toner printer for foiling illustrations.
Smooth Cardstock
My go-to at the moment (because it was on sale for like, super cheap) is Recollections' Cardstock, which you can find at Michaels.
Washi Tape
You're going to need to hold the foil against the paper somehow and prevent it from crinkling up too much in the heat.
Basically, anything low-tack and not made of cellophane ought to do.
Everything was done at 300DPI, and fits easily on to an 8.5 x 11 sheet of paper.

Print your image. If you're using cardstock, you may need to manually-feed it through your printer. Get your toner foil handy!
If your paper curls up, no worries! You can also set your printer to do less curling in some cases in the printer settings.
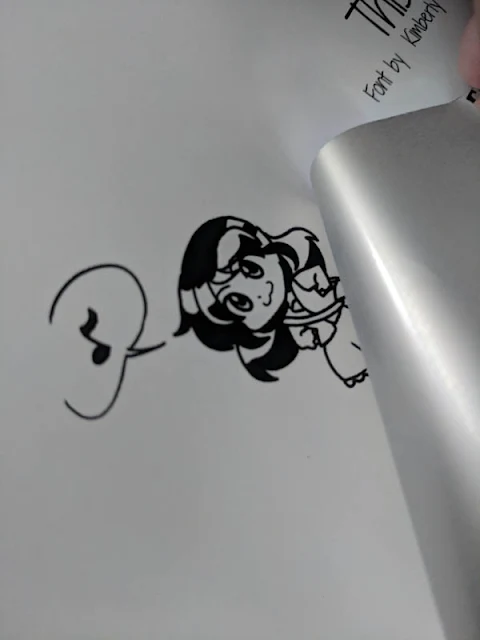
Cut out your chunks of foil. Your foil should be slightly larger than the image you're laying it over.
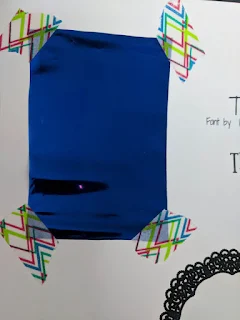
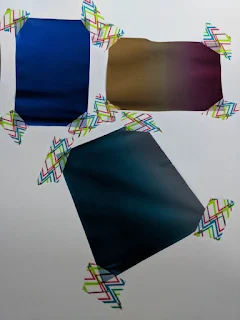
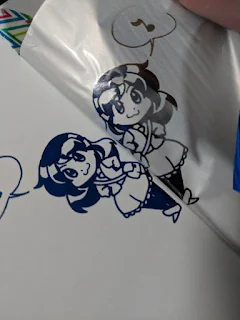
Lay down your foil. Make sure to do this with the colored side facing up!! If you're using pigment foil (rather than metallics), the matte side should be down.
Tape down your foil! Yes, tape it down so it's very flat. You may need to uncurl your paper, or hold it down to do so.
Turn on your Laminator, and let it warm up. When it's ready to go, the "Ready" light will shine green. I usually leave mine on the 5ml setting.
Feed your paper through the laminator. If you have a transfer folder, use that. If not, eh, just run the paper through. Sometimes I'll fold a sheet of printer paper to sit on top of the transfer foil, but... It's not necessary.
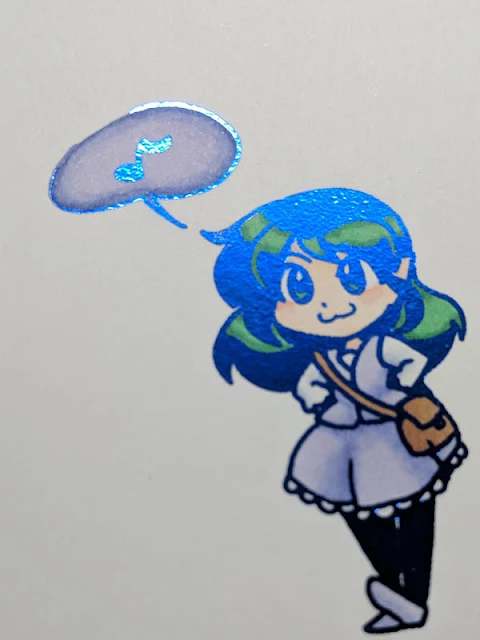
Once your paper finishes through the laminator, peel off your foil sheets and tape! Your image should be foiled and ready!
If you find areas need cleaned up, you can use a VERY, VERY low tack post-it note to pick up bits that aren't stuck to toner.
If you're feeling particularly fancy, you can use alcohol markers to color in your illustration.
First and foremost -- it is rumored that you can print over the foiling, so if you, say, produced a color illustration, you should be able to print around the area where you did not foil. Care would likely be necessary when running the paper through the printer, and minor offsets can occur. Therefore, it would likely be recommended to expand the size of the area you are foiling to cover any potential offset, but keep the "blank" area in your color image the original size.
Finer temperature control on a better laminator would likely yield better results, as would working with a printer which had finer control over the toner output. Darker prints on a toner printer produces more "glue" and would likely work better.
Other materials, such as the application fluids sold with Minc and Deco foil, as well as toner pens, are frequently available. I have not yet tested how these are used, or if they are meant to be used in the laminator, or simply using a heat gun.
Glue can also be used, with varying results. A small glue pen can provide a level of precision for small details, but can be troublesome as you will need to gently press on the foil to ensure it is consistently stuck to the glue. This often results in smudging, which may be an undesired result.
I need to experiment further with pigment foil for a comparison to the metallic foil used here. At the moment, I have Minc's white foil, but its reliability is questionable in comparison to the metallics. Pigment foil may require a darker coat of toner. On my printer, this may require setting the print quality to "fine" when going through the properties dialog in Photoshop.
Another technique of applying foil using a toner printer exists -- however, I don't like to do it. It does not appear to harm the printer, but it is wasteful of toner.
Costs a lot more than the AmazonBasics laminator. You want me to recommend it? Buy it for me, and I'll test and document it.
The Minc machine costs$50 [entirely too much money] (usually closer to $70 with coupon at my local stores) compared to the AmazonBasics Laminator, which I got for $20-something.
Why don't you use transfer folders?
¯\_(ツ)_/¯ I live dangerously.
Why toner?
Toner is “fused” to the paper it’s printed on using heat. A laminator will re-melt the toner and make it sticky enough for the foil to adhere to.
You could use glue or other adhesives, but if you’re looking to mass produce illustrations to foil, toner is the way to go. (Also, do NOT use inkjet ink. It just won't work, and you will cry.)
Why monochrome?
It’s a waste of toner to use color - when it comes to heating things, up, color toner melts just the same as black toner.
Why smooth or coated cardstock?
The foil won't apply evenly on other forms of cardstock, I noticed. The toner settles in divots on the paper's surface and well... Then you get an uneven and speckly sort of appearance. If that's what you want, that's fine though!
Color Foils: Techniques
How to Foil: Live More Worry Less Metallic Gold Wall Print
Foil Tech Q&A
So, first things first: What’s fusing foil?
Basically, it’s kind of a foil overlay you can bind to paper using an adhesive. Usually that adhesive is toner, but of course, you can use glues and specialty adhesives with a heat gun.
This may be sold in craft stores as Deco foil or Thermal foil.
In this post, we’ll be going over a quick tutorial of using this material to add foil to a printed illustration.
Table of Contents
MaterialsProcedure
Further Testing & Ideas
FAQ
Further Reading
Materials You Need
Thermal FoilTherm-o-Web Deco Foil, Minc, and other brands should be fine. For the purposes of this tutorial, I’m using Minc, but only because it was on sale.
I'm aware of ColorFoils' offerings and tutorials, however, I have not yet had a chance to use their product. If you're curious, you can find them online.
Laminator
The AmazonBasics Laminator is sufficient and approaches an appropriate temperature for basic foiling in my experience.
Toner Printer
The Printer I use is a Brother HL-3170CDW -- but I would strongly suggest using a monochrome toner printer for foiling illustrations.
Smooth Cardstock
My go-to at the moment (because it was on sale for like, super cheap) is Recollections' Cardstock, which you can find at Michaels.
Washi Tape
You're going to need to hold the foil against the paper somehow and prevent it from crinkling up too much in the heat.
Basically, anything low-tack and not made of cellophane ought to do.
Procedure
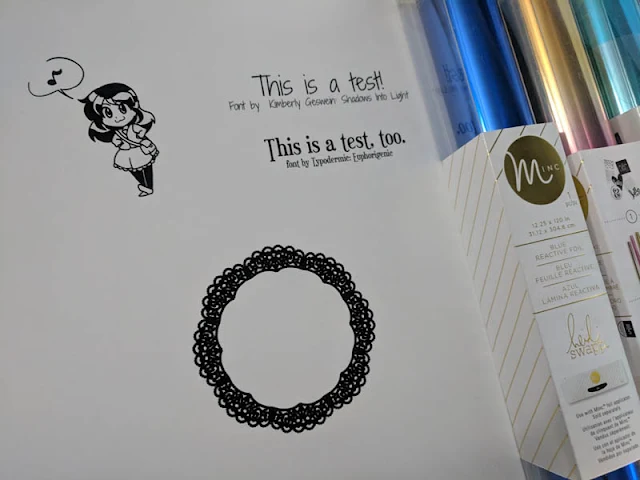
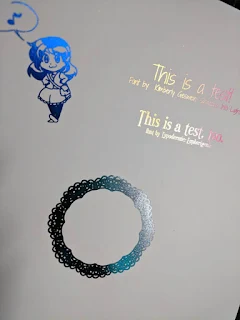
Have your image ready to print. For this test, I created an image with a couple of text areas, an illustration (with thick lines) and one of my free Photoshop brushes.Everything was done at 300DPI, and fits easily on to an 8.5 x 11 sheet of paper.
Print your image. If you're using cardstock, you may need to manually-feed it through your printer. Get your toner foil handy!
Cut out your chunks of foil. Your foil should be slightly larger than the image you're laying it over.
Lay down your foil. Make sure to do this with the colored side facing up!! If you're using pigment foil (rather than metallics), the matte side should be down.
Tape down your foil! Yes, tape it down so it's very flat. You may need to uncurl your paper, or hold it down to do so.
Turn on your Laminator, and let it warm up. When it's ready to go, the "Ready" light will shine green. I usually leave mine on the 5ml setting.
Feed your paper through the laminator. If you have a transfer folder, use that. If not, eh, just run the paper through. Sometimes I'll fold a sheet of printer paper to sit on top of the transfer foil, but... It's not necessary.
Once your paper finishes through the laminator, peel off your foil sheets and tape! Your image should be foiled and ready!
If you find areas need cleaned up, you can use a VERY, VERY low tack post-it note to pick up bits that aren't stuck to toner.
If you're feeling particularly fancy, you can use alcohol markers to color in your illustration.
Further Testing and Ideas
There are still several things left to test, ut fall outside the scope of this post.First and foremost -- it is rumored that you can print over the foiling, so if you, say, produced a color illustration, you should be able to print around the area where you did not foil. Care would likely be necessary when running the paper through the printer, and minor offsets can occur. Therefore, it would likely be recommended to expand the size of the area you are foiling to cover any potential offset, but keep the "blank" area in your color image the original size.
Finer temperature control on a better laminator would likely yield better results, as would working with a printer which had finer control over the toner output. Darker prints on a toner printer produces more "glue" and would likely work better.
Other materials, such as the application fluids sold with Minc and Deco foil, as well as toner pens, are frequently available. I have not yet tested how these are used, or if they are meant to be used in the laminator, or simply using a heat gun.
Glue can also be used, with varying results. A small glue pen can provide a level of precision for small details, but can be troublesome as you will need to gently press on the foil to ensure it is consistently stuck to the glue. This often results in smudging, which may be an undesired result.
I need to experiment further with pigment foil for a comparison to the metallic foil used here. At the moment, I have Minc's white foil, but its reliability is questionable in comparison to the metallics. Pigment foil may require a darker coat of toner. On my printer, this may require setting the print quality to "fine" when going through the properties dialog in Photoshop.
Another technique of applying foil using a toner printer exists -- however, I don't like to do it. It does not appear to harm the printer, but it is wasteful of toner.
FAQ:
Why not the Minc machine thing?Costs a lot more than the AmazonBasics laminator. You want me to recommend it? Buy it for me, and I'll test and document it.
The Minc machine costs
Why don't you use transfer folders?
¯\_(ツ)_/¯ I live dangerously.
Why toner?
Toner is “fused” to the paper it’s printed on using heat. A laminator will re-melt the toner and make it sticky enough for the foil to adhere to.
You could use glue or other adhesives, but if you’re looking to mass produce illustrations to foil, toner is the way to go. (Also, do NOT use inkjet ink. It just won't work, and you will cry.)
Why monochrome?
It’s a waste of toner to use color - when it comes to heating things, up, color toner melts just the same as black toner.
Why smooth or coated cardstock?
The foil won't apply evenly on other forms of cardstock, I noticed. The toner settles in divots on the paper's surface and well... Then you get an uneven and speckly sort of appearance. If that's what you want, that's fine though!
Further Reading
Transfer Foil to Paper With a Laser PrinterColor Foils: Techniques
How to Foil: Live More Worry Less Metallic Gold Wall Print
Foil Tech Q&A


Comments
Post a Comment