Watercolor Basics: Step by Step: Glazing Techniques
Now that we've introduced the basics of Watercolor Basics, it's time to take you step by step through some of the most common processes for completing a watercolor illustration. I'm going to take you from start to finish through my 2016 Christmas card illustration, explaining my techniques as I go. I have a series of video tutorials recorded concurrently that should be available on my Youtube channel soon, if you need some live action explanation.

If you enjoy this series, if you have learned something, or if I have inspired you in some way, please take a moment to share this, or any post, with your friends and familiy on your favorite social networking platform. There are handy sharing buttons below this post. If you enjoy art education content, and would like to be part of the process, please visit my Patreon for information on how to join the artnerd community. Backers get early access to popular series, backer exclusive content, and voting rights on upcoming content.
Glazing is a very simple technique that involves painting watercolor wet over dry. It's one of the first techniques a beginner watercolorist masters, and one of the techniques I used the most frequently when painting 7" Kara pages.


These pages are from Chapter 5 of 7" Kara. You can order Volume 1, which contains chapters 1-4, a bonus story, and concept art through Gumroad or my site. You can order a digital copy of Chapter 5 through Gumroad.
The majority of these pages were painted using glazing techniques and a lot of patience. Canson Montval paper can't handle fancy tricks, and doesn't take wet into wet too well, so if you're working on a student grade, cellulose paper like Montval, you'll either need to learn economy of line, or master glazing.
What is a Glaze?
A glaze is a thin layer of watercolor- wet over dry.
Why Glaze?
Materials Used in this Tutorial:
Watercolors of your choice (I use Winsor and Newton moist half pans, Daniel Smith, SoHo, and Holbein watercolors)
Daisy watercolor wells or palette of choice- For mixing large amounts of color
Watercolor brushes (I use mainly rounds)
2 watercolor cups- 1 clean, 1 dirty- I like the Faber-Castell collapsible cups
Paper towels
White Gouache
Synthetic Watercolor Brushes for Gouache
Paper used:
Canson Montval Sketchbook
Watercolor Brushes Used in this Tutorial:

This illustration was inked with a Sailor Mitsuo Aida brushpen.


Step 2: Securing Your Image

Although this is 140lb watercolor paper, and should not need stretching, I have not found a 140lb paper that is heavy duty enough that it doesn't need some securing. Since this paper is already spiral bound, I used two bulldog clips to clamp my paper down and help reduce buckling.
Step 3: Applying a Simple Wash

You could use masking film or masking fluid to mask off your area (which would make applying a wash much easier), but I have consistently had poor results with both, and opted to take the long route.
Step 4: Allow Wash To Dry

Step 5: Reapply Wash


Step 6: Add in background shadows

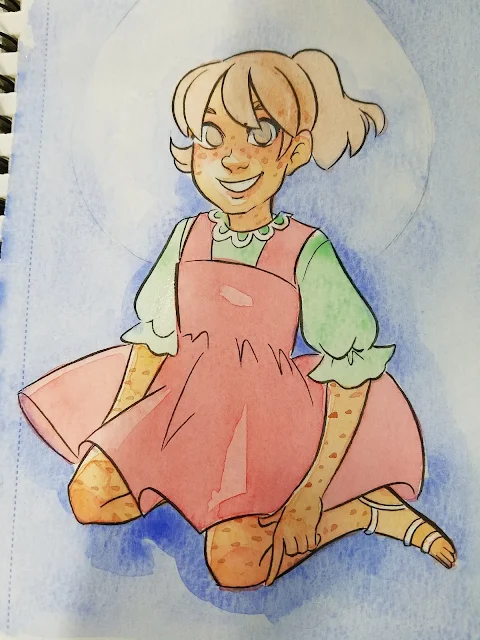
Step 7: Mix and Apply Skintone


Step 8: Add Skintone Shadows with Color


Step 9: Mix and apply blush
For first layer of blush, apply across cheeks and bridge of nose, beneath nose, to lips, tops of ears, knuckles on fingers and fingertips, elbows, knees, heels.

Step 10: Add another of blush to build up color.
Layer can blended out with clean water.


Step 11: Apply wash of color to largest article of clothes

Step 12: Allow wash to dry


Step 13: With same color mixed (or slightly more saturated version), apply shadows to clothing.

Step 14: Fill in Smaller Articles of Clothing

Step 15: As adjacent areas are dry, develop saturation and tone as necessary.
With glazes, the intention is to build up contrast and detail- so do not cover the entire area with every pass. Every pass should cover less than the one before.


 Step 16: Reserving your most concentrated colors for the end, apply dry onto dry or concentrated wet onto dry colors at the end.

Step 17: If necessary, add another layer of background wash to darken the background and build up contrast.

Step 18: Allow background to dry completely

For this illustration, I applied skin shadow beneath Kara's bangs under her chin, inside her ear, along the inside of her right arm, along the outside of her left arm, and on her legs.
Step 20: Add another glaze of shadow to darken skin.

Step 21: Apply most concentrated (dry onto dry) colors at this stage, to prevent reactivation or muddy colors


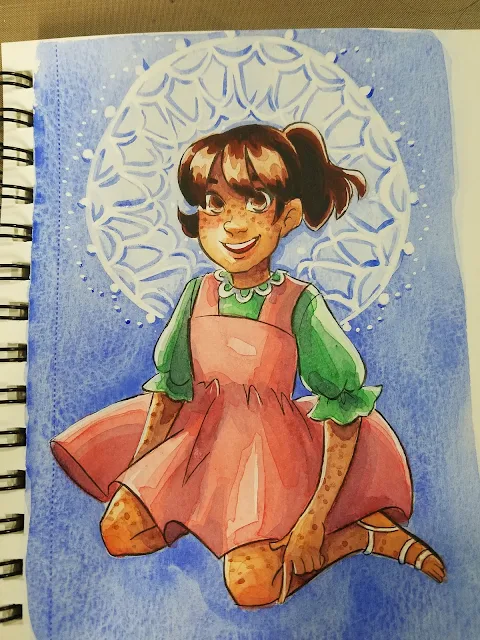
For the Mandala:

Step 2: Working from the outside, I outline the circle with gouache using the synthetic round, and add small, evenly spaced dots around the perimeter.
Step 3: Working one row at a time, I fill the circle in with loops and laces. Although the size varies from row to row, it stays consistent within the row itself.

Step 4: To make the white gouache pop, use the background color to lightly edge your gouache.
If you make a mistake, correction is easy! Just wait until the paint dries, and then cover the mistake with white gouache.

Step 5: Allow to Dry
Our Sponsor:

For more beautiful watercolor work, why not pick up a copy of 7" Kara, Volume 1? 7" Kara is a lush watercolor comic the entire family can enjoy, following the adventures of tiny Kara as she discovers humans, explores the backyard, and befriends a kitten. Created by Becca Hillburn, if you enjoy this blog and my art, you'll love 7" Kara. Volume 1 is available in the Natto-shop.

If you enjoy this series, if you have learned something, or if I have inspired you in some way, please take a moment to share this, or any post, with your friends and familiy on your favorite social networking platform. There are handy sharing buttons below this post. If you enjoy art education content, and would like to be part of the process, please visit my Patreon for information on how to join the artnerd community. Backers get early access to popular series, backer exclusive content, and voting rights on upcoming content.
Glazing is a very simple technique that involves painting watercolor wet over dry. It's one of the first techniques a beginner watercolorist masters, and one of the techniques I used the most frequently when painting 7" Kara pages.


These pages are from Chapter 5 of 7" Kara. You can order Volume 1, which contains chapters 1-4, a bonus story, and concept art through Gumroad or my site. You can order a digital copy of Chapter 5 through Gumroad.
The majority of these pages were painted using glazing techniques and a lot of patience. Canson Montval paper can't handle fancy tricks, and doesn't take wet into wet too well, so if you're working on a student grade, cellulose paper like Montval, you'll either need to learn economy of line, or master glazing.
What is a Glaze?
A glaze is a thin layer of watercolor- wet over dry.
Why Glaze?
- If you're working on inexpensive or difficult papers, delicate papers, or papers not designed for watercolor, thin glazes with long drytimes may allow you to achieve the results you want.
- Glazes are an easy technique to learn
- Versatile
- For some artists, this may be the only technique you need
Materials Used in this Tutorial:
Watercolors of your choice (I use Winsor and Newton moist half pans, Daniel Smith, SoHo, and Holbein watercolors)
Daisy watercolor wells or palette of choice- For mixing large amounts of color
Watercolor brushes (I use mainly rounds)
2 watercolor cups- 1 clean, 1 dirty- I like the Faber-Castell collapsible cups
Paper towels
White Gouache
Synthetic Watercolor Brushes for Gouache
Paper used:
Canson Montval Sketchbook
Watercolor Brushes Used in this Tutorial:
- For rounds larger than 6, I use synthetic brushes. Your preferences may vary from mine- I have several brands, and still have not found a brand I think perform as well as natural hair brushes. Synthetic brushes are much cheaper than natural hair brushes, especially at larger sizes, and are useful for blocking in color, as we will be doing in this tutorial.
- Creative Mark Rhapsody Kolinsky Sable Brushes- 4, 2, 1, 0
- Creative Mark Squirrel Brushes- 4, 6
- Blick Master Studio Squirrel- 4, 6

This illustration was inked with a Sailor Mitsuo Aida brushpen.


Although this is 140lb watercolor paper, and should not need stretching, I have not found a 140lb paper that is heavy duty enough that it doesn't need some securing. Since this paper is already spiral bound, I used two bulldog clips to clamp my paper down and help reduce buckling.
Step 3: Applying a Simple Wash

You could use masking film or masking fluid to mask off your area (which would make applying a wash much easier), but I have consistently had poor results with both, and opted to take the long route.
Step 4: Allow Wash To Dry


Step 8: Add Skintone Shadows with Color


For first layer of blush, apply across cheeks and bridge of nose, beneath nose, to lips, tops of ears, knuckles on fingers and fingertips, elbows, knees, heels.

Layer can blended out with clean water.


With glazes, the intention is to build up contrast and detail- so do not cover the entire area with every pass. Every pass should cover less than the one before.


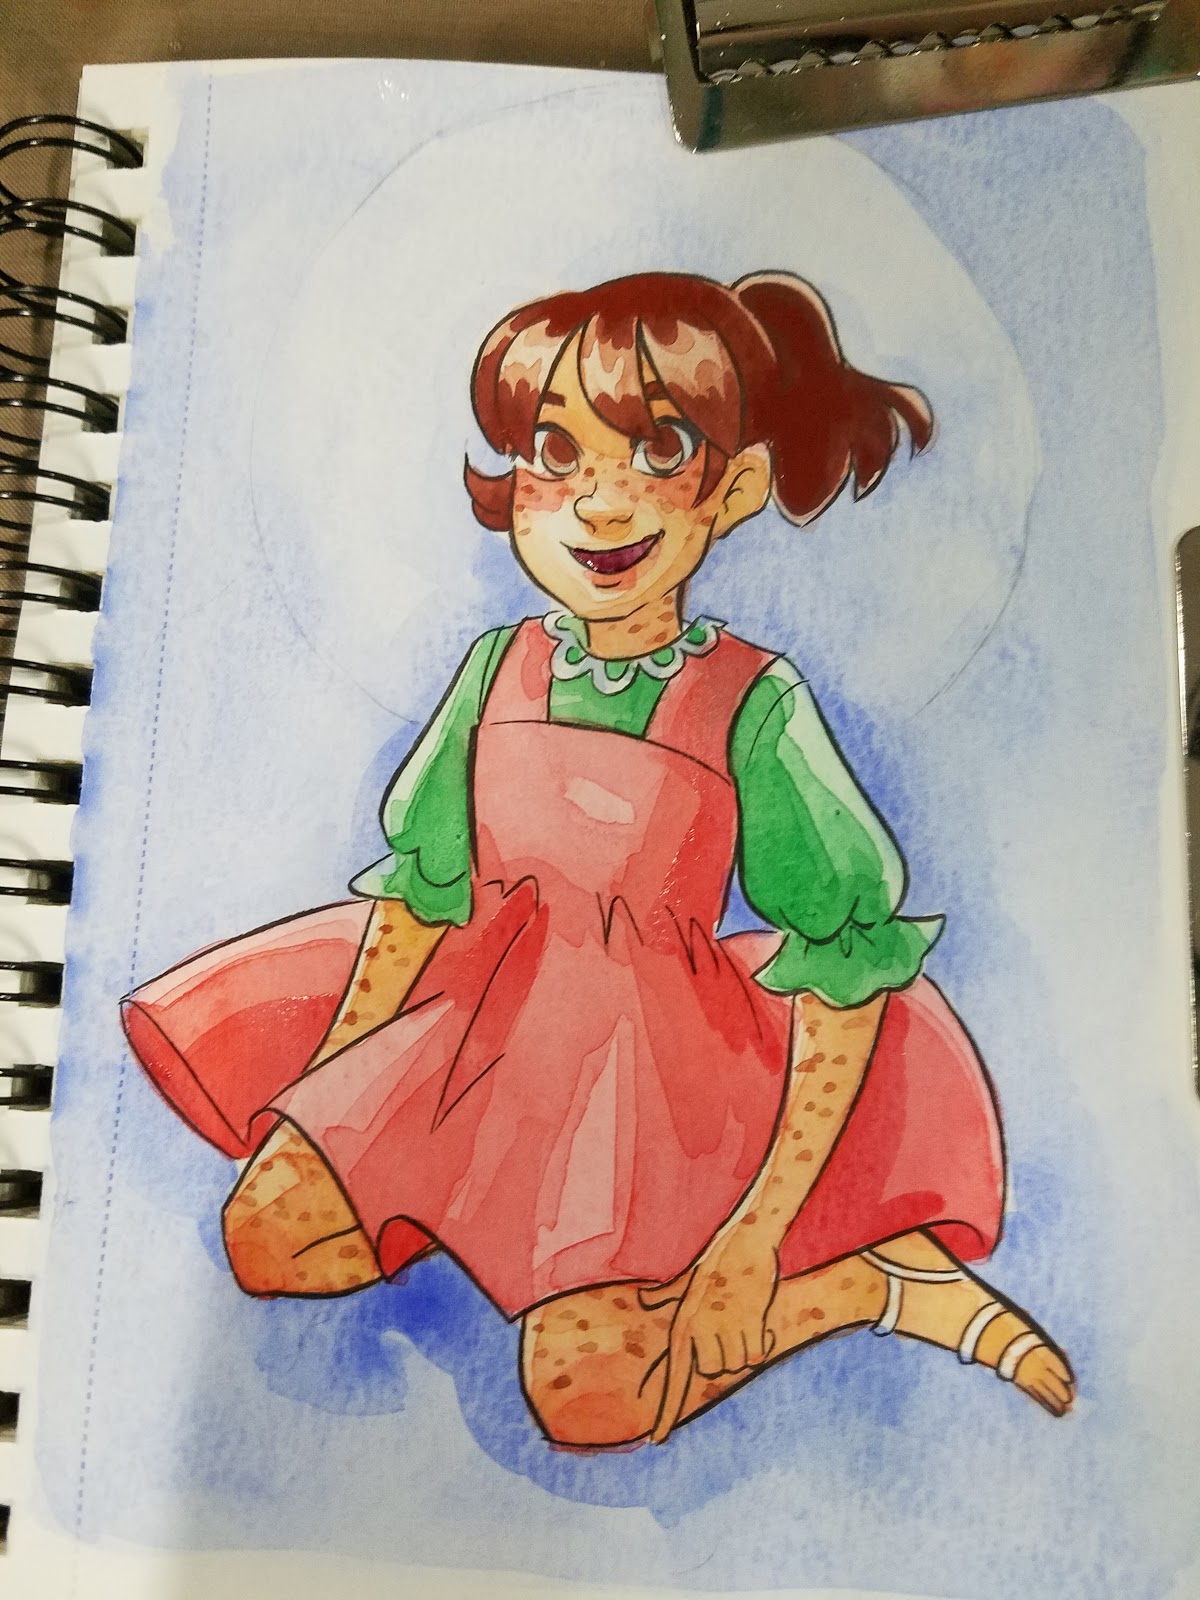

Step 19: Once everything is dry, apply shadow colors to skin (as demonstrated in the Watercolor Basics: Step by Step: Adding Shadows (link) tutorial)

Step 20: Add another glaze of shadow to darken skin.


For the Mandala:
Materials used:
Concentrated mix of background color (ultramarine+cerulean)
Small synthetic round (2)
Step 1: Begin with your dried watercolor.
Note I've already left an area for the mandala lightly painted.

Step 2: Working from the outside, I outline the circle with gouache using the synthetic round, and add small, evenly spaced dots around the perimeter.
Step 3: Working one row at a time, I fill the circle in with loops and laces. Although the size varies from row to row, it stays consistent within the row itself.

Step 4: To make the white gouache pop, use the background color to lightly edge your gouache.
If you make a mistake, correction is easy! Just wait until the paint dries, and then cover the mistake with white gouache.


As you can see, glazing is a fairly simple technique that can give you great results. It's particularly suited to cheap, cellulose papers that can't withstand much work. Once you've mastered the basic glaze, you are well on your way to painting your own watercolor pages successfully.


Comments
Post a Comment