Preparing Spot Illustrations for InDesign and Placement in InDesign
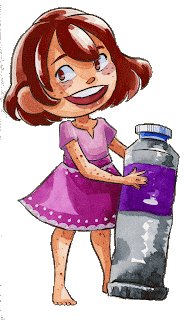
Thread 2! Let's talk a little about using those cute lil illustrations in our InDesign File!
— 🍀Becca Hillburn🍀 (@Nattosoup) June 16, 2020
Image 1: The images we want to use
Image 2: A finished example
Image 3: The section we need to decorate. pic.twitter.com/rY3Enl4YlY
So the first thing I need to do is merge all my alterations onto one layer (since the original art is all on one layer) Same method as used before-DUPLICATION! pic.twitter.com/wJh5mzOfO1
— 🍀Becca Hillburn🍀 (@Nattosoup) June 16, 2020
I'm going to use the crop tool to make separate files. InDesign can read Photoshop files, and will maintain the transparency, so we're going to be saving these as Photoshop files. pic.twitter.com/FMEikk3Bji
— 🍀Becca Hillburn🍀 (@Nattosoup) June 16, 2020
Once all my files have been separated out and saved as PSD's, its time to plonk them into my InDesign file. I want to talk about Indesign a bit. pic.twitter.com/bsrmmz3Ago
— 🍀Becca Hillburn🍀 (@Nattosoup) June 16, 2020
In case you aren't familiar with it, InDesign is a layout program. Usually, I use Affinity Publisher, as it's WAY CHEAPER ($50 lifetime license)& lighter weight, although v prone to crashing.The thing is, a printer may want an .indd file,or a PostScript file & AP doesn't do that. pic.twitter.com/IzsEZrDD84
— 🍀Becca Hillburn🍀 (@Nattosoup) June 16, 2020
So on the left hand side,we have a toolbar that's similar to Photoshop. Everything is JUST DIFFERENT enough to be wildly frustrating (like the text tool),so it'll take some getting used to. On the right,we have our preview & Master- if you need to duplicate a spread, do it there. pic.twitter.com/bYjuLfQkVQ
— 🍀Becca Hillburn🍀 (@Nattosoup) June 16, 2020
I am not an InDesign expert- just a self published comic artist who lays out her own books- so take this tutorial with a grain of salt, I recommend you look up other InDesign tutorials if you're doing your own layout work! pic.twitter.com/pe0dD02IMt
— 🍀Becca Hillburn🍀 (@Nattosoup) June 16, 2020
So at this point, most of the book has been laid out- all I really have left is a few more commissions in the Guest Art Gallery, the 4komas to recap Volume 1, and these Naomi illustrations for the Making 7" Kara Section.
— 🍀Becca Hillburn🍀 (@Nattosoup) June 16, 2020
So Control D allows you to place an item, and will open up a selection menu. I've already navigated to the correct folder (I'll talk about that in a bit), so I just need to select my art. pic.twitter.com/upoOgqiubU
— 🍀Becca Hillburn🍀 (@Nattosoup) June 16, 2020
Like in Photoshop, you use the bounding box to resize, but unlike PS, it won't automatically resize it, so you need to hit Shift, Control, Alt and E to get it to scale to the bounding box. pic.twitter.com/l77mfkmrRg
— 🍀Becca Hillburn🍀 (@Nattosoup) June 16, 2020
Remember earlier, when we went to a lot of effort to delete the background, then when we went to effort to isolate each art asset, THEN went to the effort to save it as an individual .psd ? It pays off now. pic.twitter.com/t7Iih8pvgp
— 🍀Becca Hillburn🍀 (@Nattosoup) June 16, 2020
We can easily layer art assets on top of each other- and the nice thing about InDesign is that it's REFERENCING the original file, so if you update the original, you can have it update the InDesign file with just a single mouse click. THIS leads us to the next part. pic.twitter.com/leqWTxDhwn
— 🍀Becca Hillburn🍀 (@Nattosoup) June 16, 2020
Ok, so when you're using InDesign, you want all of the assets that are going to go into that book, INCLUDING font files, to go into a folder. It can be a series of nested folders inside that folder, but you need a main folder. InDesign is going to reference these files so...
— 🍀Becca Hillburn🍀 (@Nattosoup) June 16, 2020
...if you move stuff around, it's going to have to be relinked in InDesign. This has its pros and cons, but it allows a printer to easily update your file for you if there's a color error.
— 🍀Becca Hillburn🍀 (@Nattosoup) June 16, 2020
So this is a great example- I have this really cute illo of Naomi showing off her painted page, and I'd like to use it here- but oh hey, it's getting in the way of this spread. I have a lot of unused space, but I'd need to alter that file.... pic.twitter.com/FtWkGJmc6j
— 🍀Becca Hillburn🍀 (@Nattosoup) June 16, 2020
So I can open that original file in Photoshop, edge the spread over, hit save, go into InDesign, and if you squint, you can see a lil warning- that's telling me the file has changed. I hit that and it updates my file! How? It pulled from the source! pic.twitter.com/cNFCX75nIY
— 🍀Becca Hillburn🍀 (@Nattosoup) June 16, 2020
I'm on the fence about this page- Naomi is helping to illustrate what the process actually looks like (I paint on the floor), but I can take advantage of some of that unused space so it's less cramped. pic.twitter.com/AKqLE7UmhK
— 🍀Becca Hillburn🍀 (@Nattosoup) June 16, 2020
So after adding these illos, I realized I need EVEN MORE Pancake spot illos, so back to painting I guess!
— 🍀Becca Hillburn🍀 (@Nattosoup) June 16, 2020


Comments
Post a Comment