Taking Sketchbook Inks to the Next Level
Although Inktober is over, that's no reason to stop inking! I know many of you are tired out from the daily grind of drawing and inking a piece every day for October, but hopefully these easy inking hacks will inspire you to pick up the brush/pen/nib once more. Now that you've put in some practice inking, these playful additions should not only be easy, but loads of fun. And all of them look like so much more than the sum of their parts.
If you need to pick up any supplies for these tutorials, please use the included links. These affiliate links pay me a small bounty when products are purchased, and are at no additional cost to you. Using my affiliate links, or beginning your Amazon shopping trips with my affiliate links (even if you don't directly purchase the item linked) is a great way to help support this blog at no cost to you.
If you enjoy these sort of posts, and would like to help me make more of them, please head on over to my Patreon for information on how to join my merry band of artnerds, and how to support future content. Even a small monthly contribution goes a long way towards future tutorials and reviews!
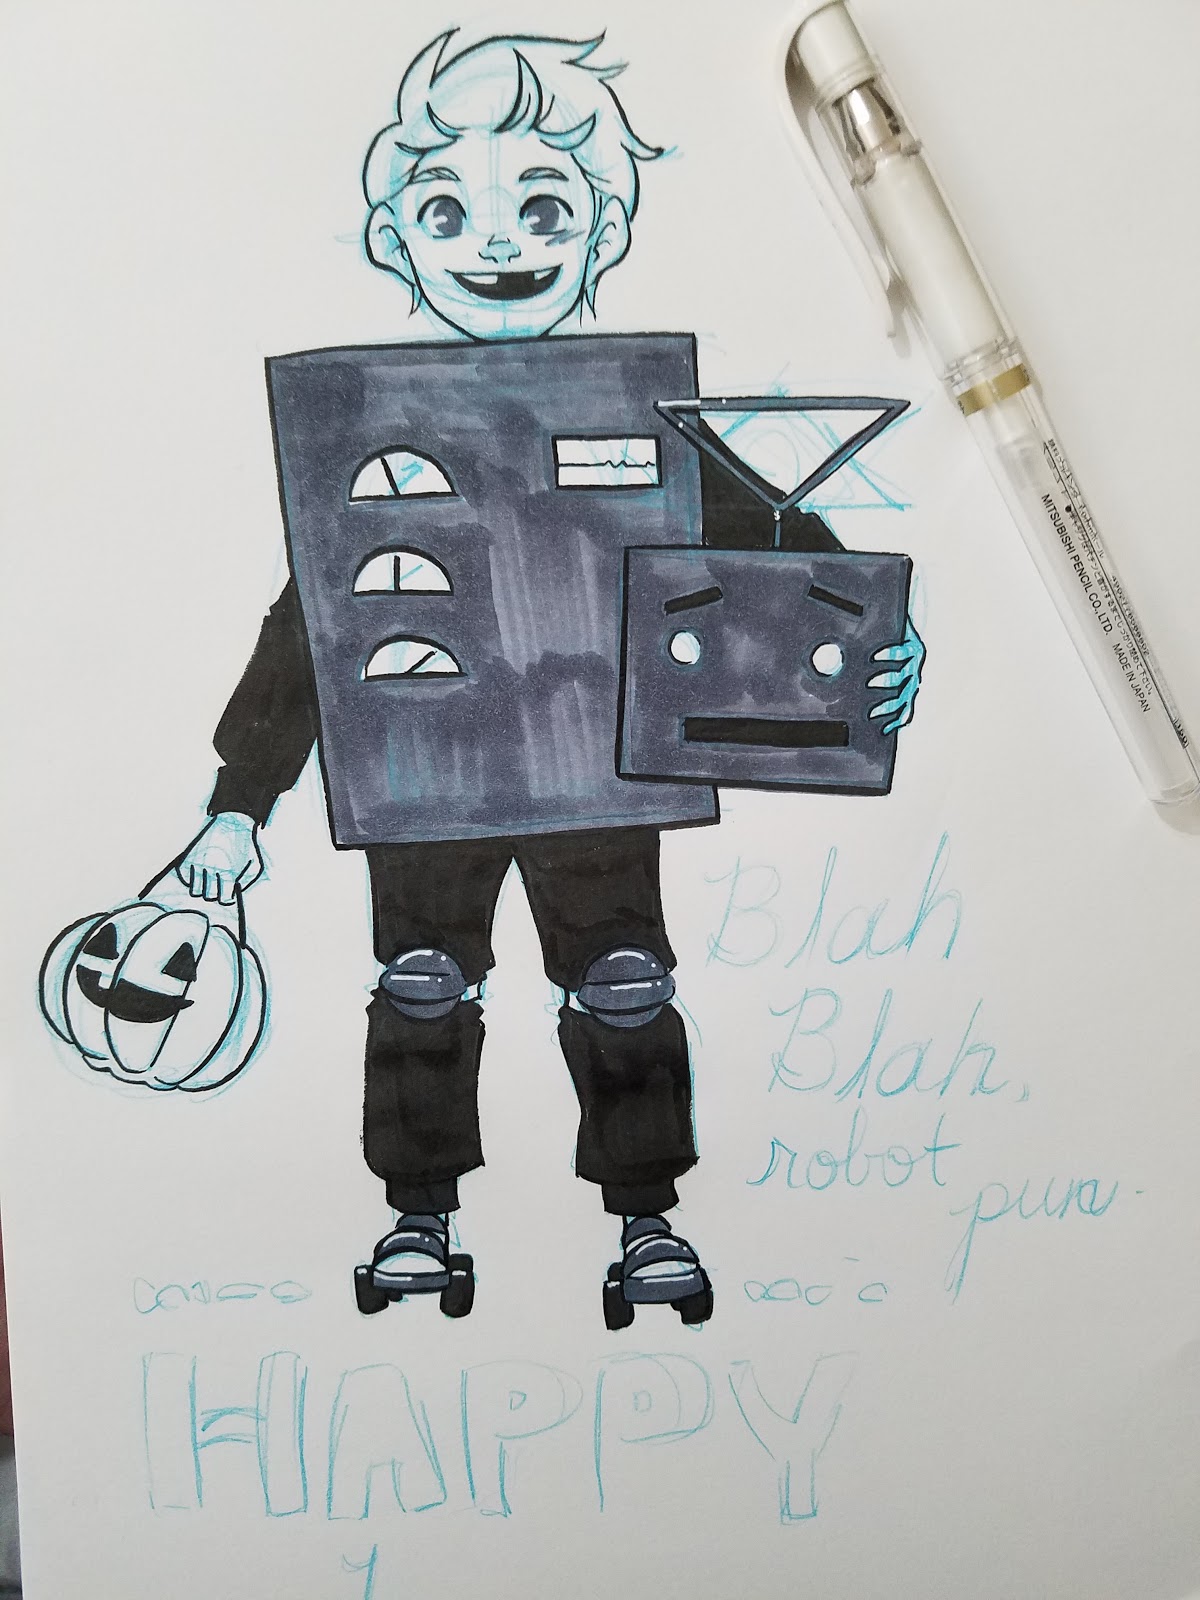
Blue Lead+Alcohol Marker+Black Inks
Materials Needed:
C6 Copic Marker or other cool gray alcohol marker
Signo White Gel Pen
Non photo blue lead (I use Color Eno Soft Blue)
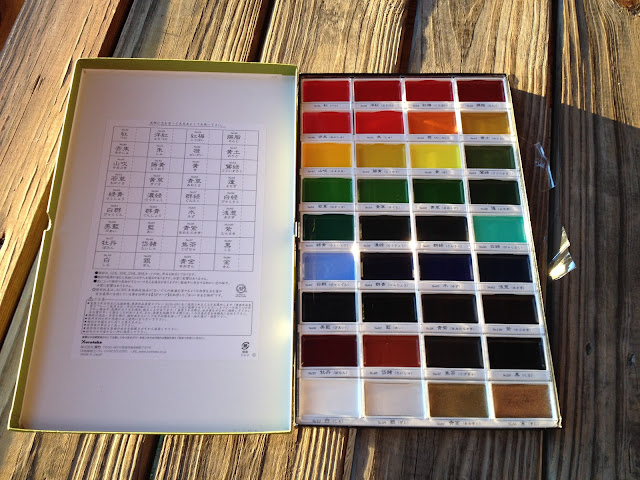
Fude pen (I use Kuretake's Fudegokochi)
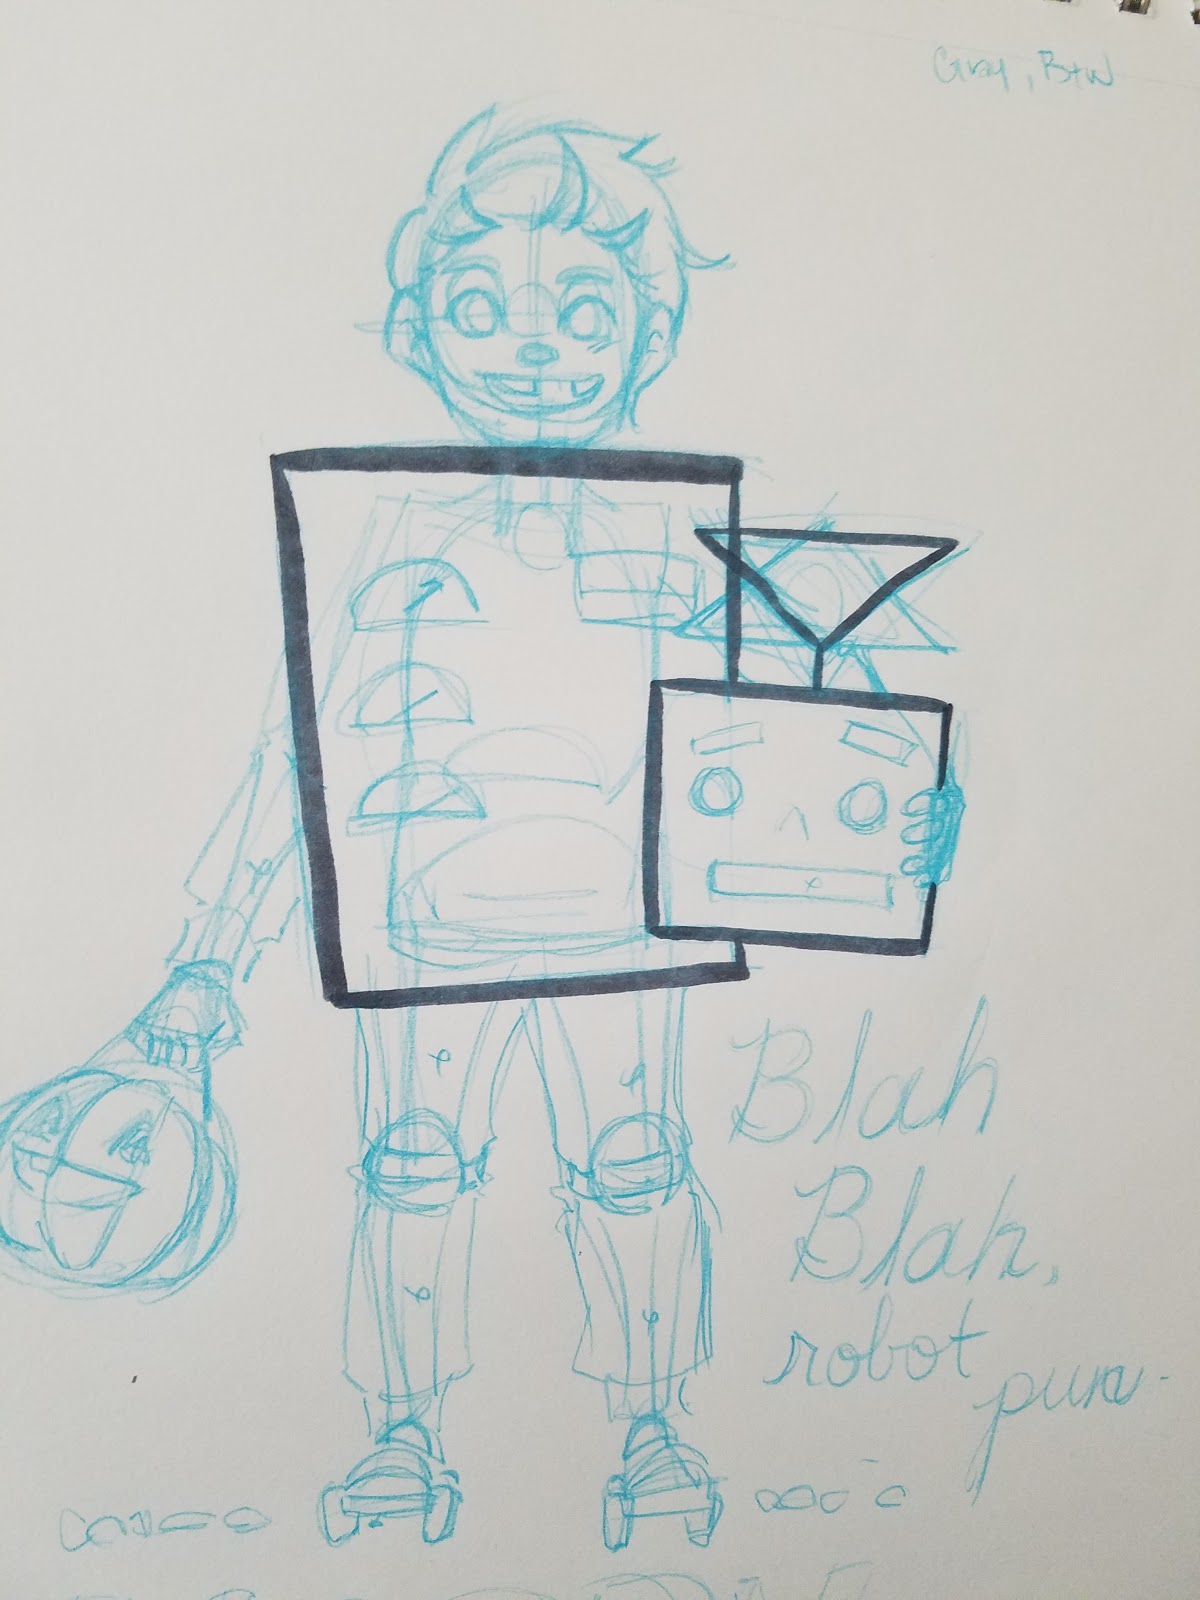
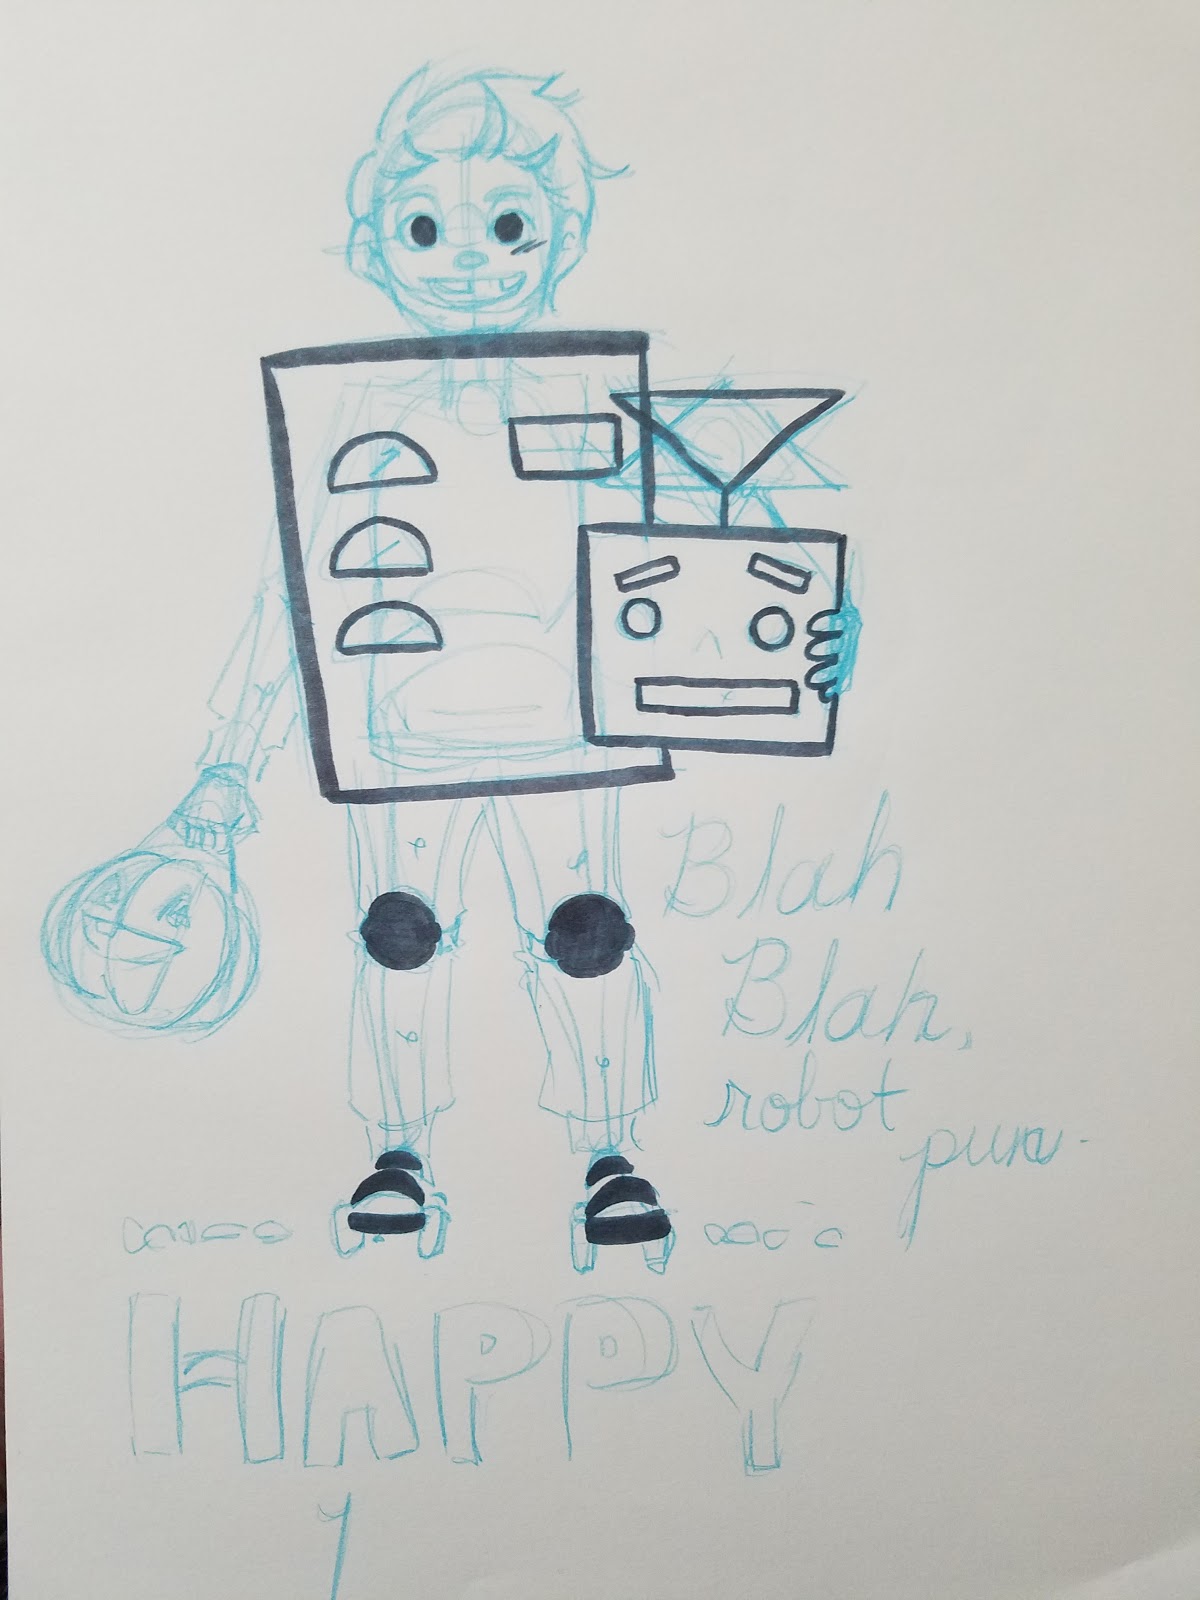
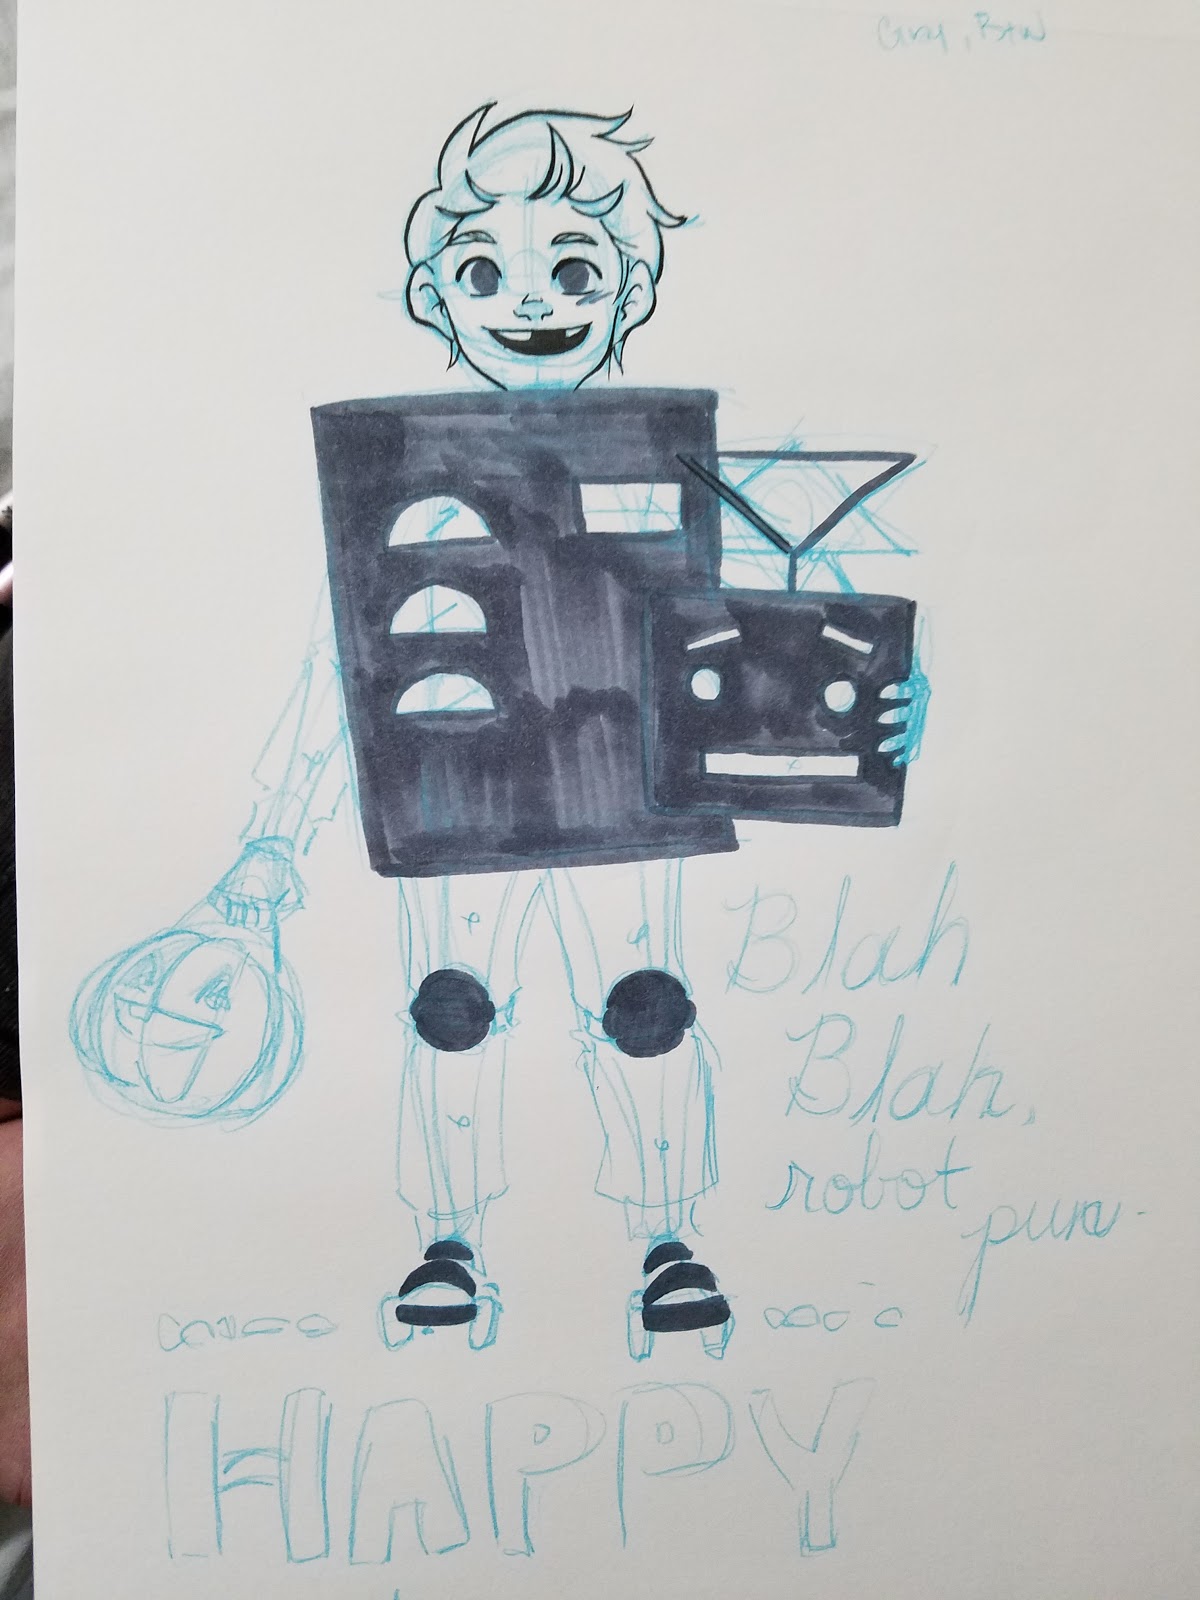
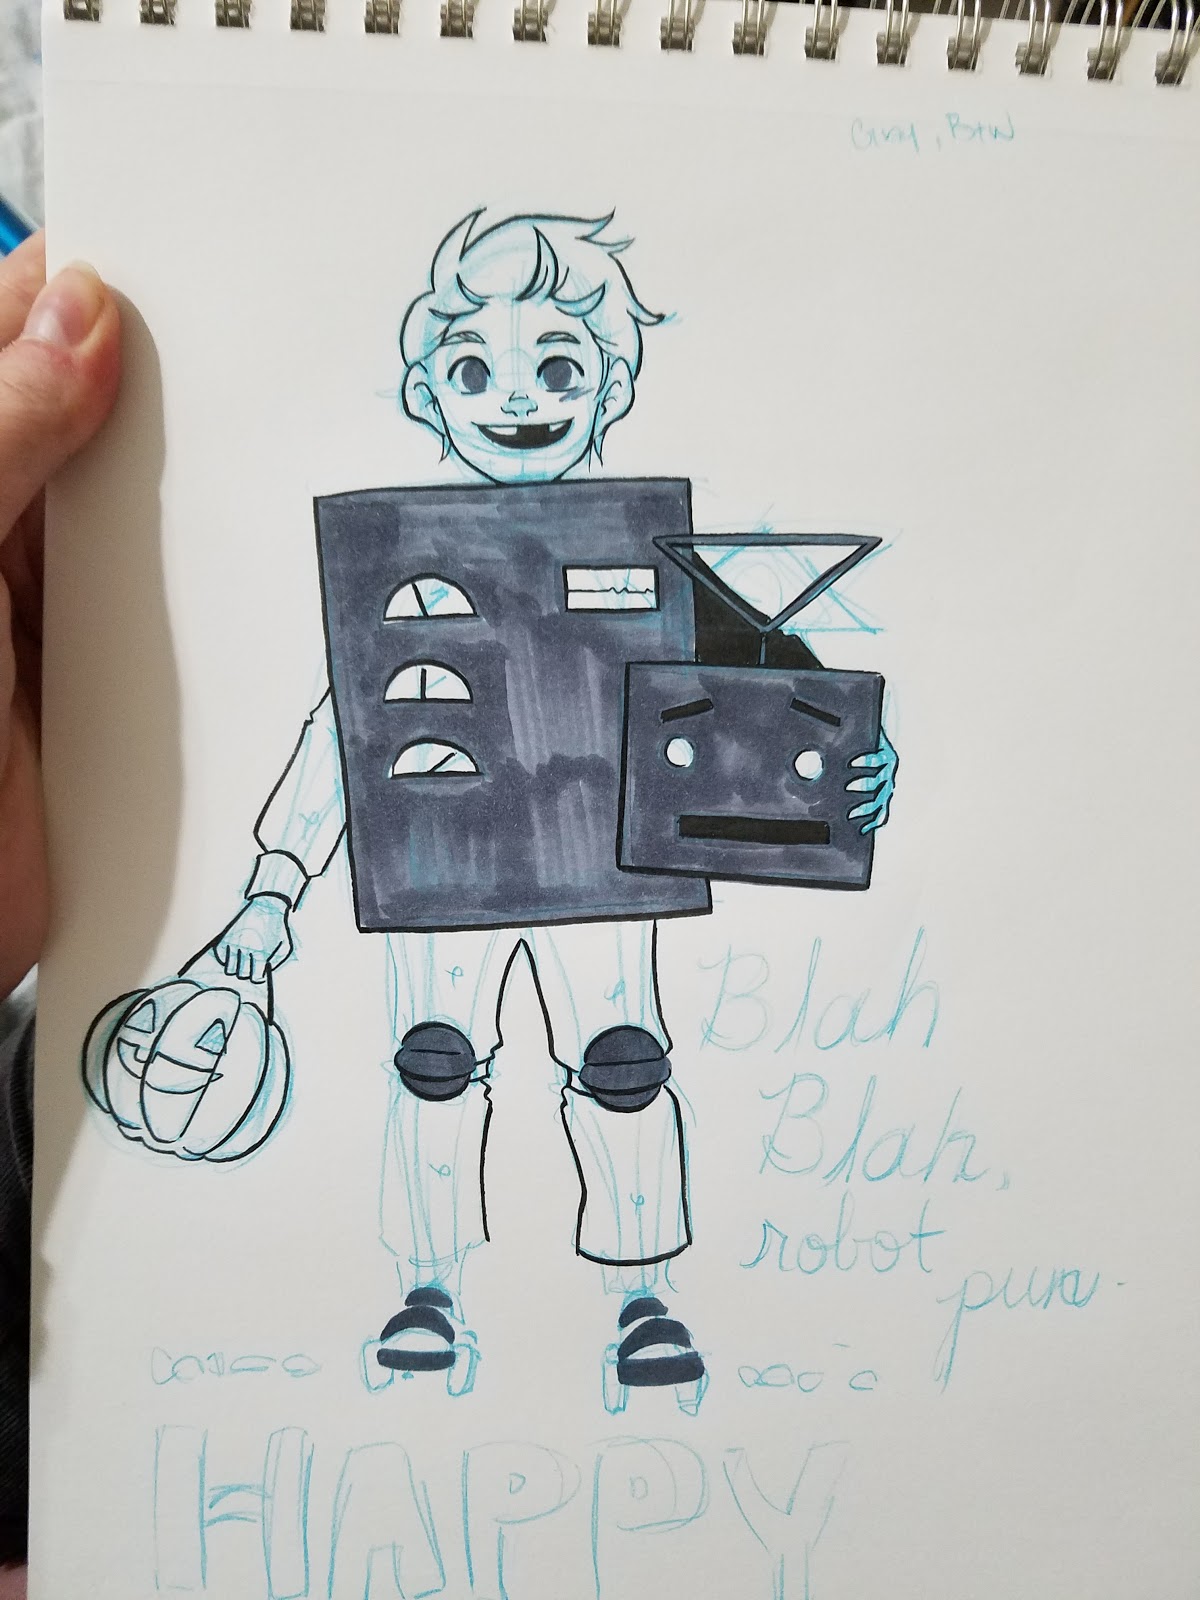
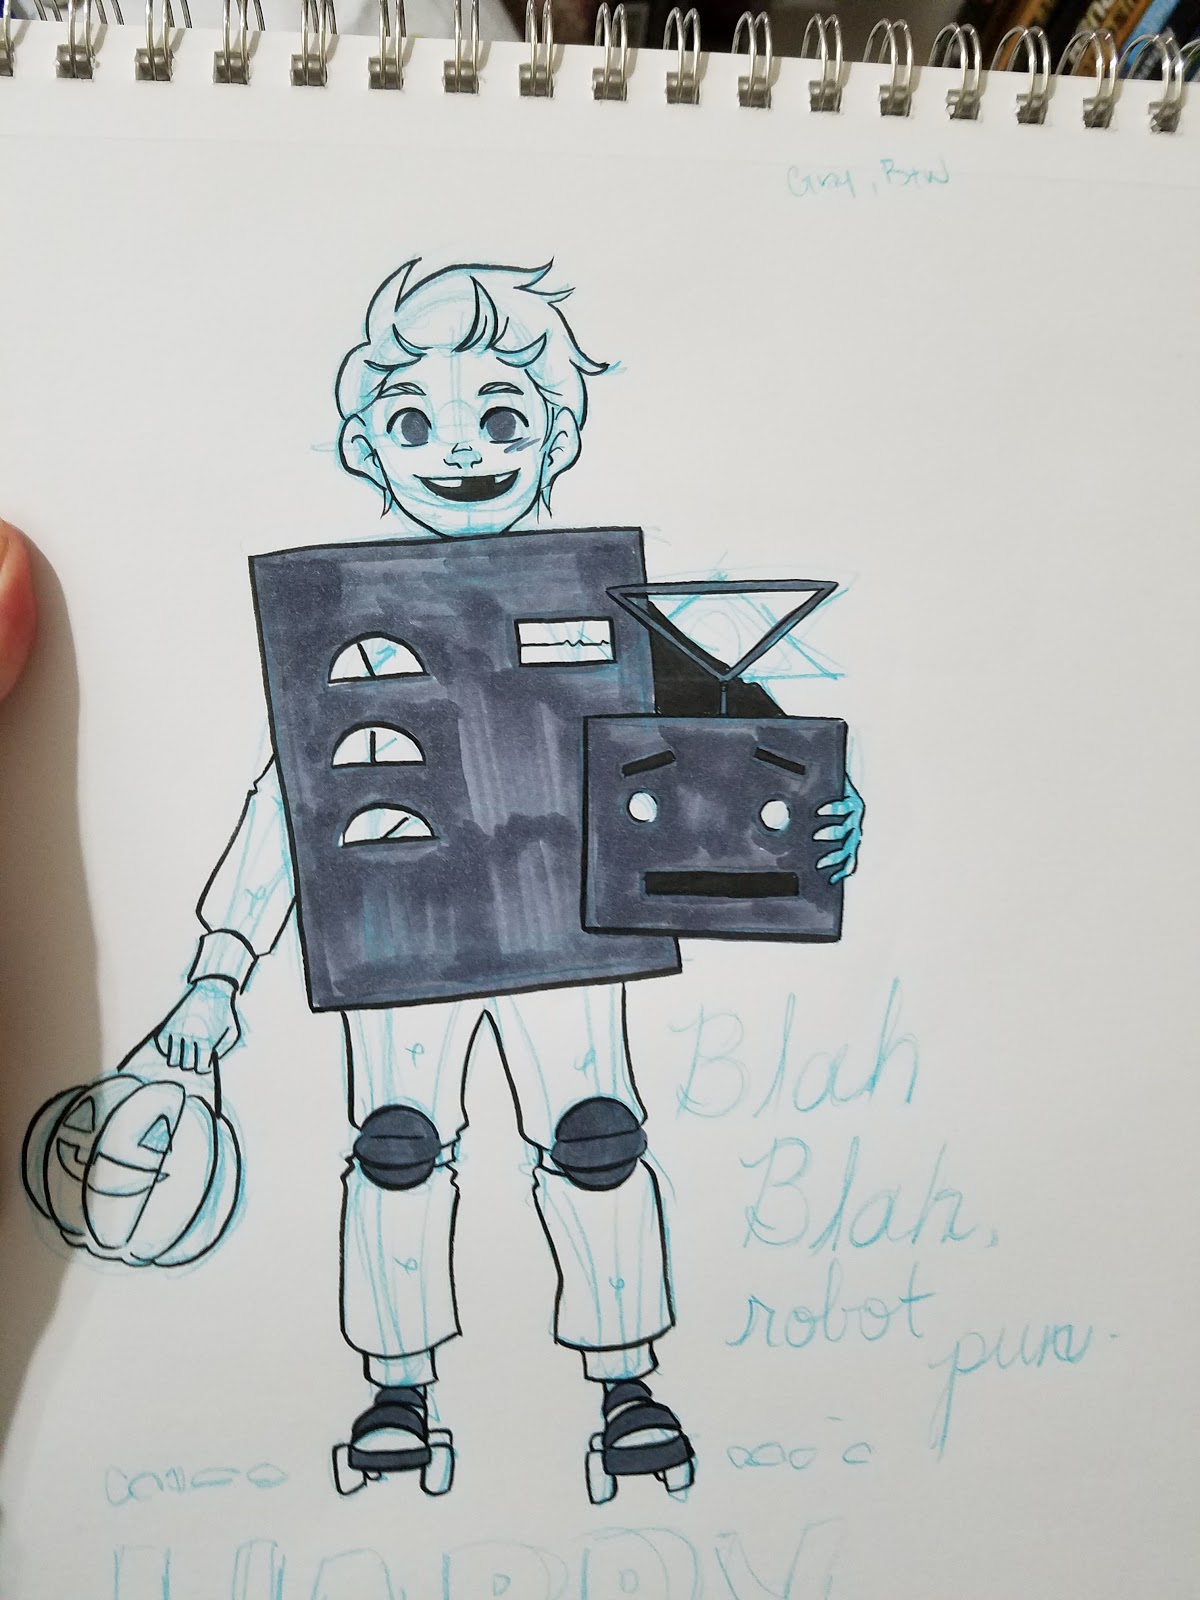
Step 1: Sketch

Step 2: Outline with Alcohol Marker

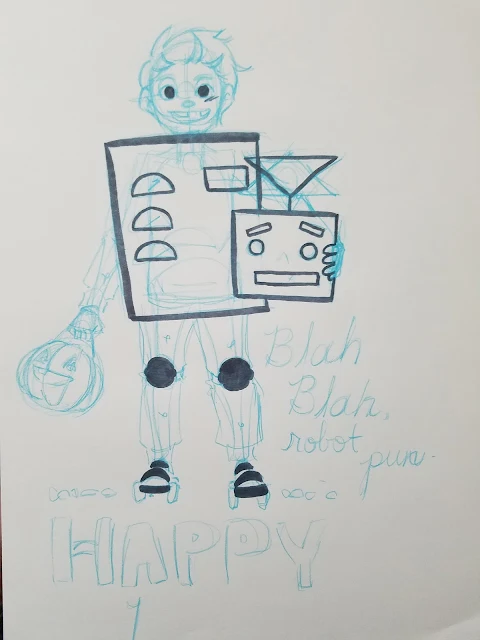
Step 3: Fill in with Alcohol Marker


Step 4: Ink with Pen


 Step 4: Fill in Spot Black

Step 5: Add Highlights with Signo

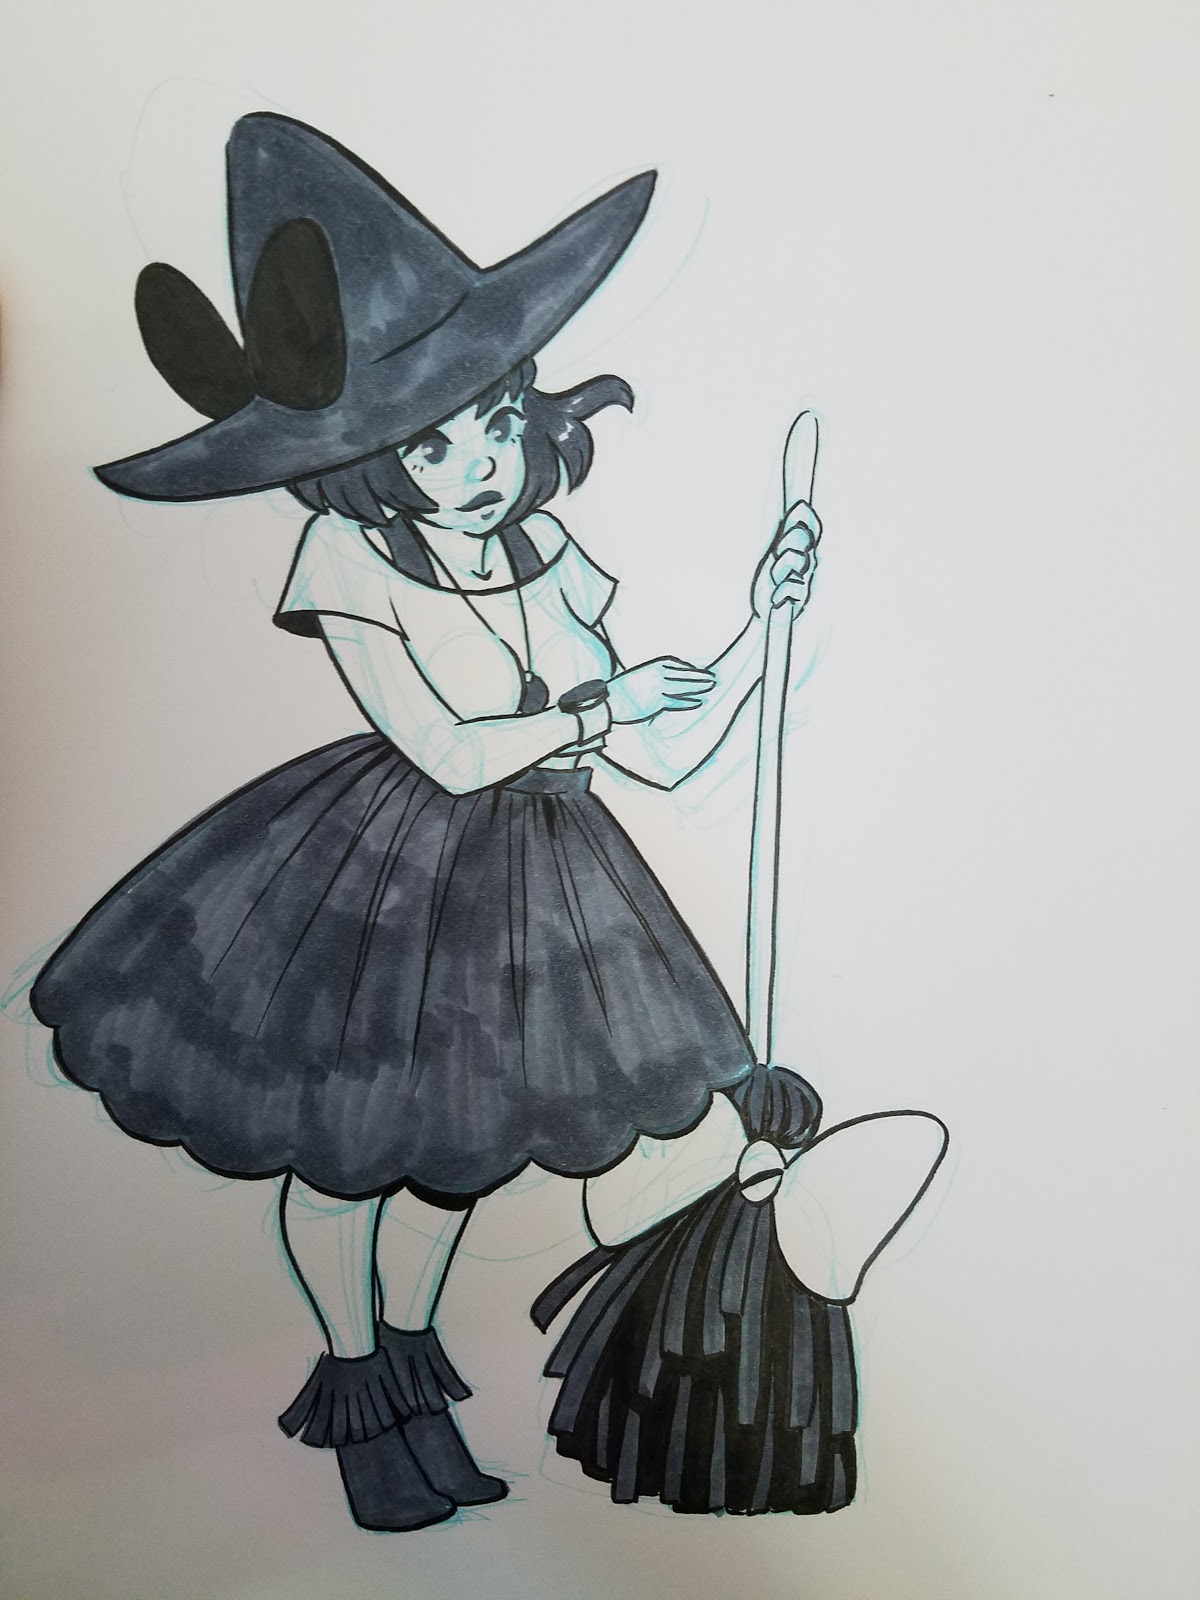
Further Examples:


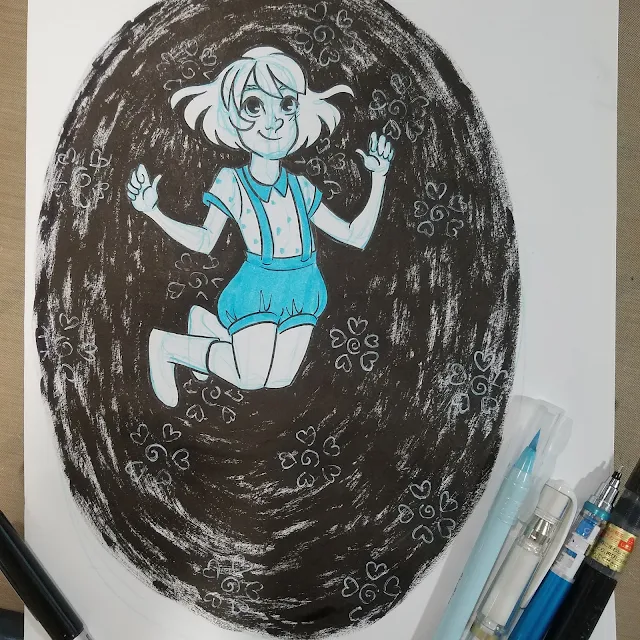
Step 1: Sketch
 Step 2: Outline areas you want to fill with color

Step 3: Begin Coloring


Step 4: Ink with Black Pen


Step 5: Add Highlights


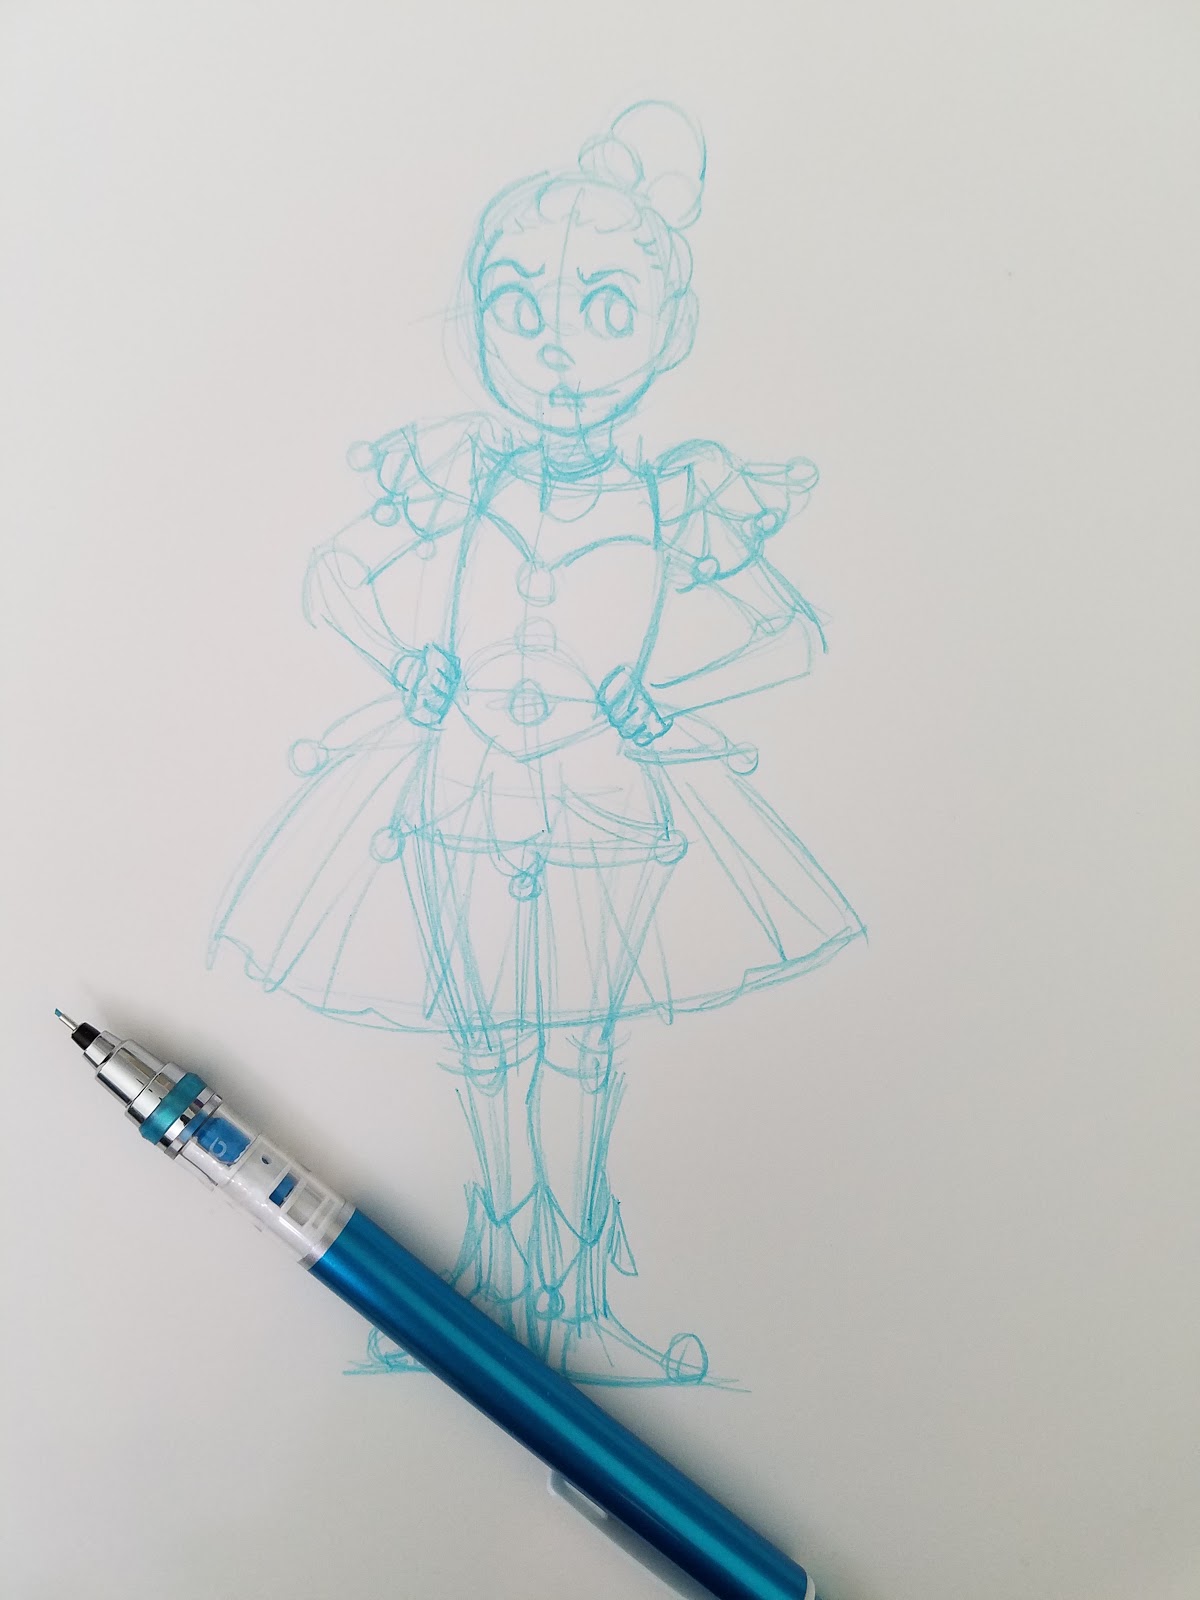
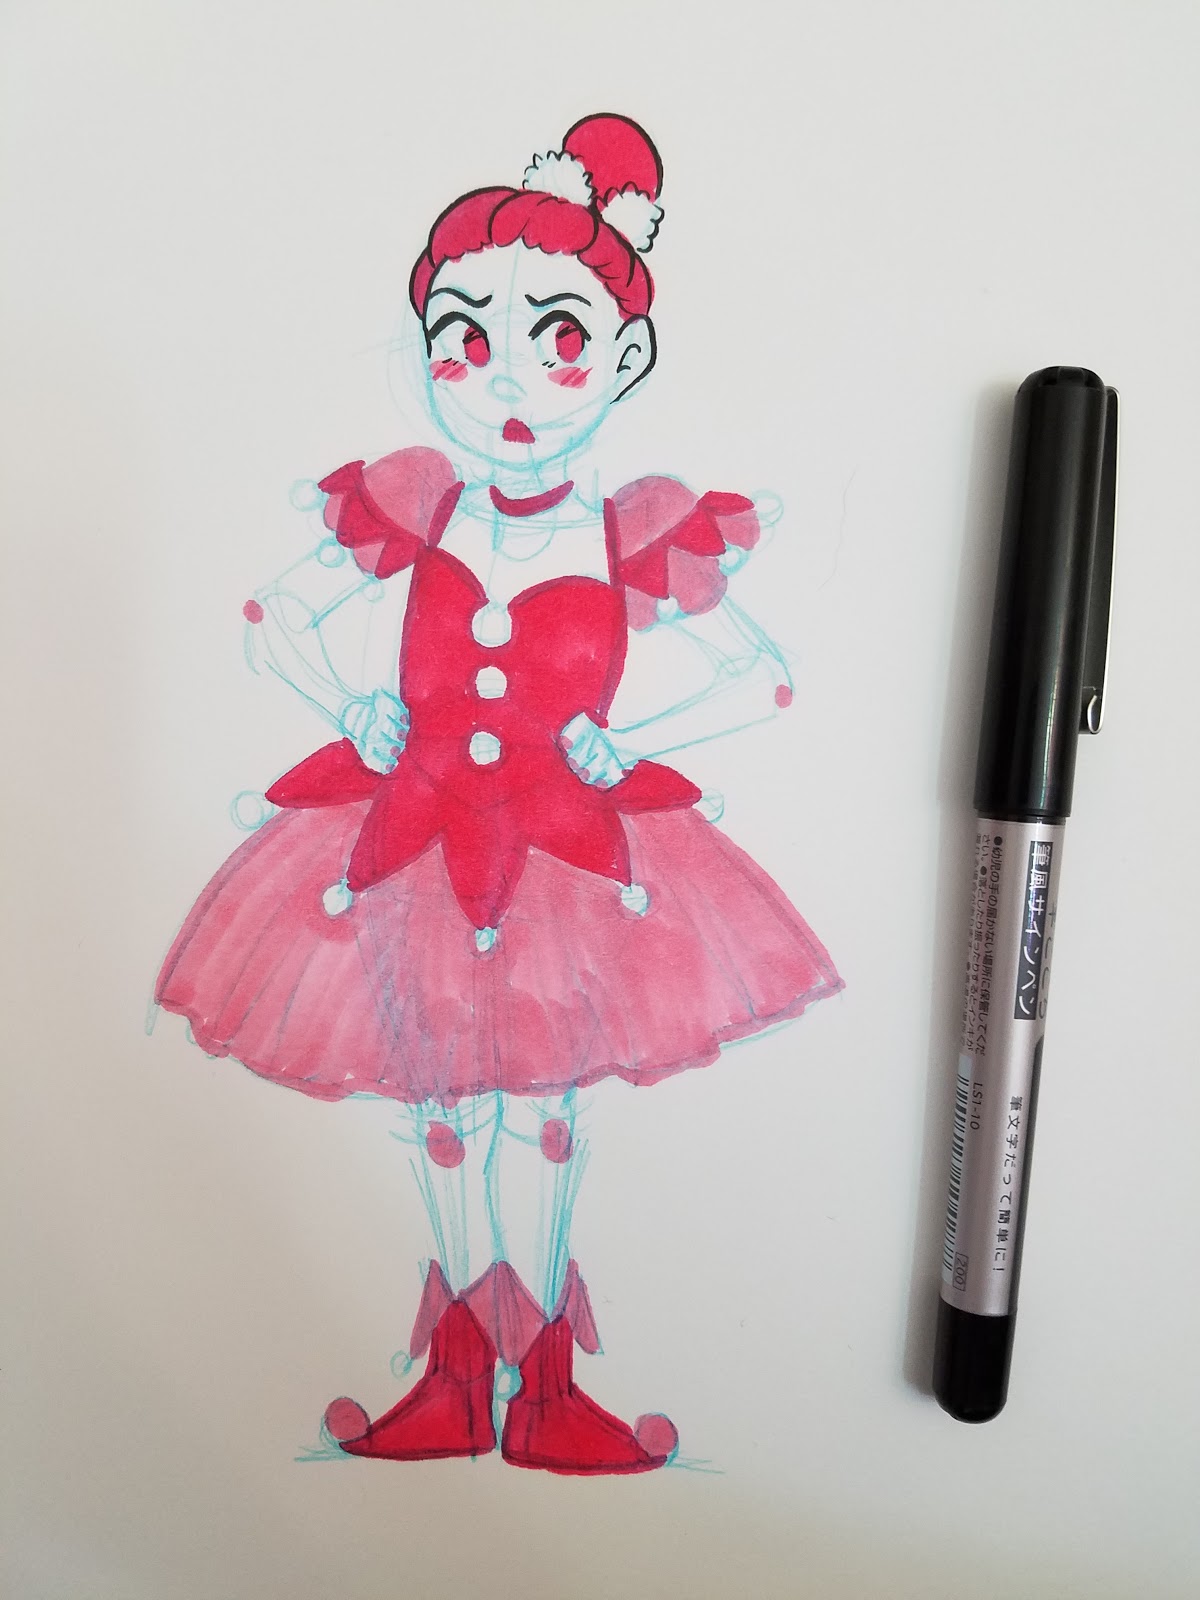
Using a colored lead+colored ink+black ink
Materials Needed:
Colored Lead (I used Pentel's red lead)
Matching Colored Brushpen (I used Pentel's Brushpen in Red)
Signo White Gel Pen
Fude pen (I use Kuretake's Fudegokochi)
Black brushpen (I used a Pentel Pocketbrush and a Pentel Brushpen)
Step 1: Sketch in Colored Lead

Step 2: Outline and Fill with colored ink
Step 3: Ink
Step 4: Fill in Spot Blacks

Colored Lead+Colored Ink+Inkwash Techniques+Black Ink
Materials Needed:
Colored Lead (I used Pentel's red lead)
Matching Colored Brushpen (I used Pentel's Brushpen in Red)
Signo White Gel Pen
Fude pen (I use Kuretake's Fudegokochi)
Black brushpen (I used a Pentel Pocketbrush and a Pentel Brushpen)
Waterbrush with Clean Water
Surface to use as palette (I'm using an Inkssentials Craft Mat by Ranger)
 Step 2: Apply colored ink to palette. Add a drop of water. Begin painting delicate washes. Allow to dry.

 Further Examples

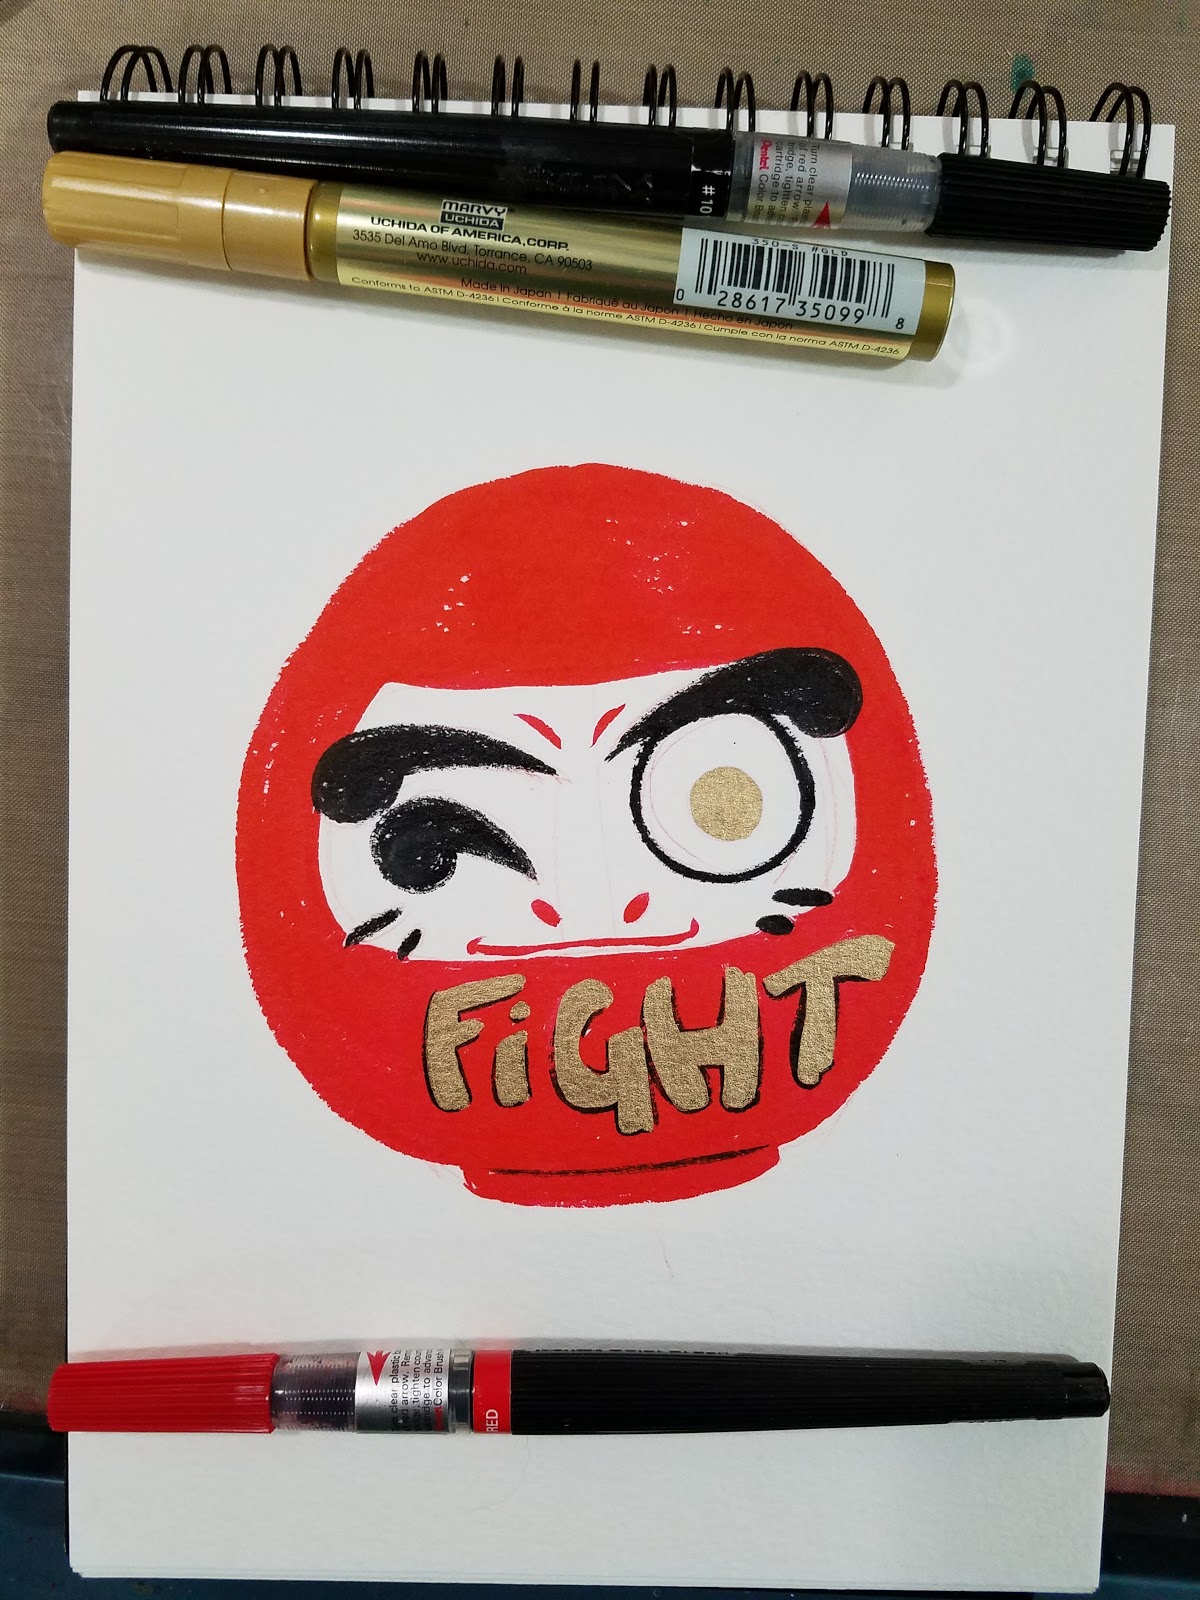
Colored Leads+Colored Ink+Metallic Ink+Black Ink
Materials Needed:
Colored Lead (I used Pentel's red lead)
Matching Colored Brushpen (I used Pentel's Brushpen in Red)
Metallic pen (I used Uchida's DecoColor Premium)
Fude pen (I use Kuretake's Fudegokochi)

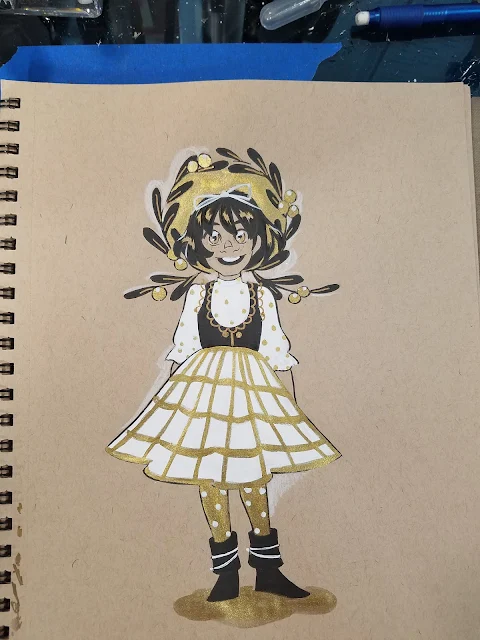
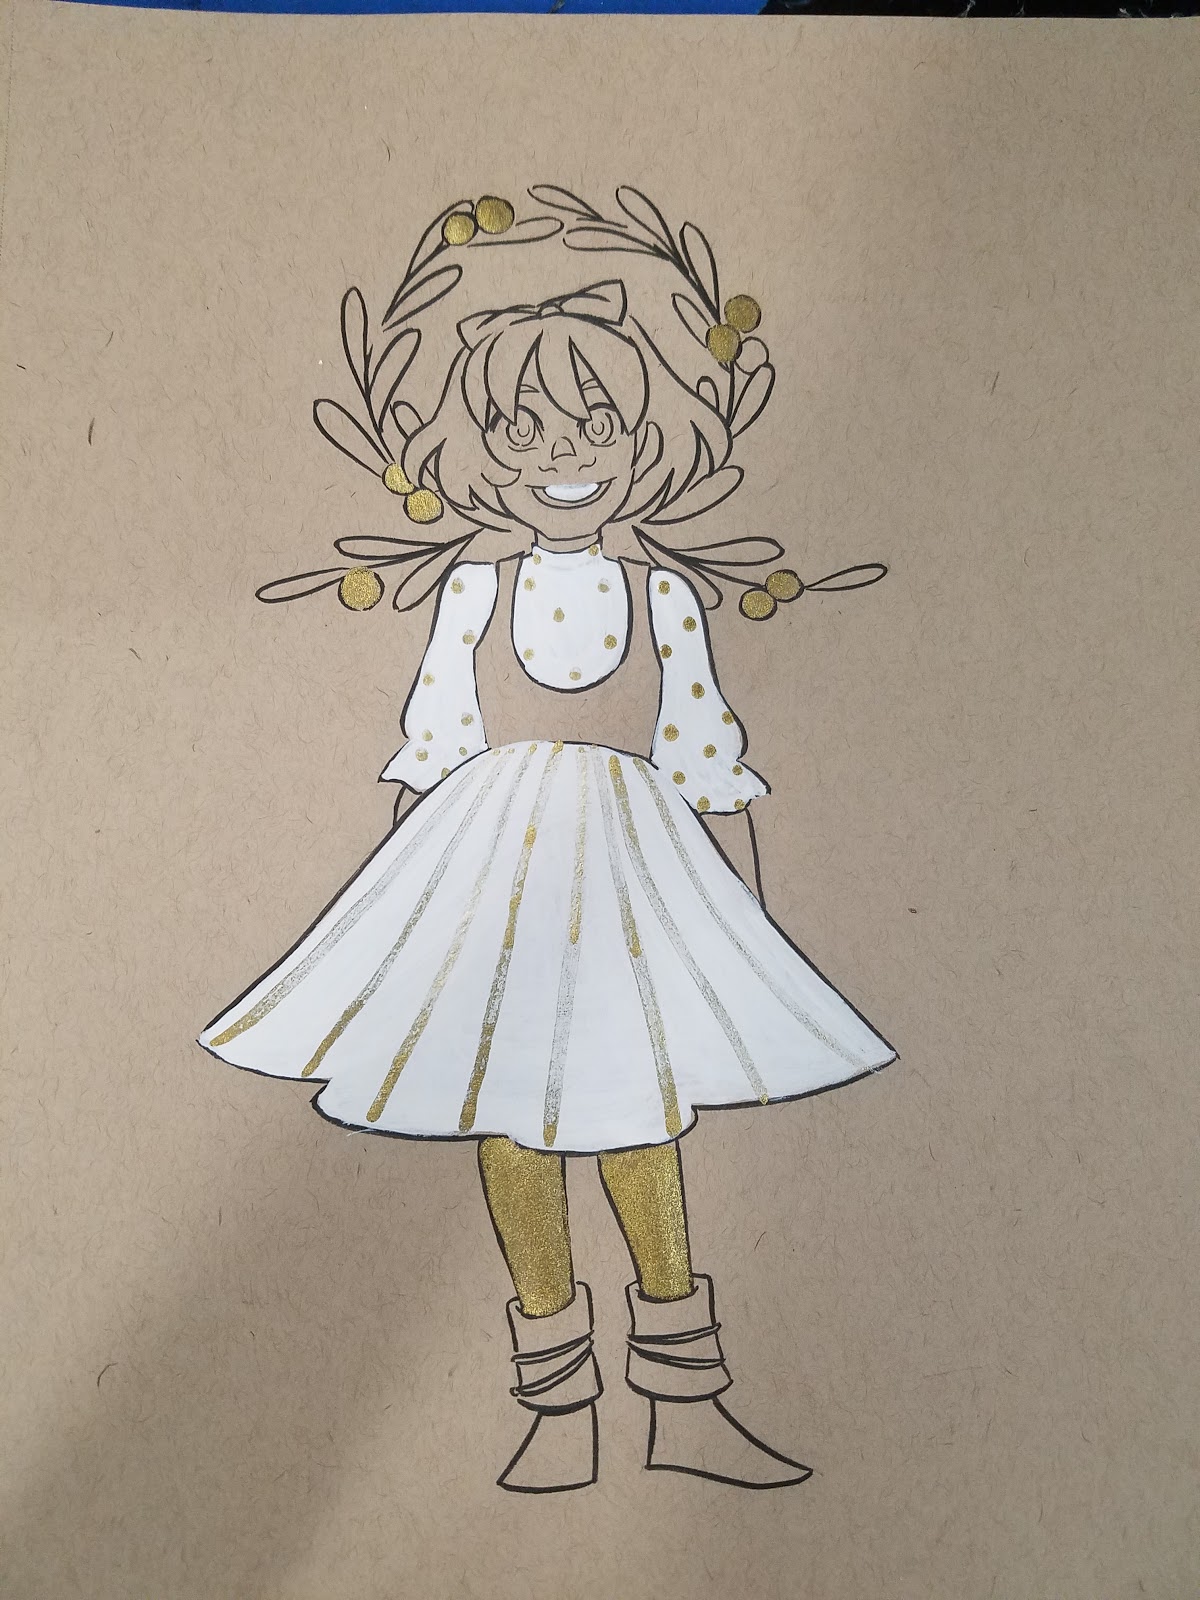
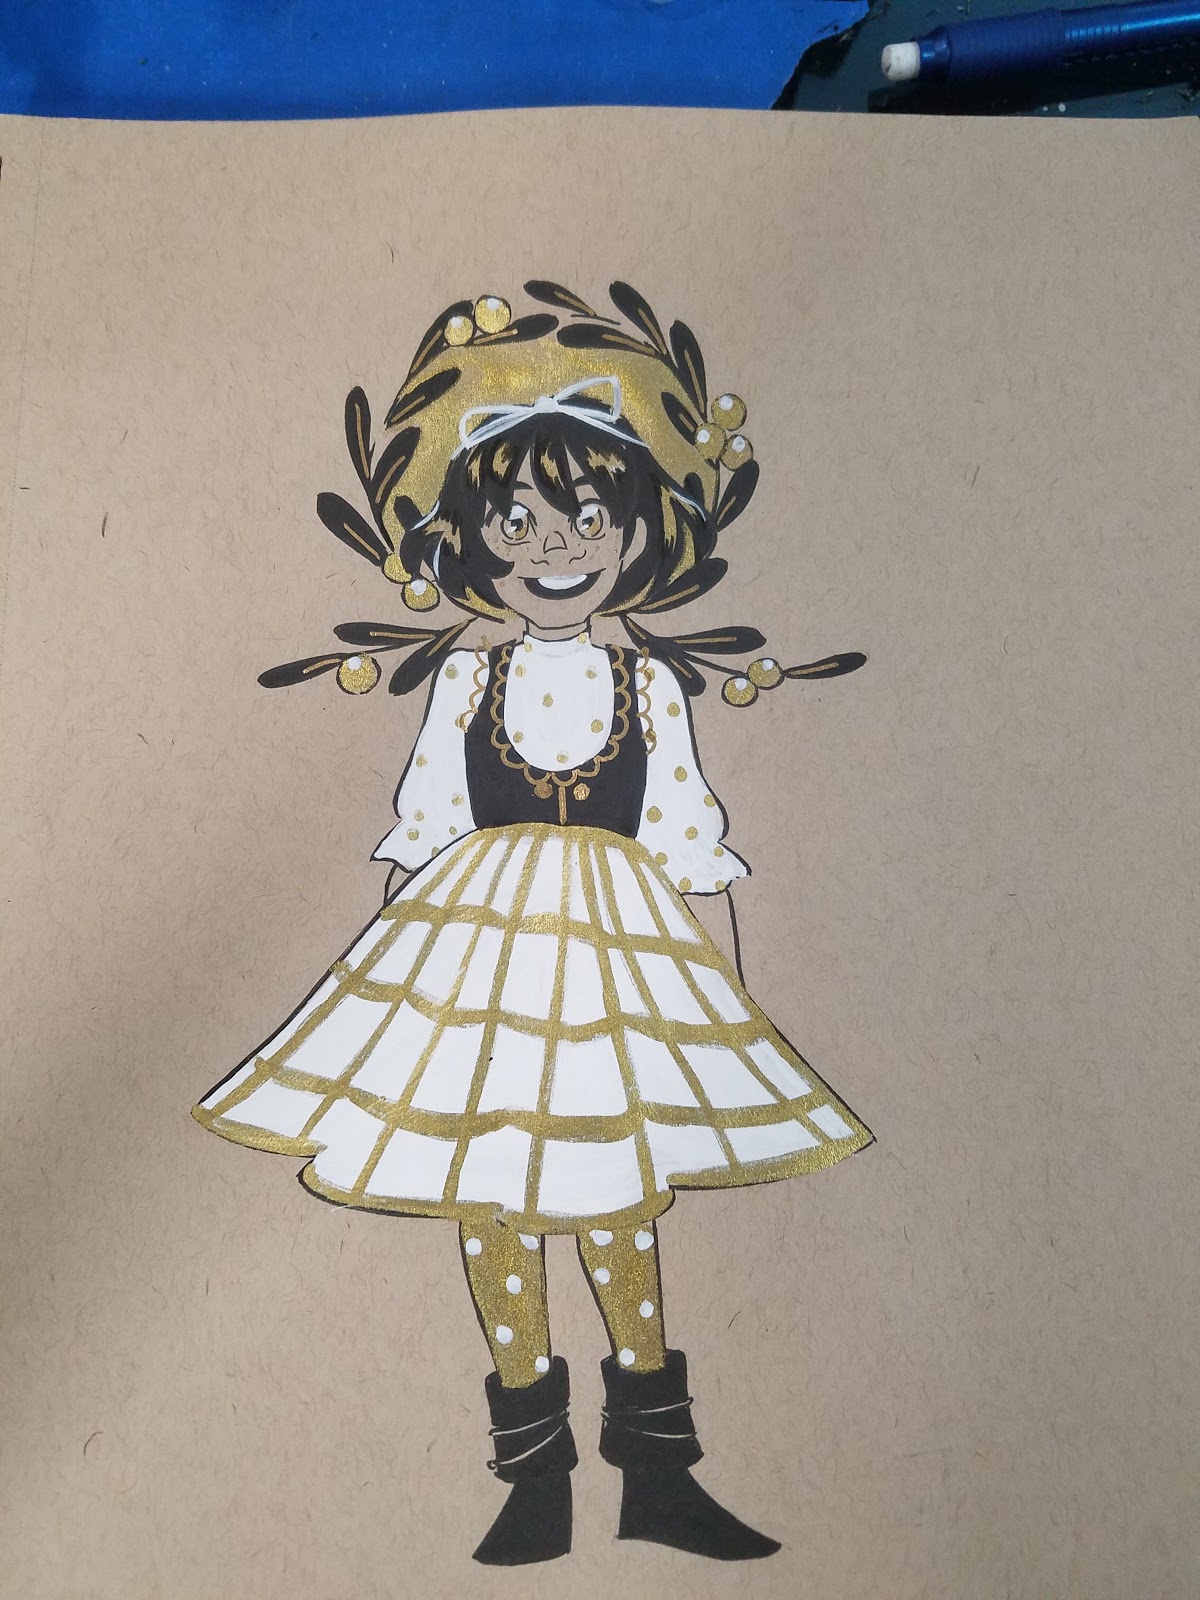
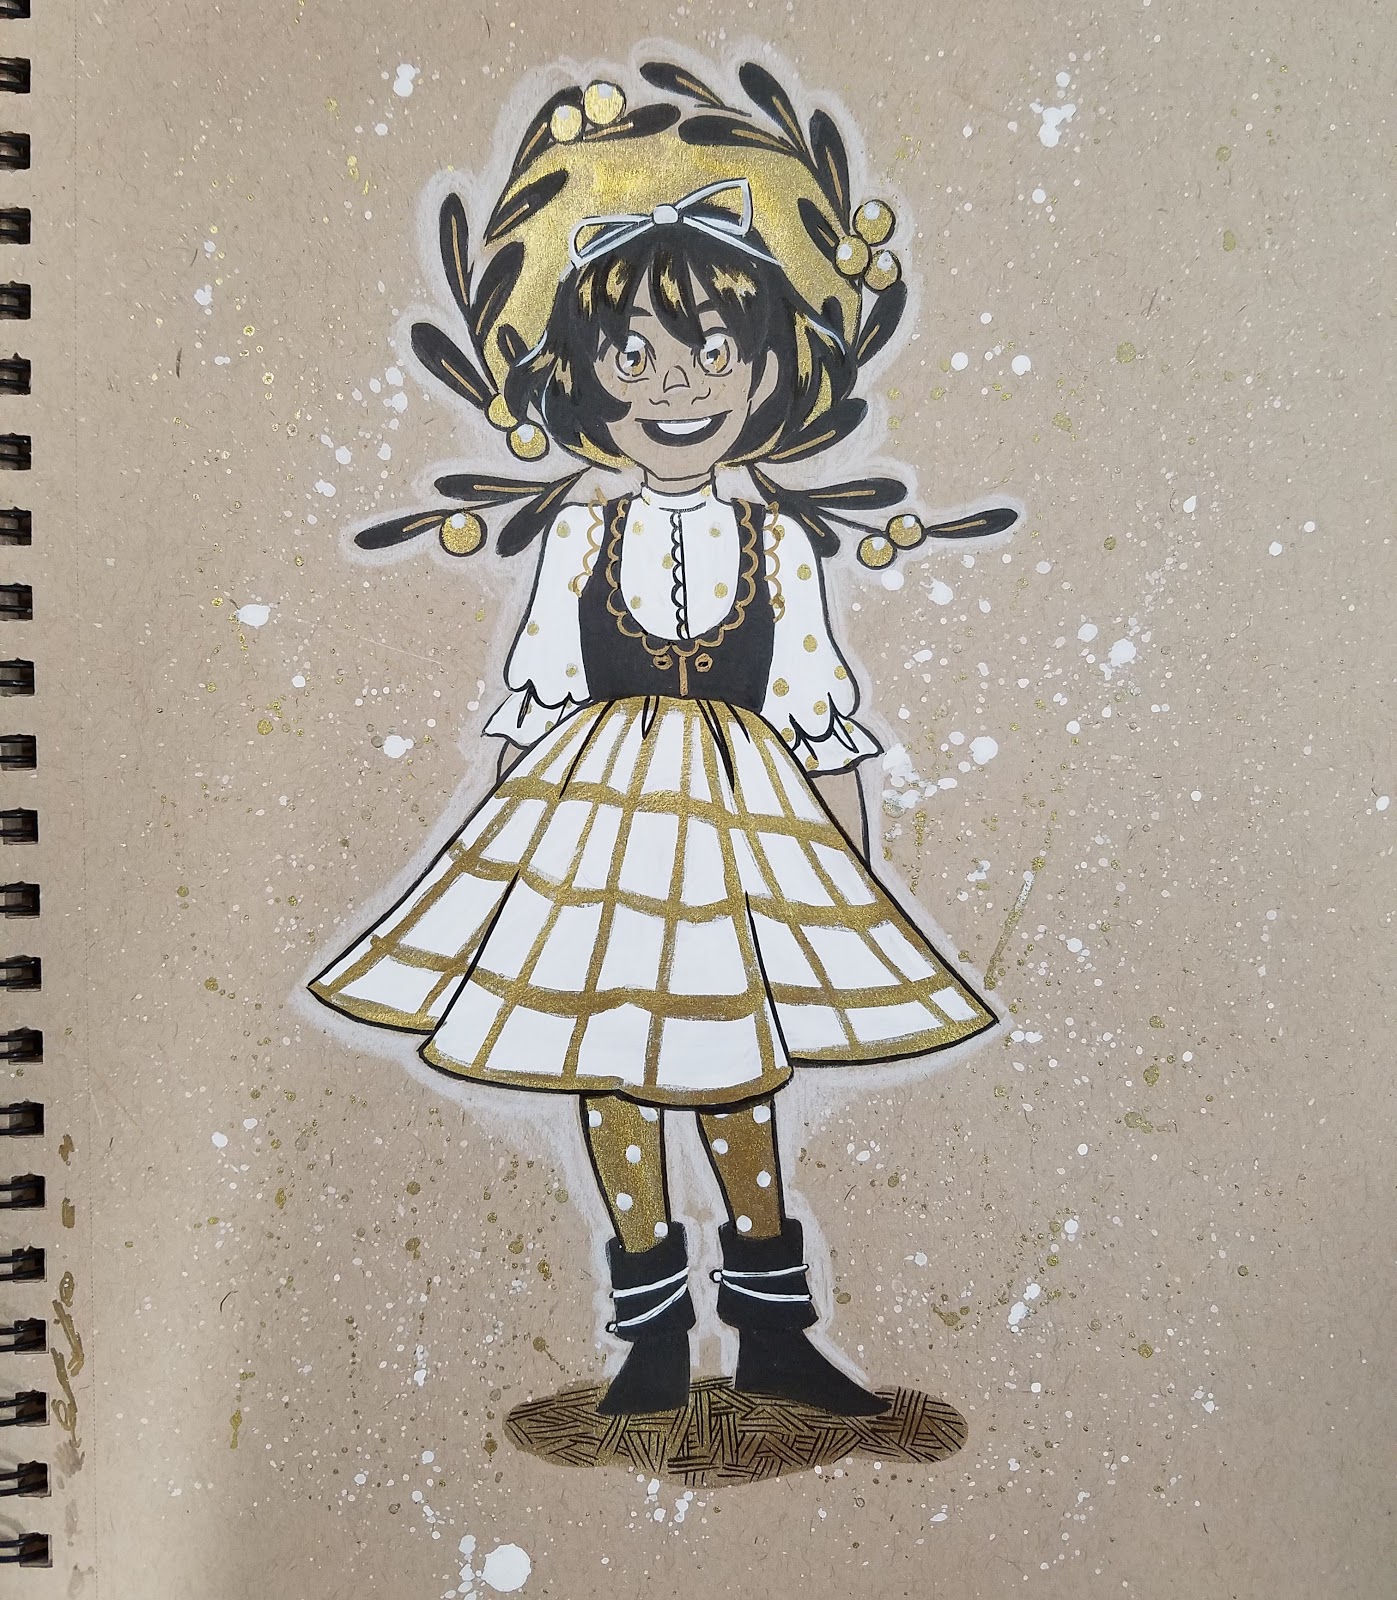
Toned Tan Paper+Graphite+Black Ink+Copic Opaque White (or Gouache)+ Gold Ink
Materials Needed:
Colored Paper (I used Strathmore's Toned Tan paper)
Black Ink (I used a Sailor Mitsuo Aida brushpen, as it's waterproof)
Graphite lead
White Gouache, White Signo, or Copic Opaque White
Gold Ink (I used Winsor and Newton's Gold Ink)
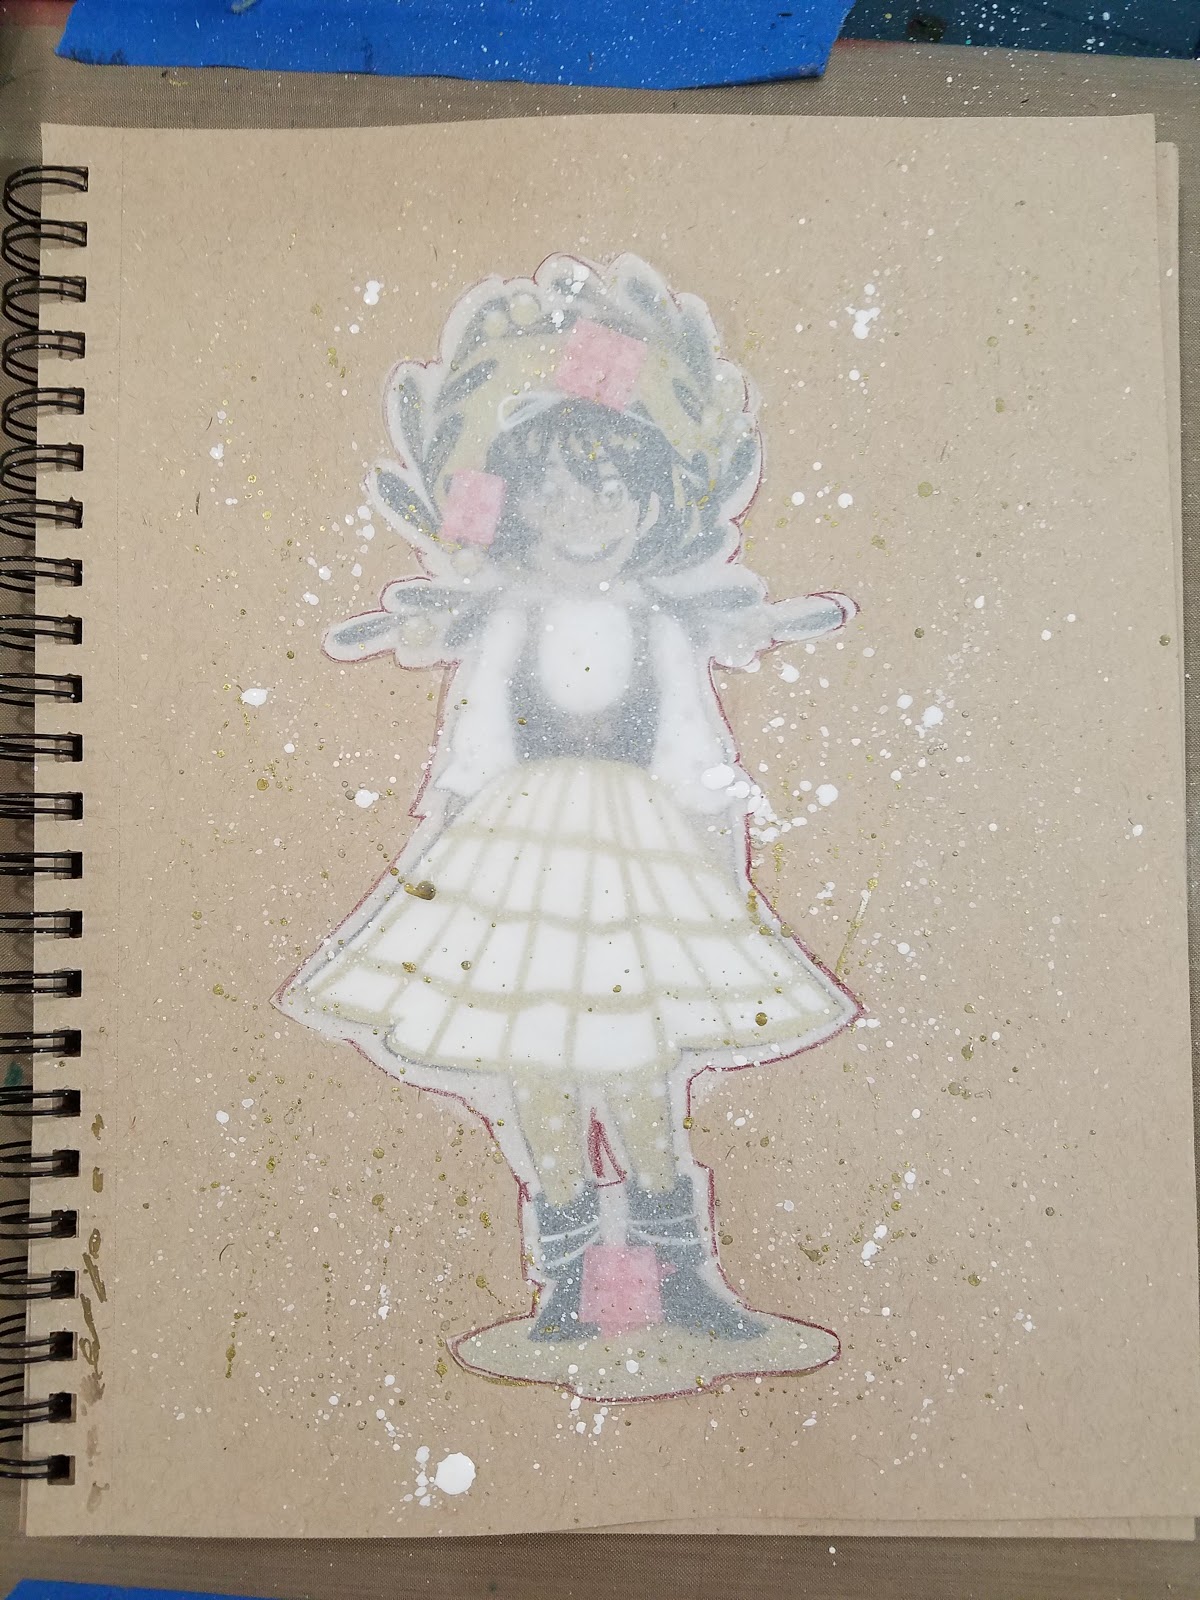
Optional: Tracing Paper (for mask)
Step 1: Pencil Image
Step 2: Ink Image
Step 3: Erase Inks
Step 4: Fill in major areas of white, allow to dry

Step 2: After white gouache/Copic Opaque white is dry, you may begin applying gold ink

Step 3: Some areas may need repeat coverage for opacity

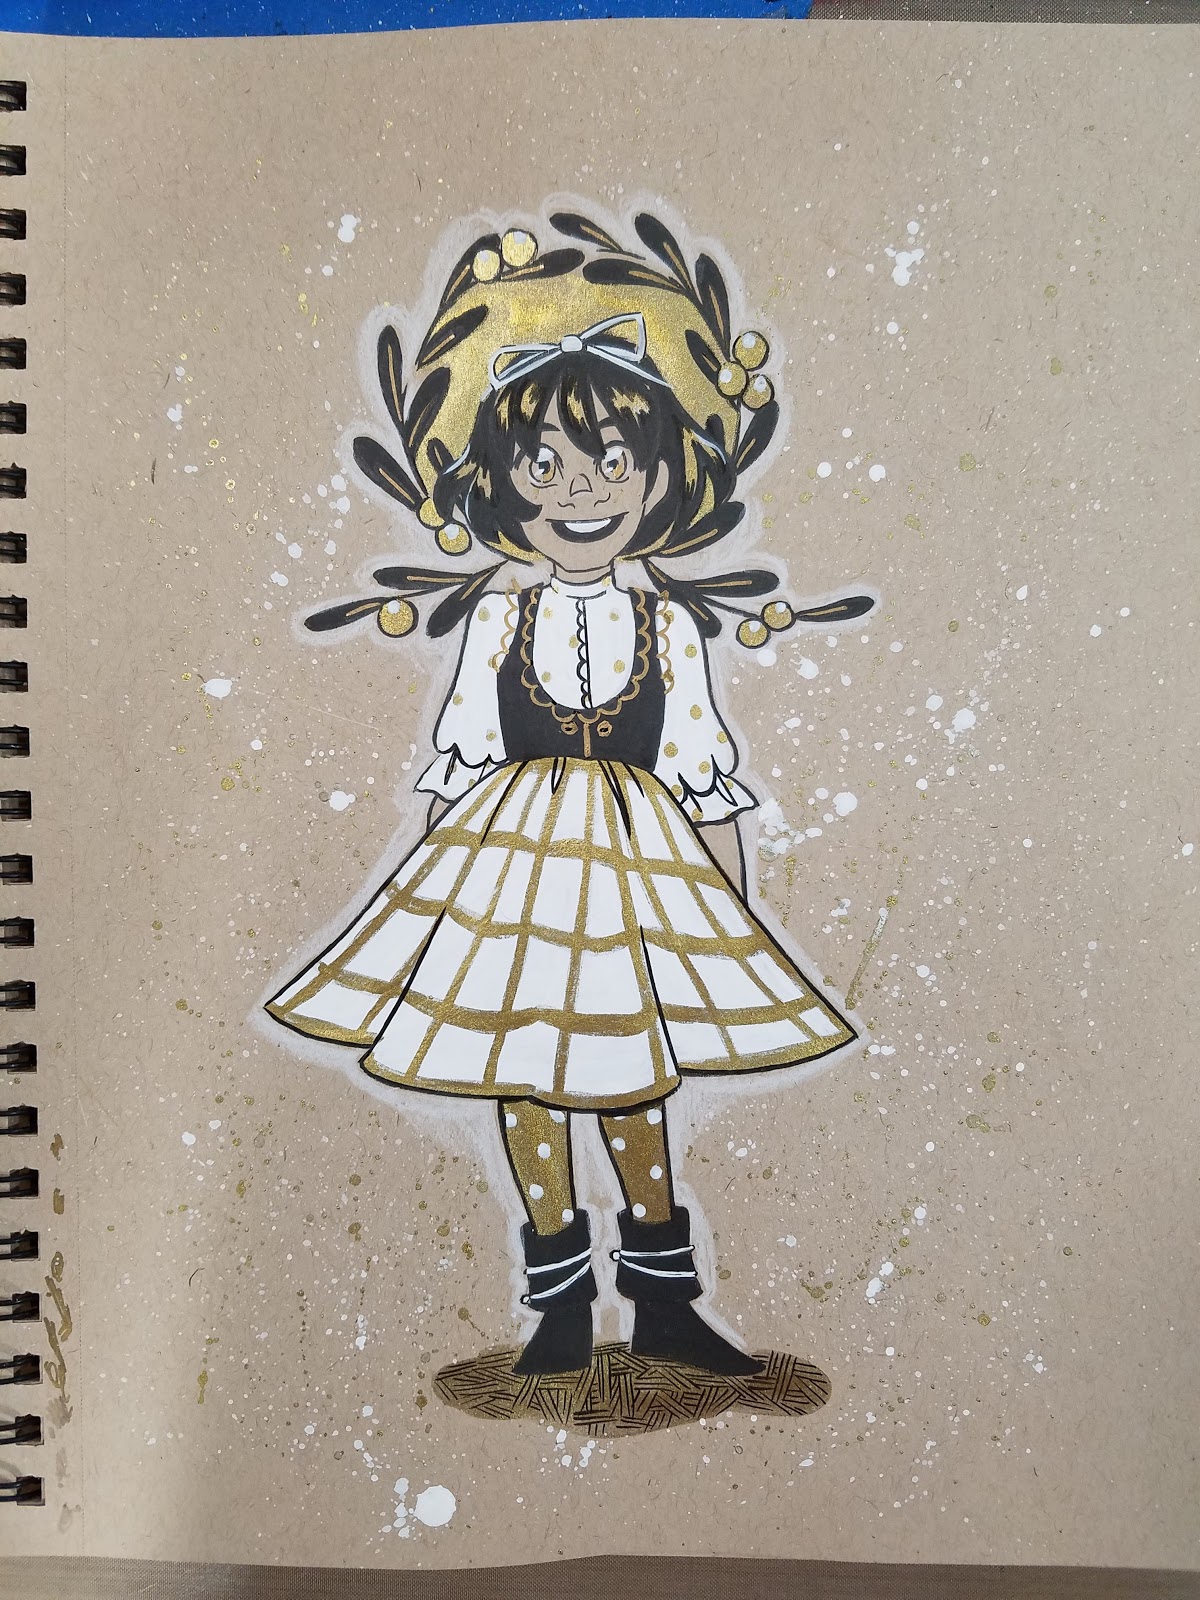
Step 4: Begin filling in areas of spot black

Step 5: Add white details and refine areas of black ink, reinking when necessary

Step 6: For Splatter Effect: With tracing paper, cut a mask for the area you'd like to protect

Step 7: Tape it down

Step 8: Splatter with ink of choice (in this instance, gold and white)

Step 9: Remove mask


Ink+Watercolor Faux Inkwash
Materials needed:
Sturdy Paper (I recommend watercolor, inexpensive is fine)
Ink (I used a waterproof India Ink or a waterproof brushpen like the Sailor Mitsuo Aida)
Matching Watercolor color (I used Holbein's Carbon Black)
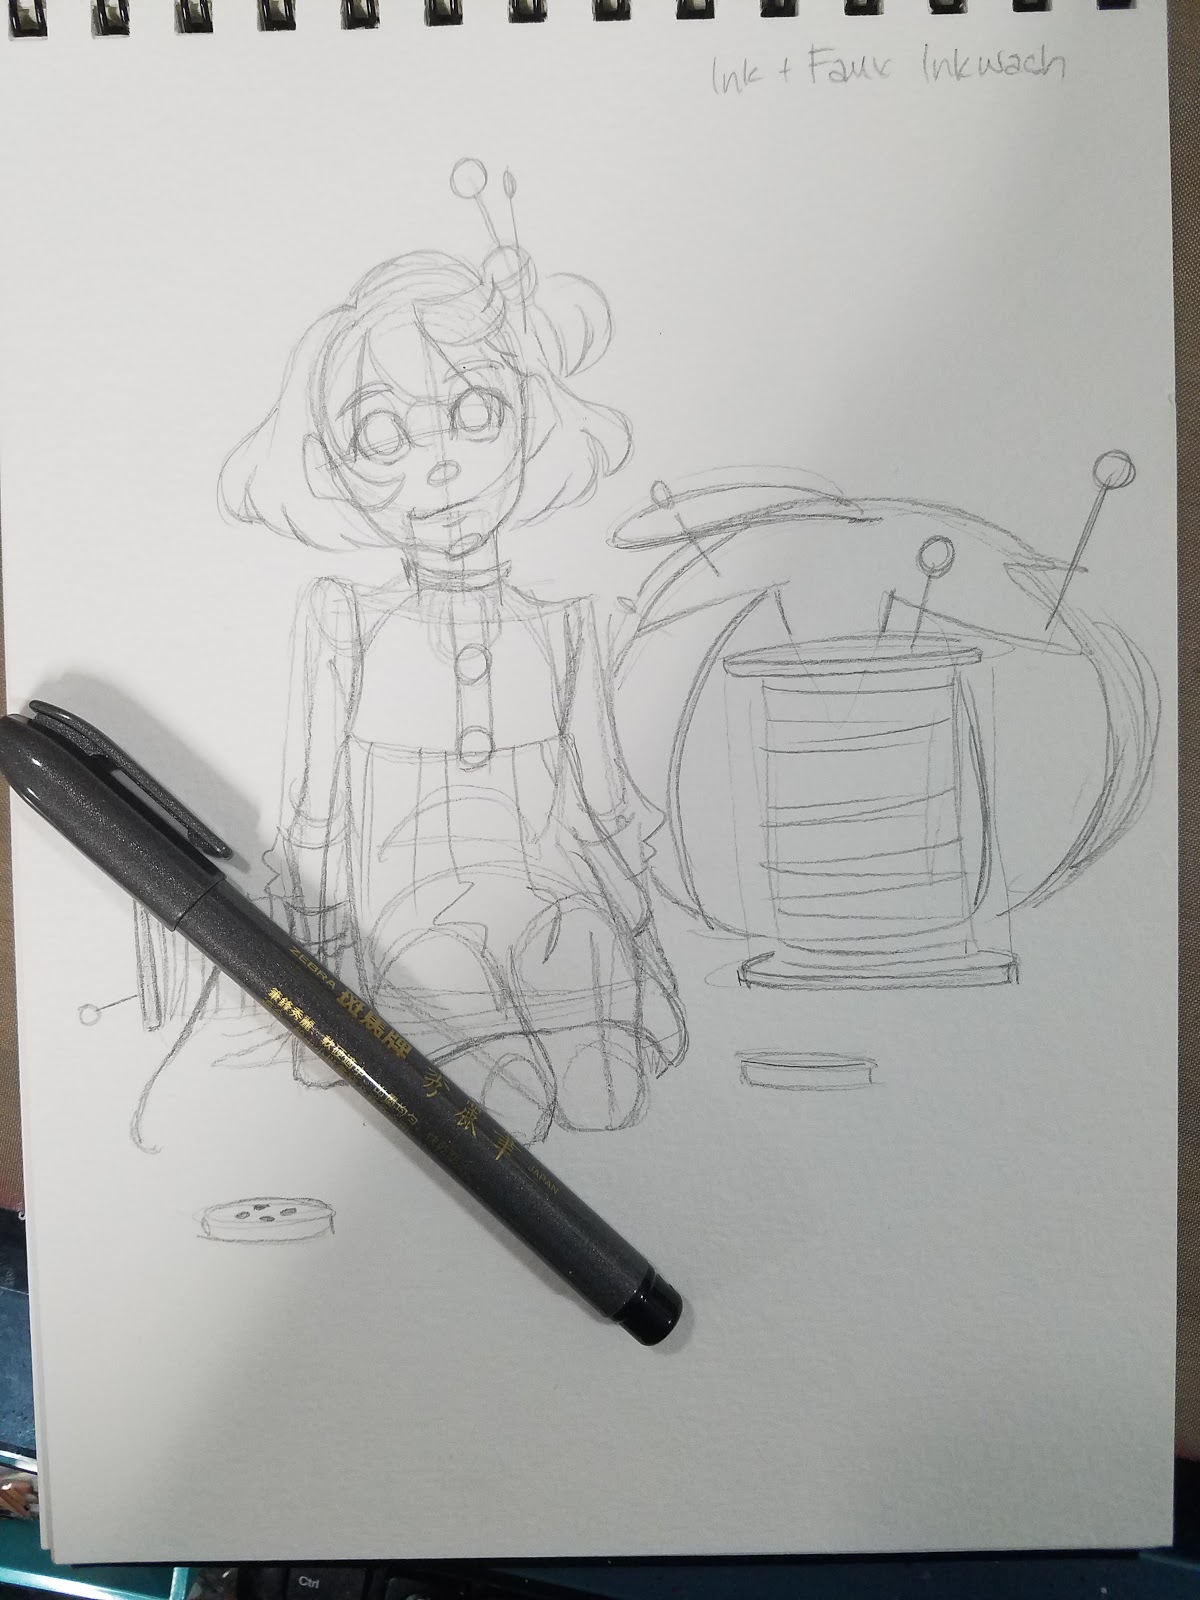
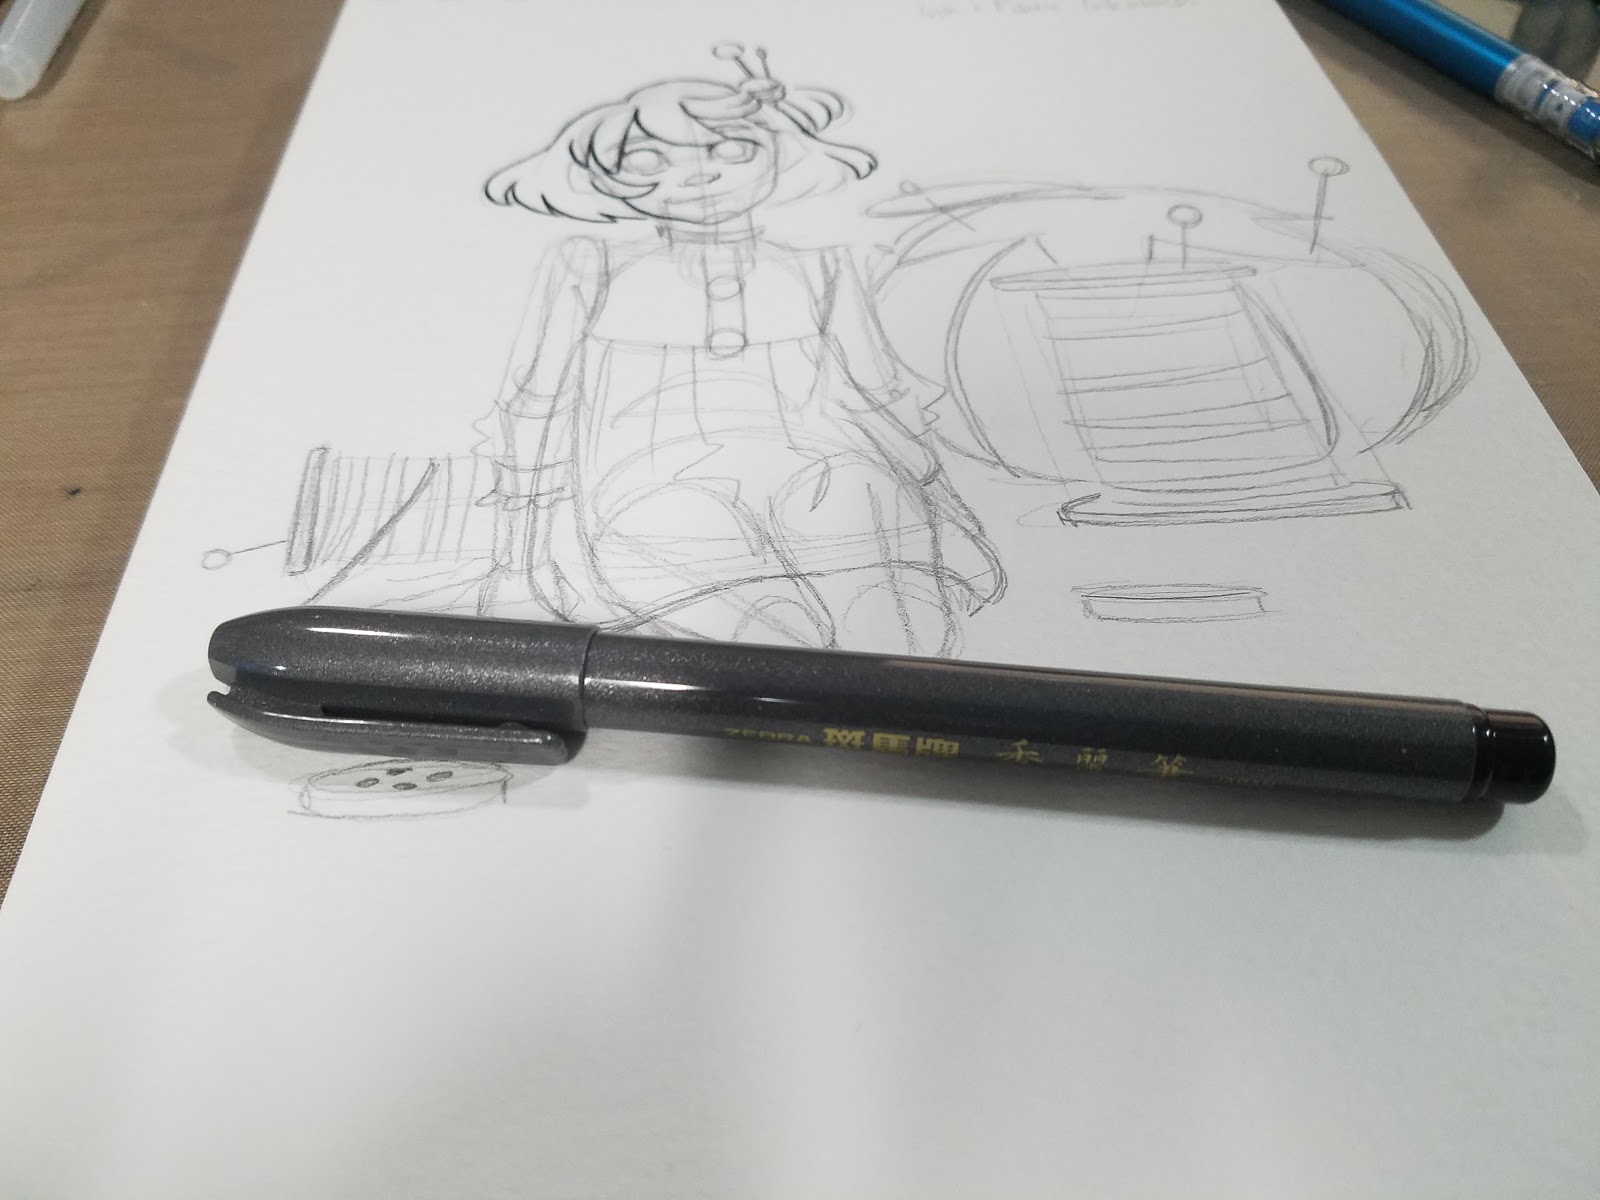
Step 1: Pencils

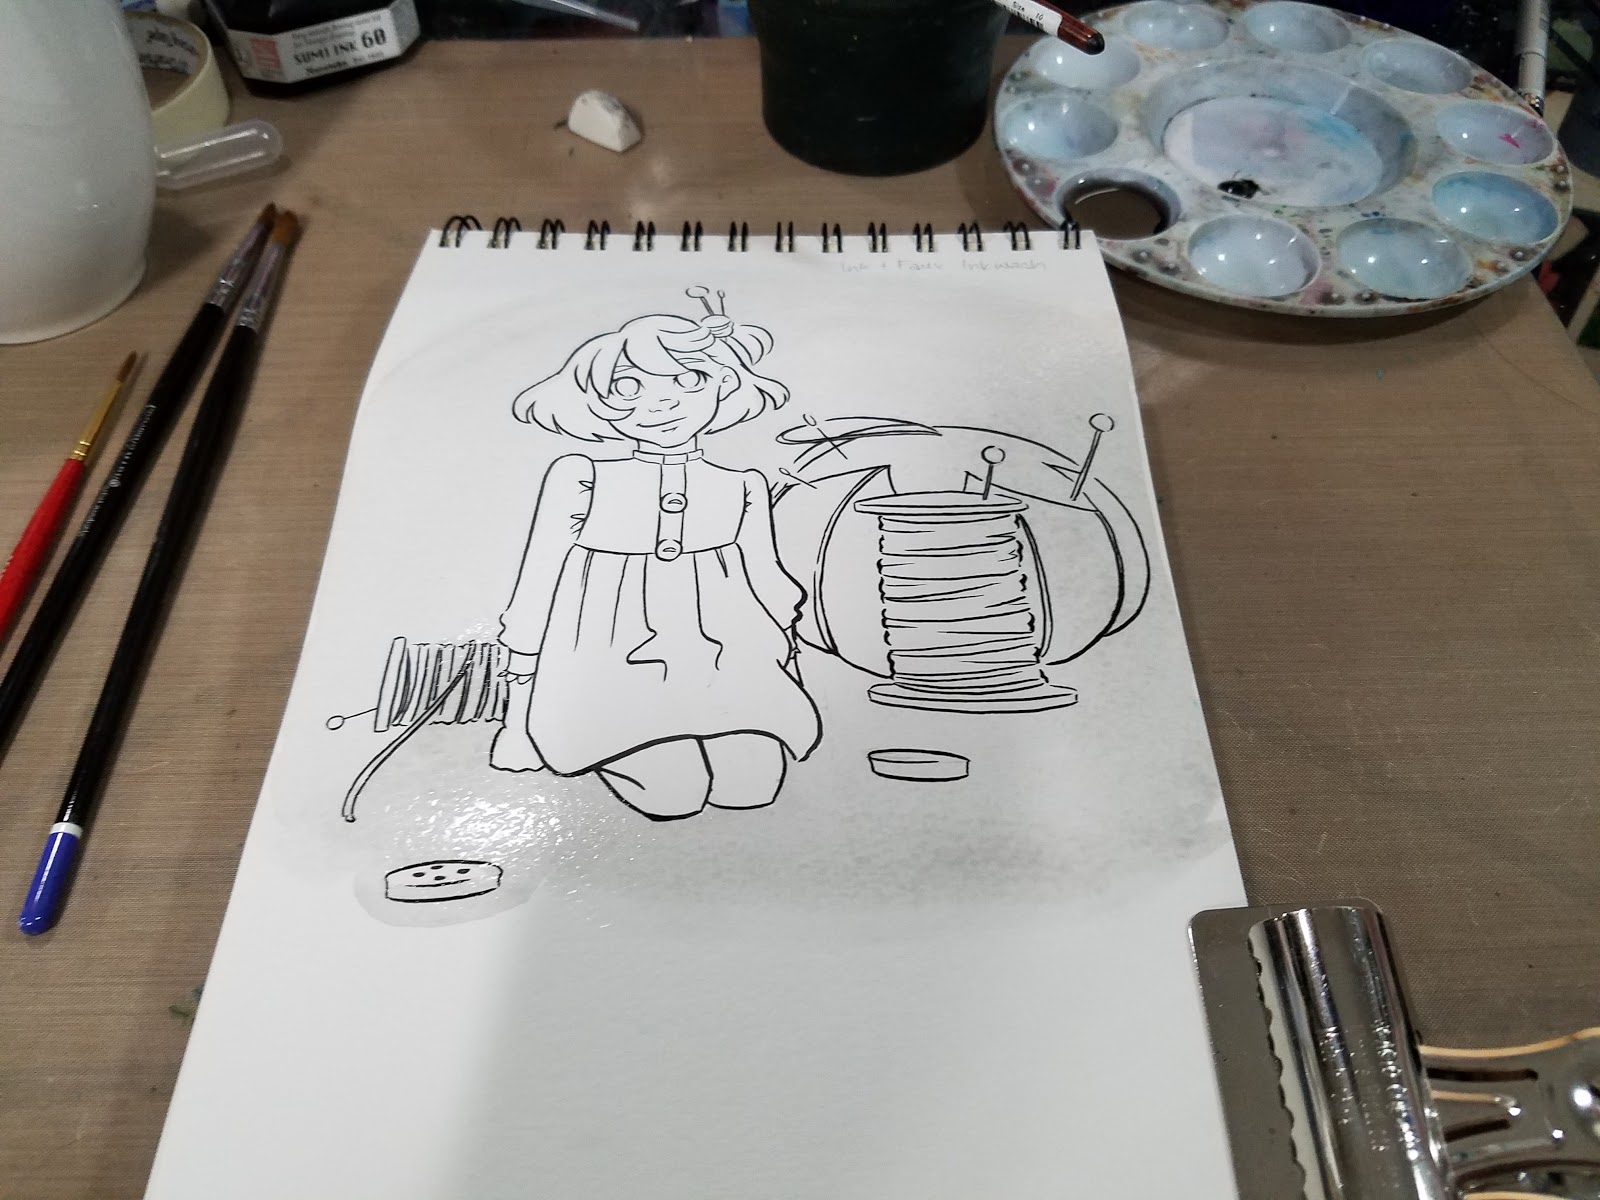
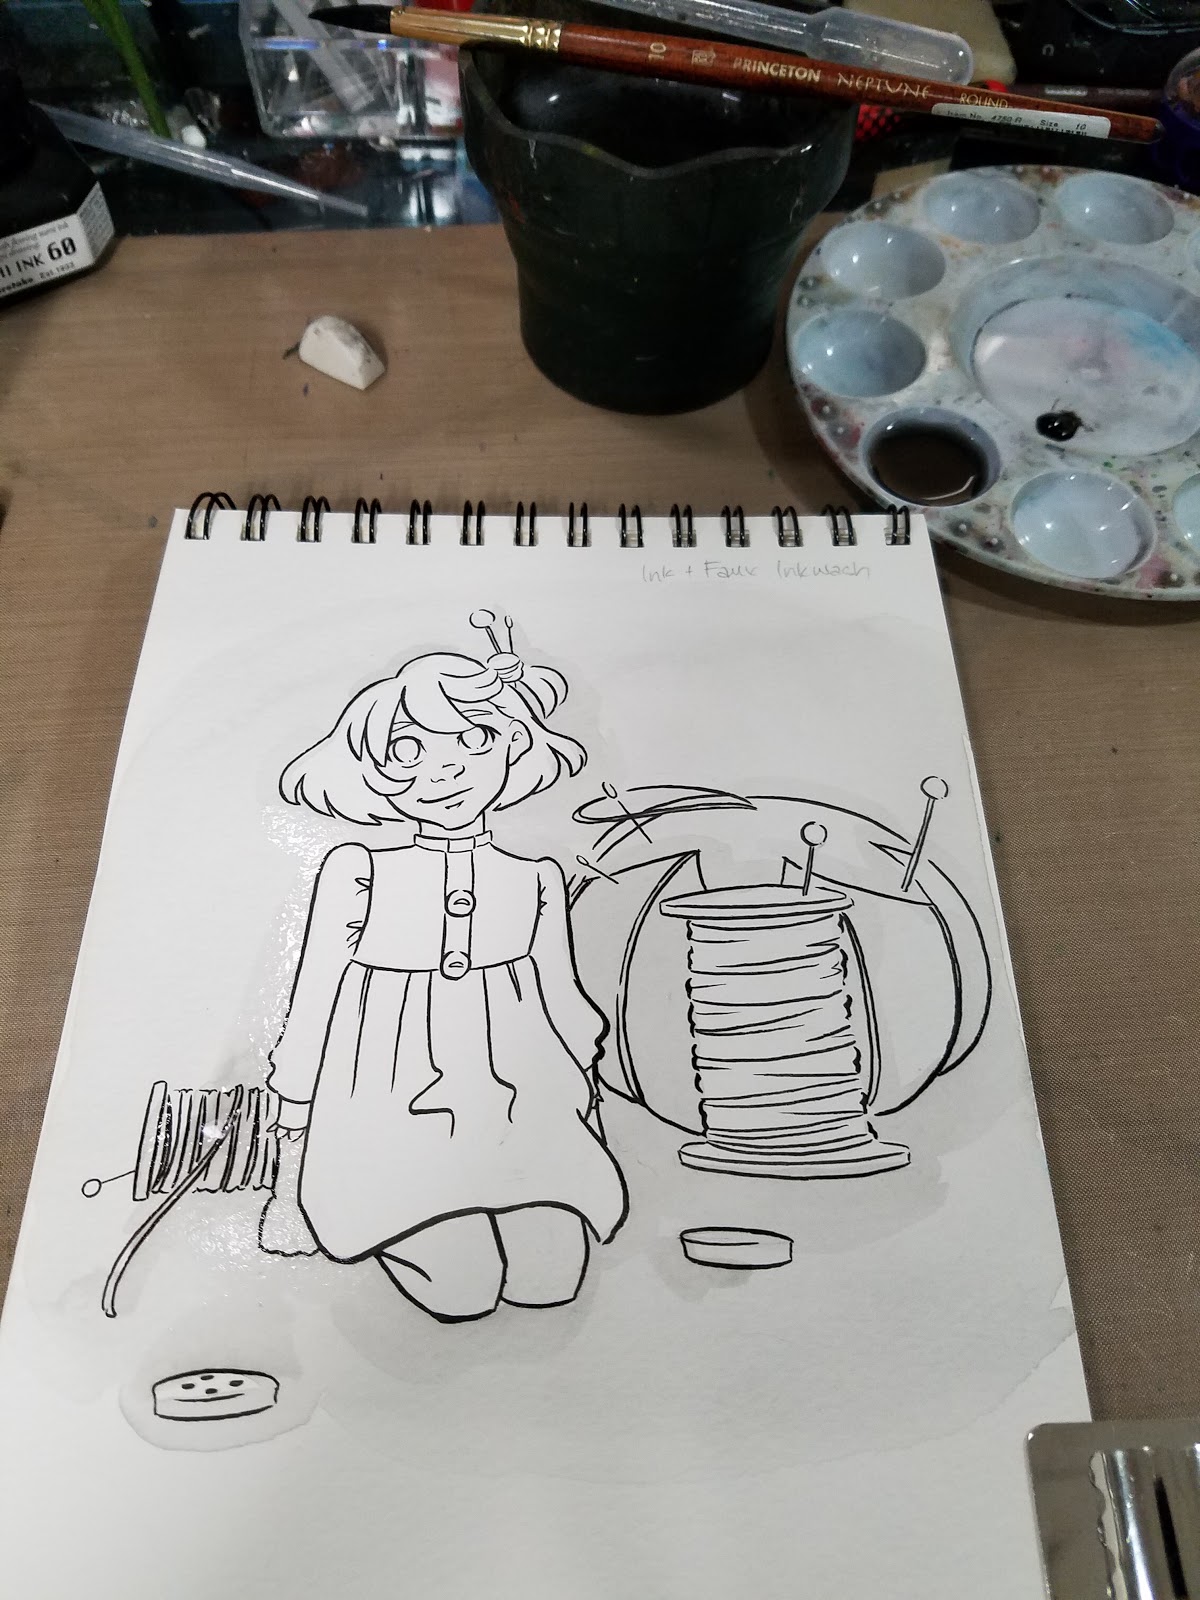
Step 2: Ink with waterproof ink


Step 3: Erase Pencils

Step 4: Select your paint

Step 5: Apply pea sized portion to palette

Step 6: Fill well with water, begin mixing paint, starting from lightest to darkest.


Step 7: For much darker objects, you may work directly from watercolor paint knob.


Step 8: Keep layering, allowing paint to dry between layers.


Step 9: Add highlights with White Signo, Copic Opaque White, or White Gouache


Further Examples:


So those are some of my favorite easy ways to bring my sketchbook inks to the next level! Only require a few additional supplies (that most of you already have lying around), and can really make a big impact on your work, and help break up inking monotony.
Questions? Comments? Let me know via email (left sidebar) or Twitter! Let's talk about YOUR favorite easy inking hacks! Liked this blogpost? Found it helpful? Share it with your friends and fans using the handy social media links below this post! Your share and signal boost really helps me out, and is much appreciated.
If you need to pick up any supplies for these tutorials, please use the included links. These affiliate links pay me a small bounty when products are purchased, and are at no additional cost to you. Using my affiliate links, or beginning your Amazon shopping trips with my affiliate links (even if you don't directly purchase the item linked) is a great way to help support this blog at no cost to you.
If you enjoy these sort of posts, and would like to help me make more of them, please head on over to my Patreon for information on how to join my merry band of artnerds, and how to support future content. Even a small monthly contribution goes a long way towards future tutorials and reviews!
Blue Lead+Alcohol Marker+Black Inks
Materials Needed:
C6 Copic Marker or other cool gray alcohol marker
Signo White Gel Pen
Non photo blue lead (I use Color Eno Soft Blue)
Fude pen (I use Kuretake's Fudegokochi)
Step 1: Sketch

Step 2: Outline with Alcohol Marker
Step 3: Fill in with Alcohol Marker


Step 4: Ink with Pen

Step 5: Add Highlights with Signo
Further Examples:


Blue Lead+Multiple Alcohol Inks+Black Ink
Materials Needed:
Complimentary marker colors (at least 2)
Signo White Gel Pen
Non photo blue lead (I use Color Eno Soft Blue)
Fude pen (I use Kuretake's Fudegokochi)
Complimentary marker colors (at least 2)
Signo White Gel Pen
Non photo blue lead (I use Color Eno Soft Blue)
Fude pen (I use Kuretake's Fudegokochi)
Step 1: Sketch

Step 3: Begin Coloring


Step 4: Ink with Black Pen

Step 5: Add Highlights

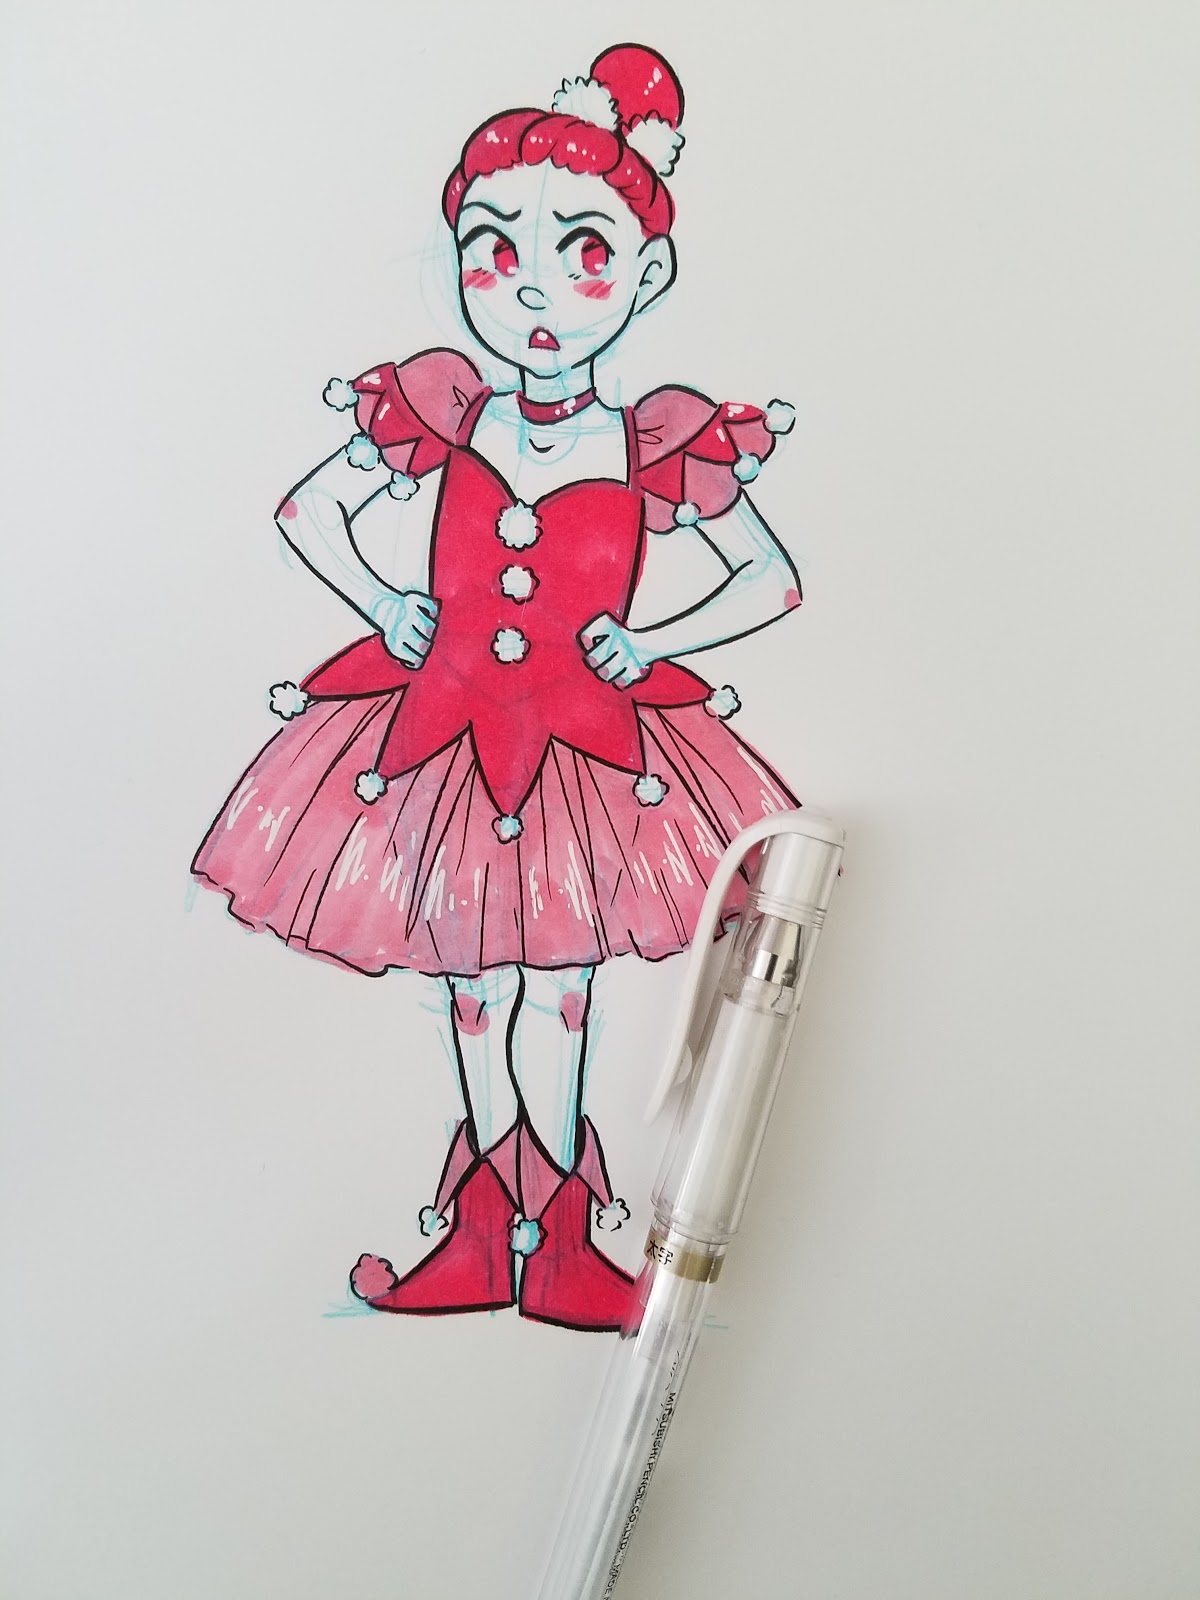
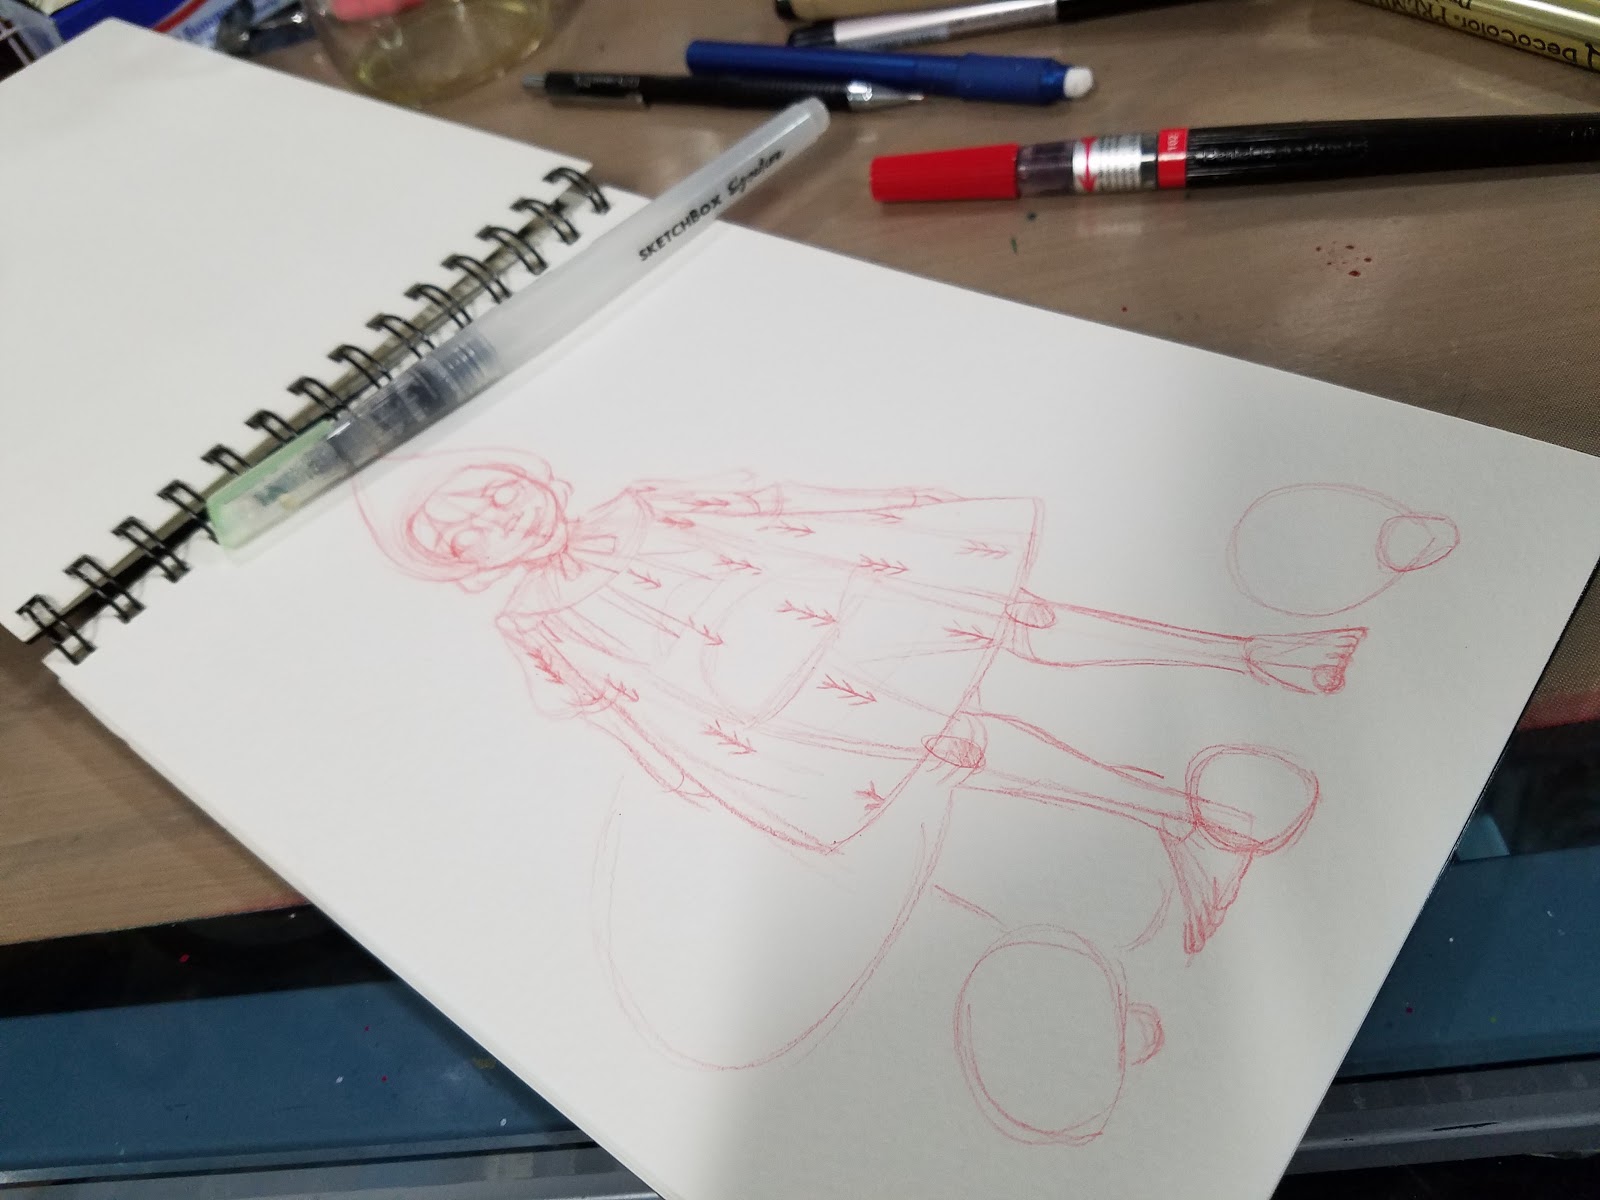
Using a colored lead+colored ink+black ink
Materials Needed:
Colored Lead (I used Pentel's red lead)
Matching Colored Brushpen (I used Pentel's Brushpen in Red)
Signo White Gel Pen
Fude pen (I use Kuretake's Fudegokochi)
Black brushpen (I used a Pentel Pocketbrush and a Pentel Brushpen)
Step 1: Sketch in Colored Lead

Step 2: Outline and Fill with colored ink
Step 3: Ink
Step 4: Fill in Spot Blacks

Further Examples:

Colored Lead+Colored Ink+Inkwash Techniques+Black Ink
Materials Needed:
Colored Lead (I used Pentel's red lead)
Matching Colored Brushpen (I used Pentel's Brushpen in Red)
Signo White Gel Pen
Fude pen (I use Kuretake's Fudegokochi)
Black brushpen (I used a Pentel Pocketbrush and a Pentel Brushpen)
Waterbrush with Clean Water
Surface to use as palette (I'm using an Inkssentials Craft Mat by Ranger)
Step 1: Sketch image in colored lead

Step 3: Apply red ink. Allow to dry thoroughly (takes awhile on watercolor paper).
Step 4: Ink with black ink.


Colored Leads+Colored Ink+Metallic Ink+Black Ink
Materials Needed:
Colored Lead (I used Pentel's red lead)
Matching Colored Brushpen (I used Pentel's Brushpen in Red)
Metallic pen (I used Uchida's DecoColor Premium)
Fude pen (I use Kuretake's Fudegokochi)
Toned Tan Paper+Graphite+Black Ink+Copic Opaque White (or Gouache)+ Gold Ink
Materials Needed:
Colored Paper (I used Strathmore's Toned Tan paper)
Black Ink (I used a Sailor Mitsuo Aida brushpen, as it's waterproof)
Graphite lead
White Gouache, White Signo, or Copic Opaque White
Gold Ink (I used Winsor and Newton's Gold Ink)
Optional: Tracing Paper (for mask)
Step 1: Pencil Image
Step 2: Ink Image
Step 3: Erase Inks
Step 4: Fill in major areas of white, allow to dry

Step 2: After white gouache/Copic Opaque white is dry, you may begin applying gold ink
Step 3: Some areas may need repeat coverage for opacity

Step 4: Begin filling in areas of spot black

Step 5: Add white details and refine areas of black ink, reinking when necessary

Step 6: For Splatter Effect: With tracing paper, cut a mask for the area you'd like to protect

Step 7: Tape it down

Step 8: Splatter with ink of choice (in this instance, gold and white)
Step 9: Remove mask
Ink+Watercolor Faux Inkwash
Materials needed:
Sturdy Paper (I recommend watercolor, inexpensive is fine)
Ink (I used a waterproof India Ink or a waterproof brushpen like the Sailor Mitsuo Aida)
Matching Watercolor color (I used Holbein's Carbon Black)
Step 1: Pencils
Step 2: Ink with waterproof ink

Step 3: Erase Pencils

Step 4: Select your paint

Step 5: Apply pea sized portion to palette

Step 6: Fill well with water, begin mixing paint, starting from lightest to darkest.

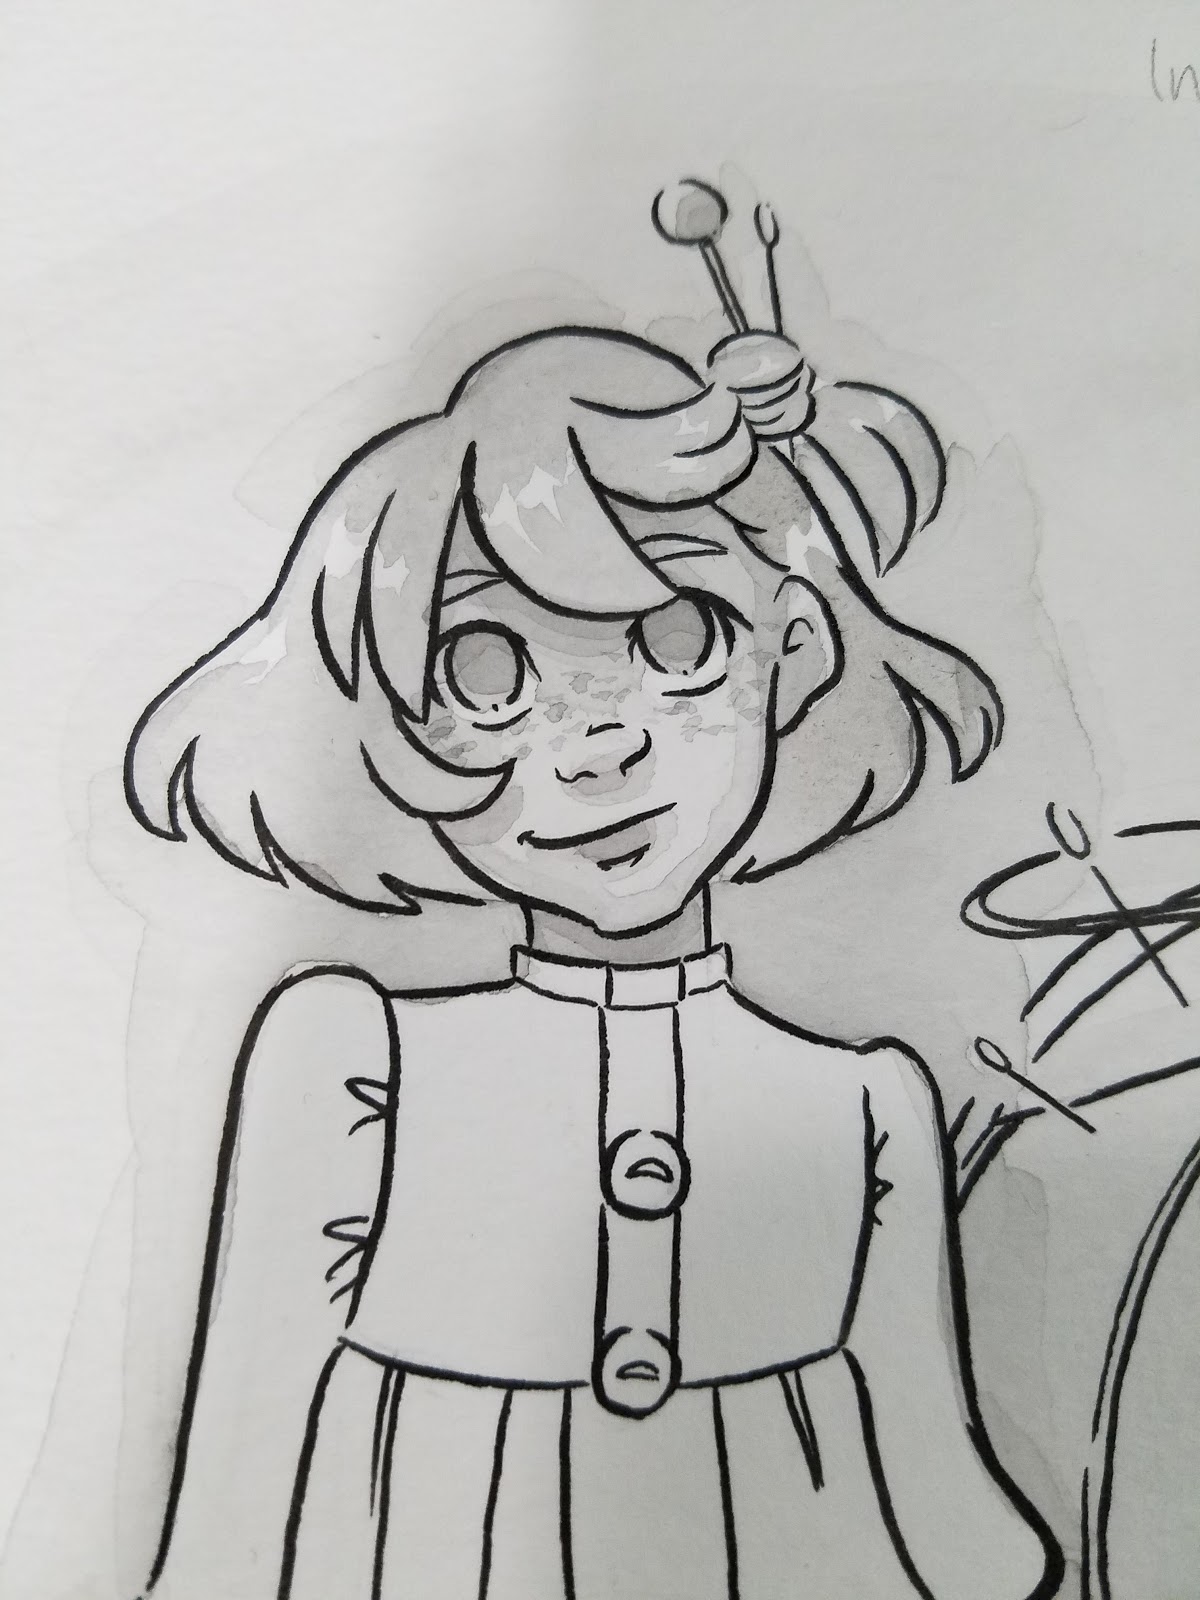
Step 7: For much darker objects, you may work directly from watercolor paint knob.


Step 8: Keep layering, allowing paint to dry between layers.
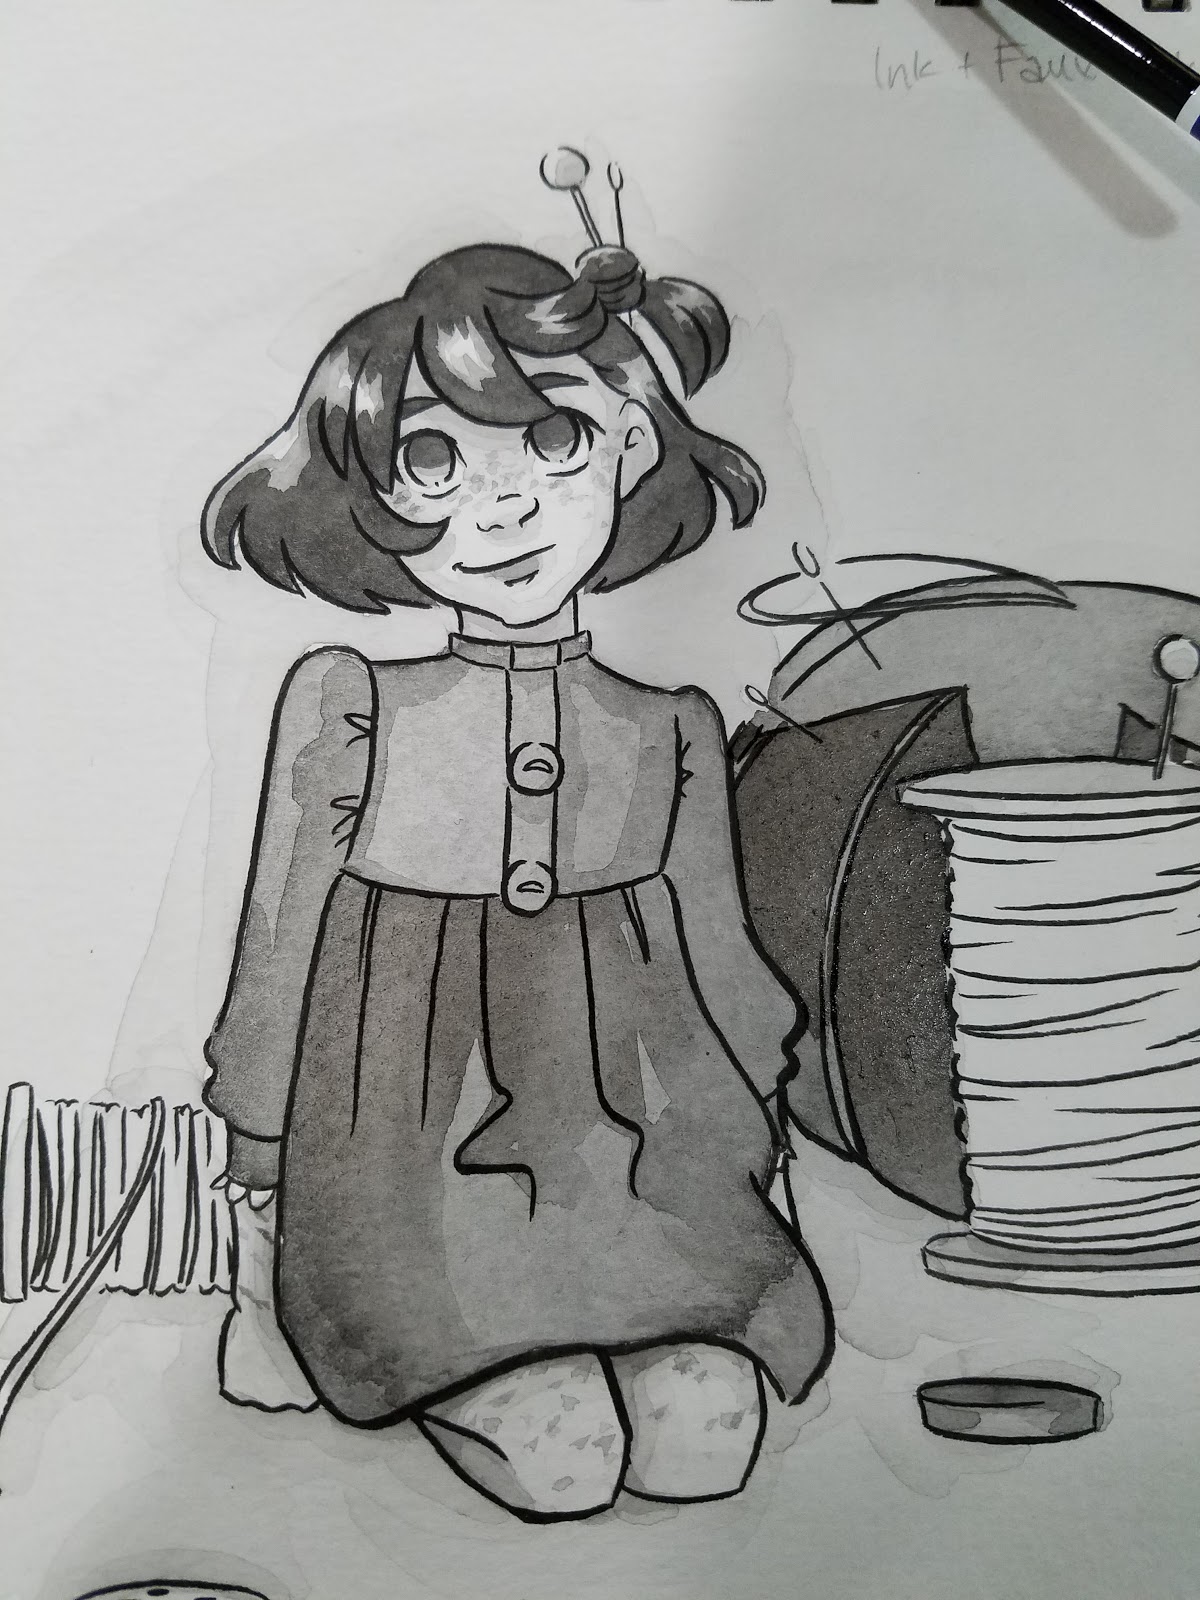

Step 9: Add highlights with White Signo, Copic Opaque White, or White Gouache


Further Examples:


These sample are from Pretty Paladin Critical Missy, my Chainmail Bikini story.
So those are some of my favorite easy ways to bring my sketchbook inks to the next level! Only require a few additional supplies (that most of you already have lying around), and can really make a big impact on your work, and help break up inking monotony.
Questions? Comments? Let me know via email (left sidebar) or Twitter! Let's talk about YOUR favorite easy inking hacks! Liked this blogpost? Found it helpful? Share it with your friends and fans using the handy social media links below this post! Your share and signal boost really helps me out, and is much appreciated.
Comments
Post a Comment